StickerFab Fog Light Overlays for Tacoma (2024-2026)
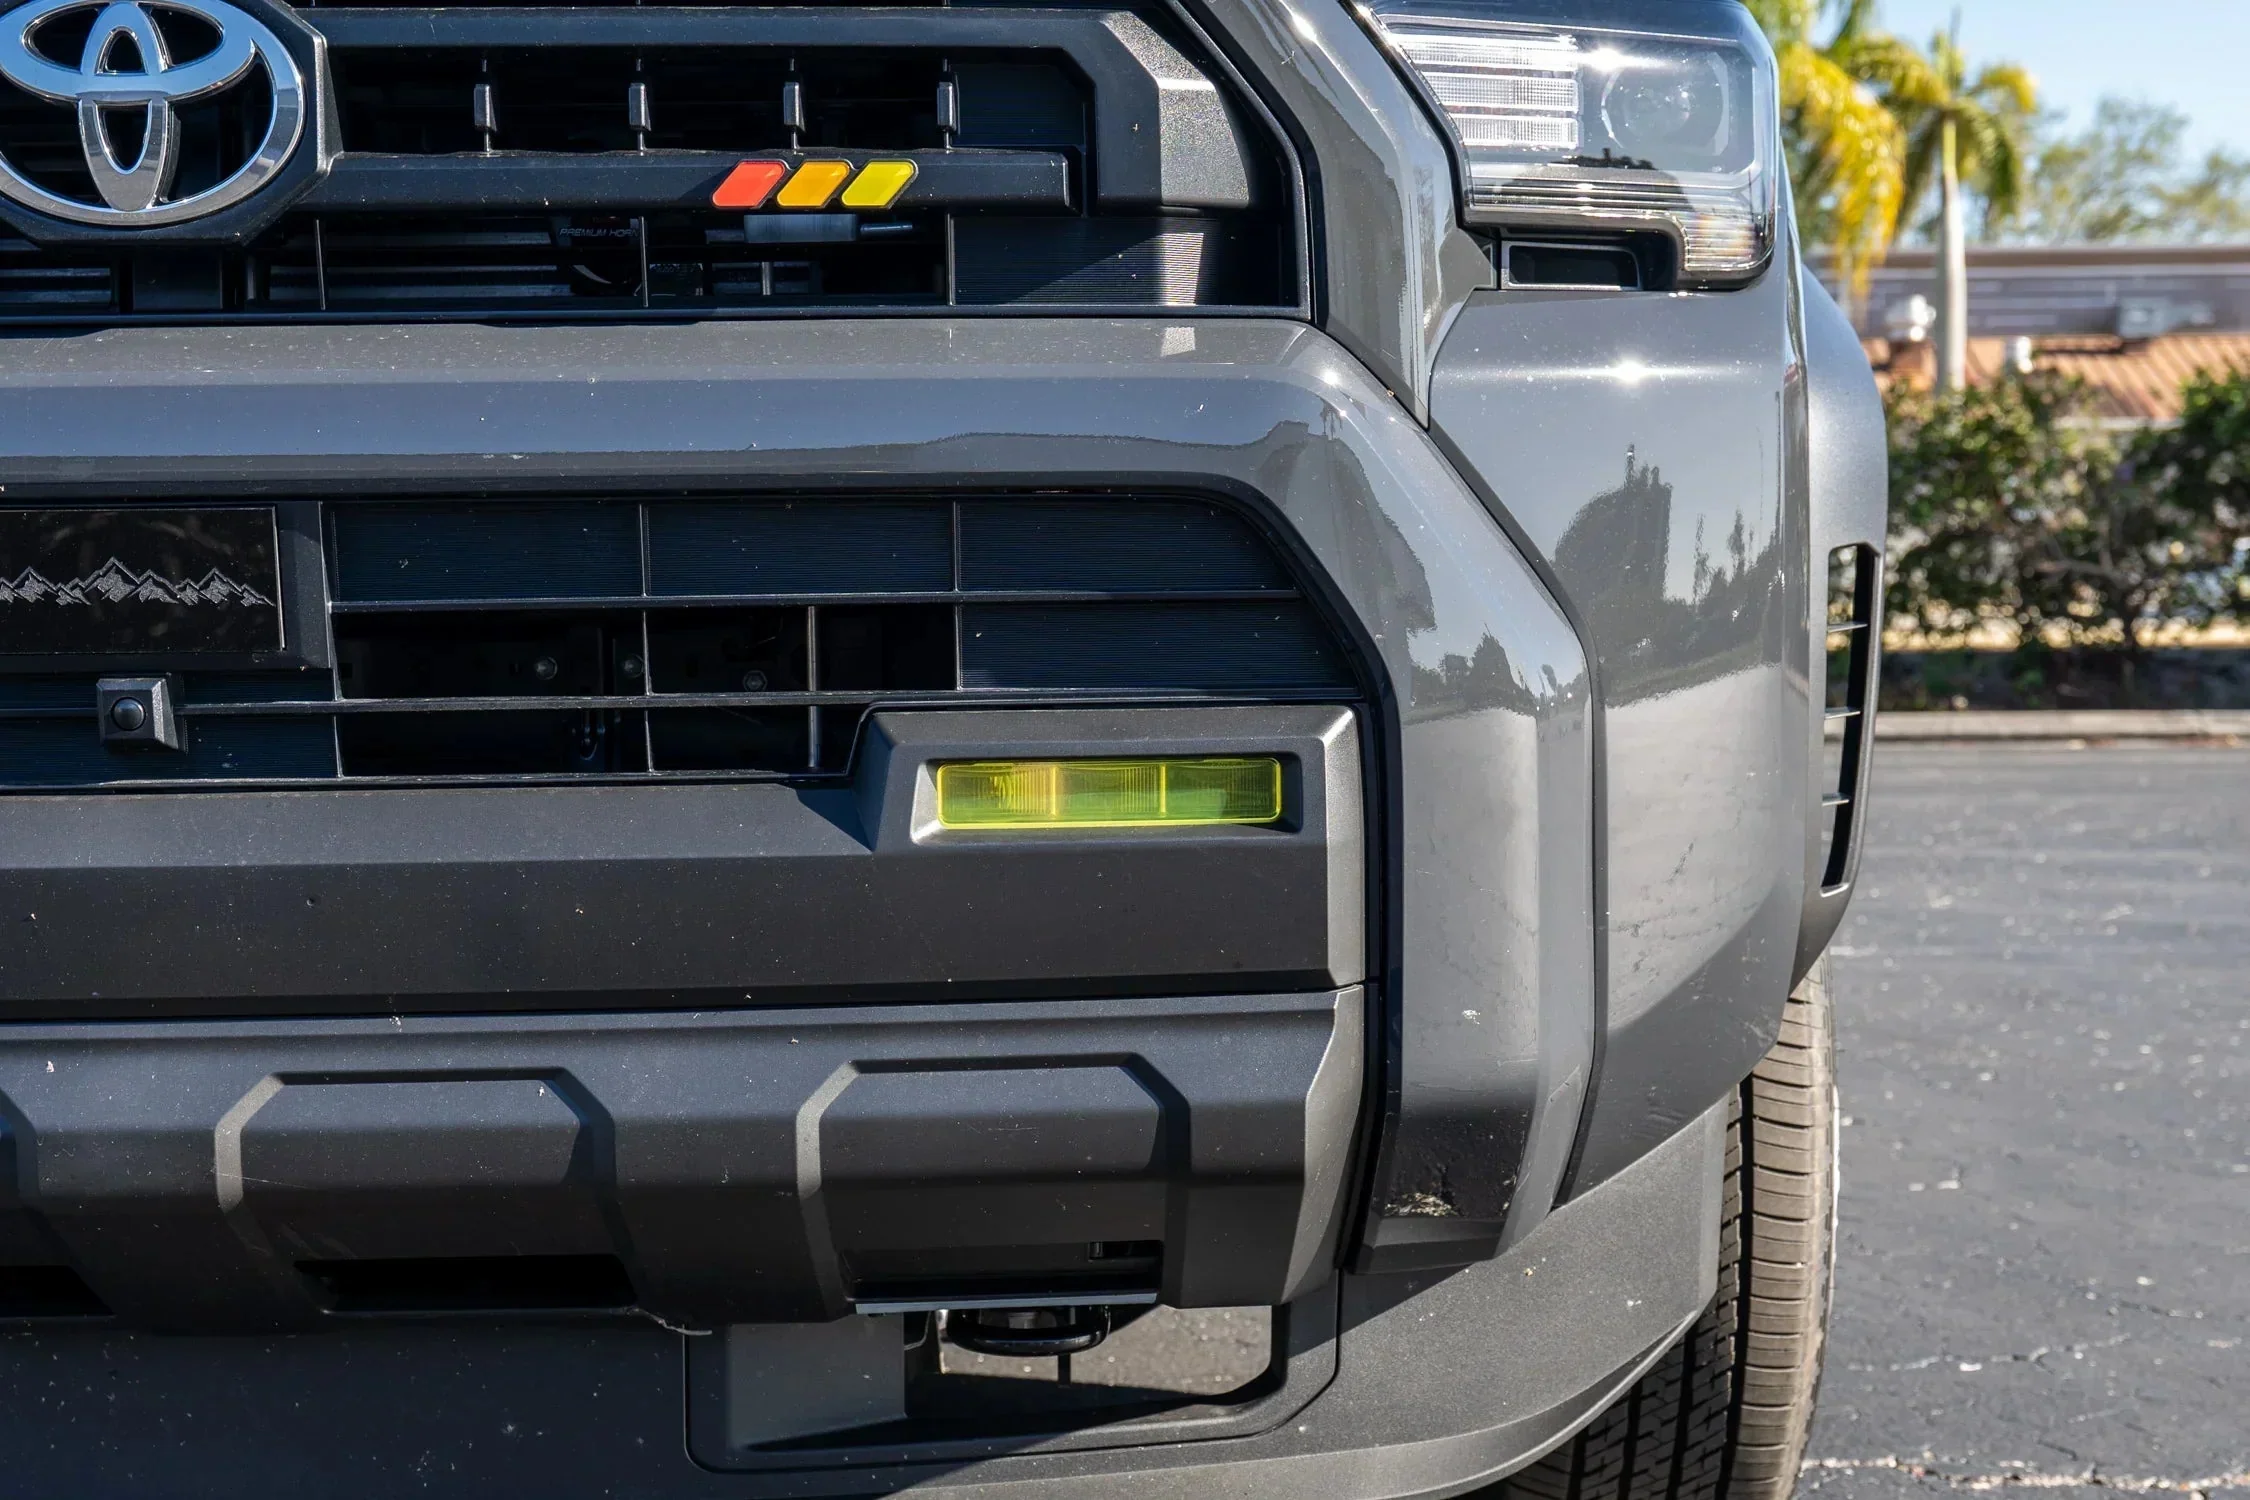
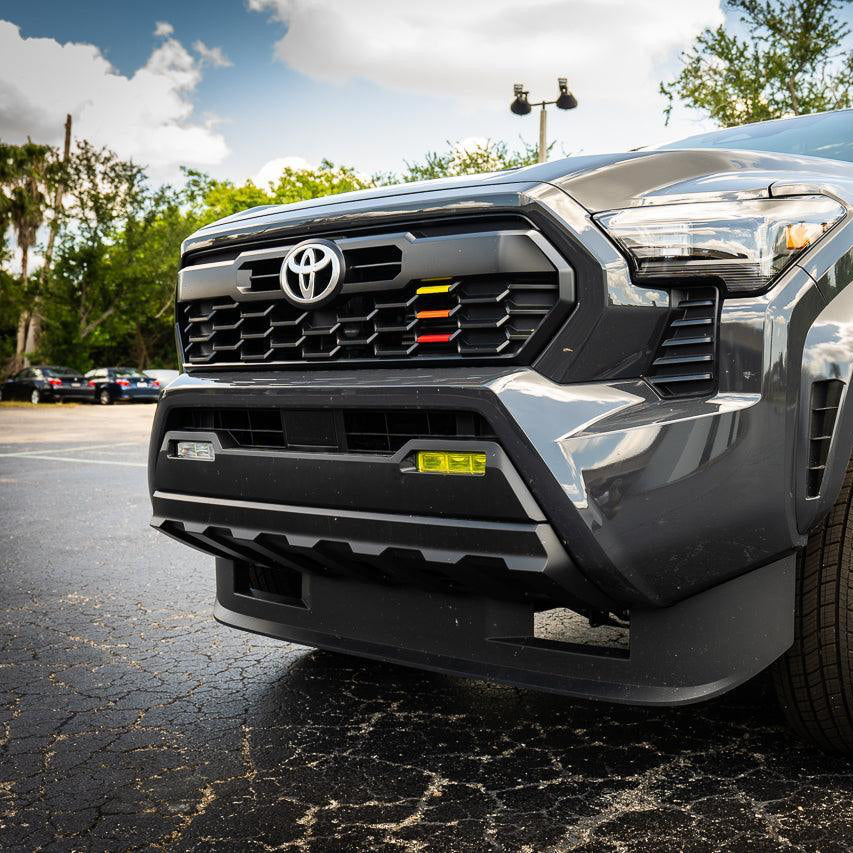
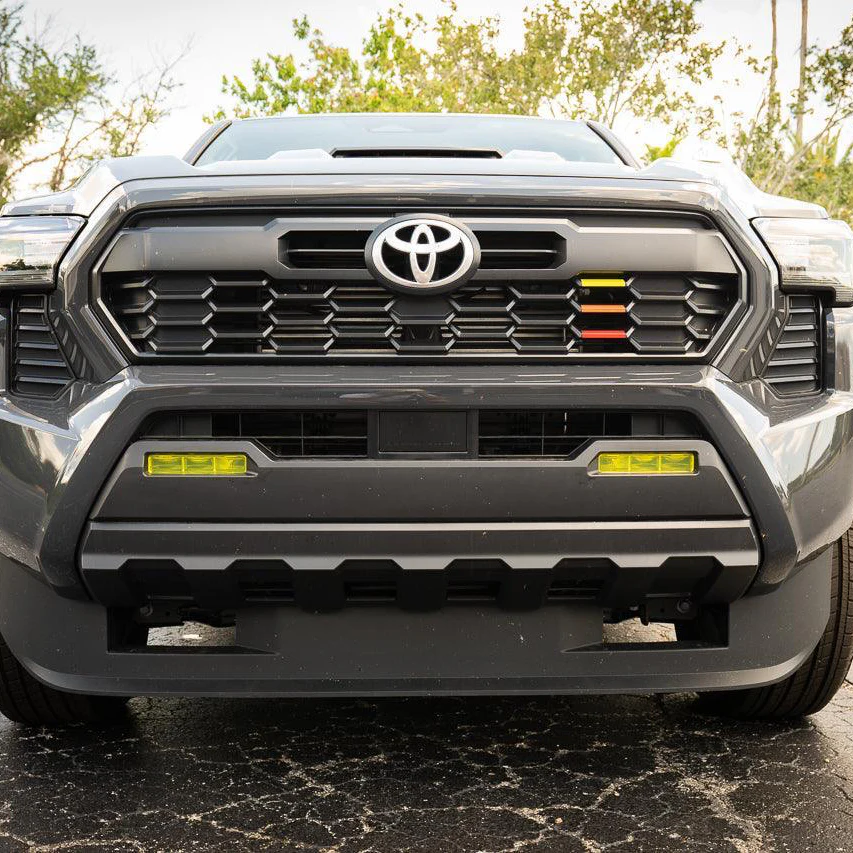
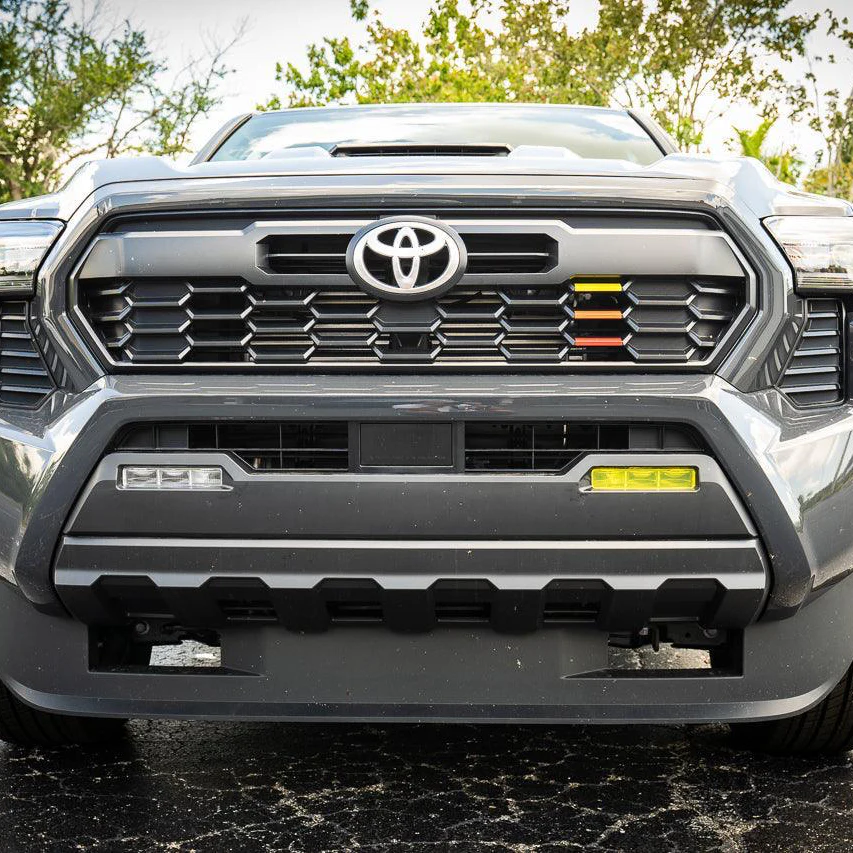
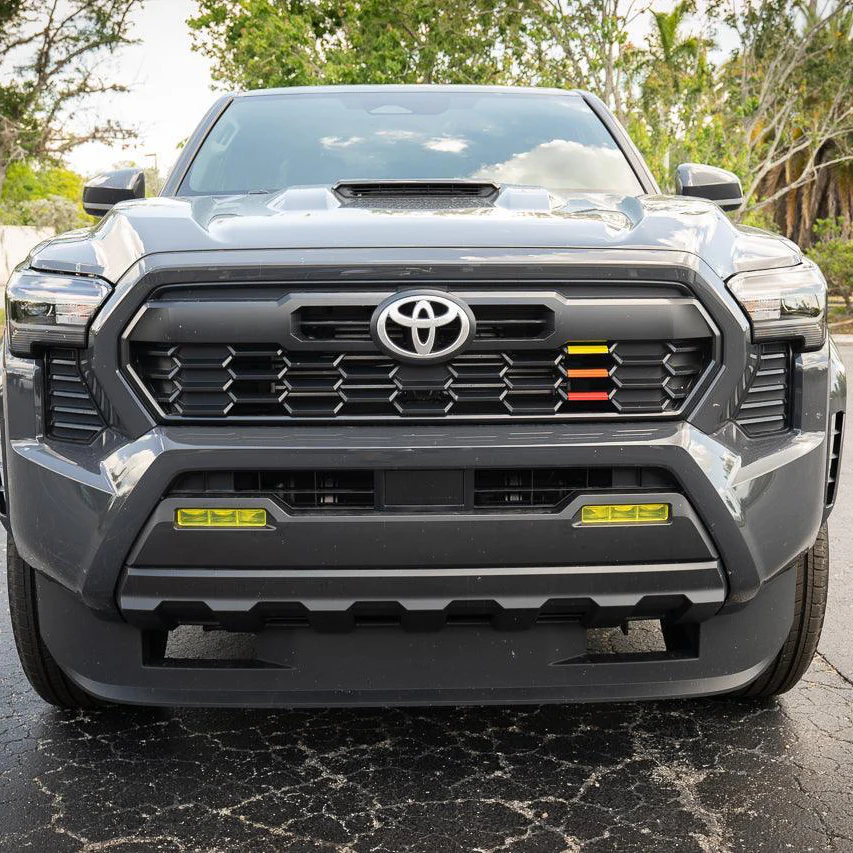
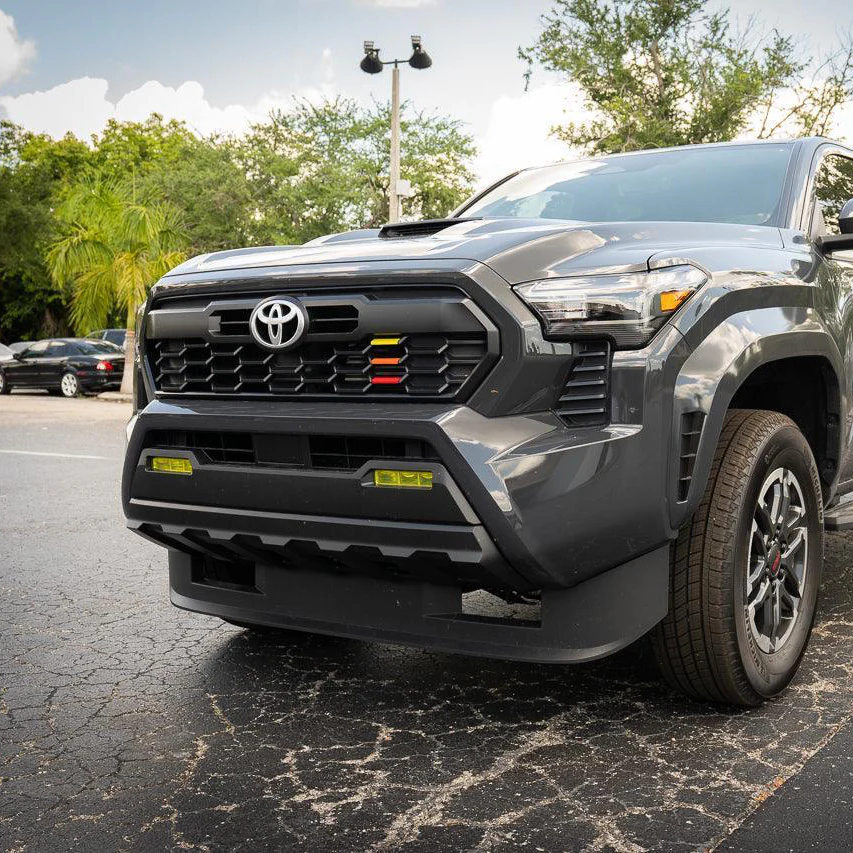
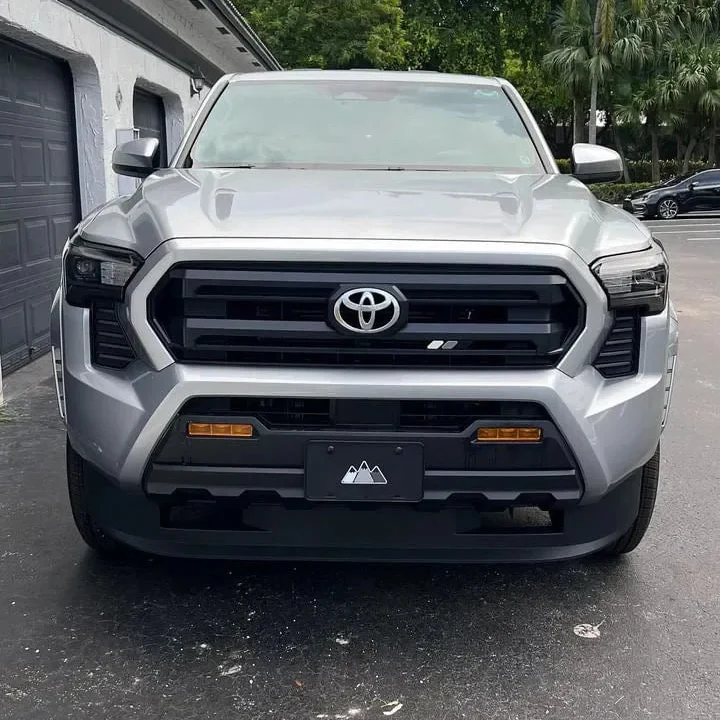
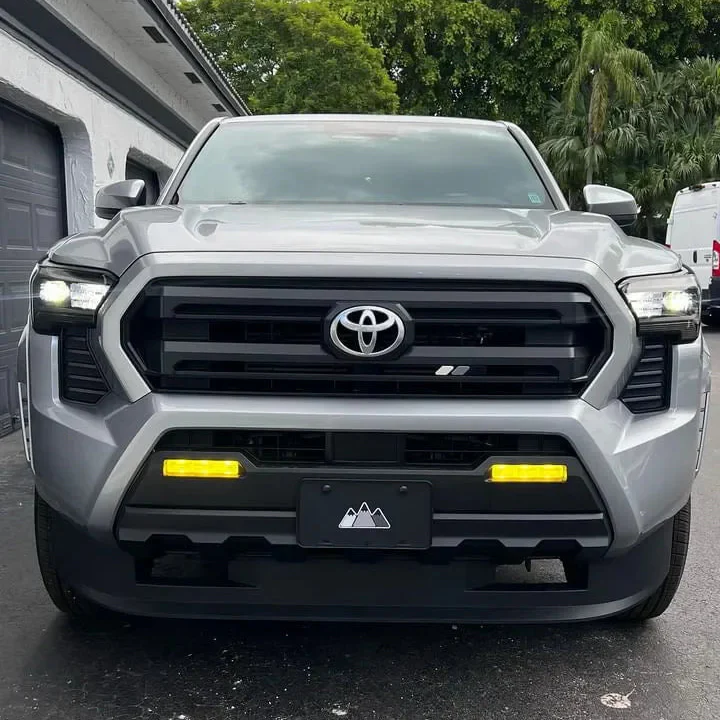
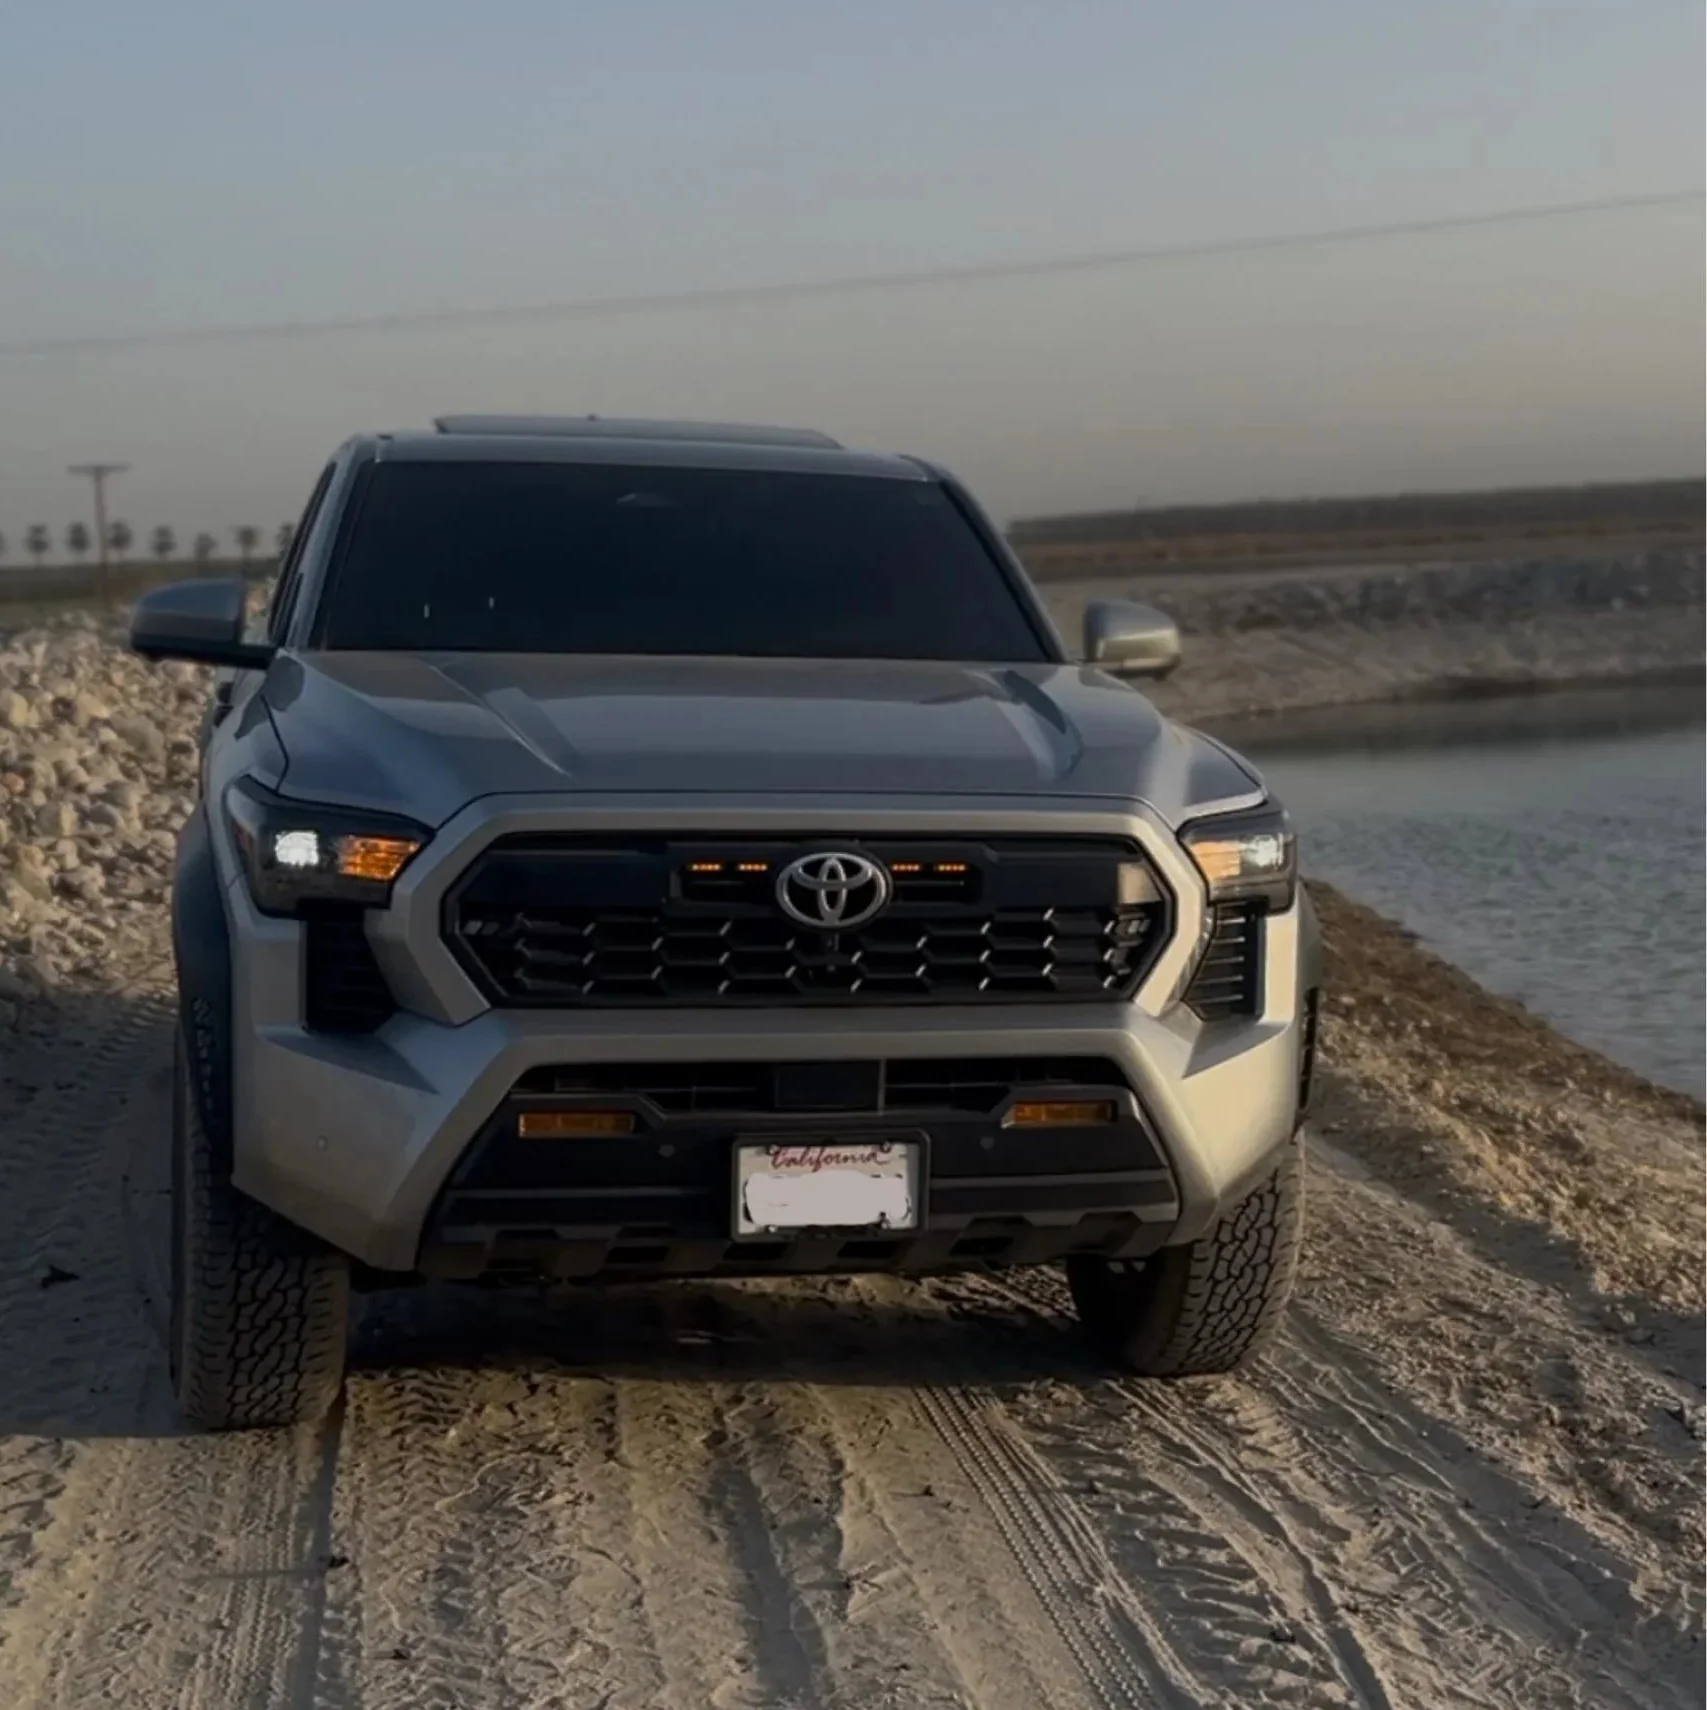
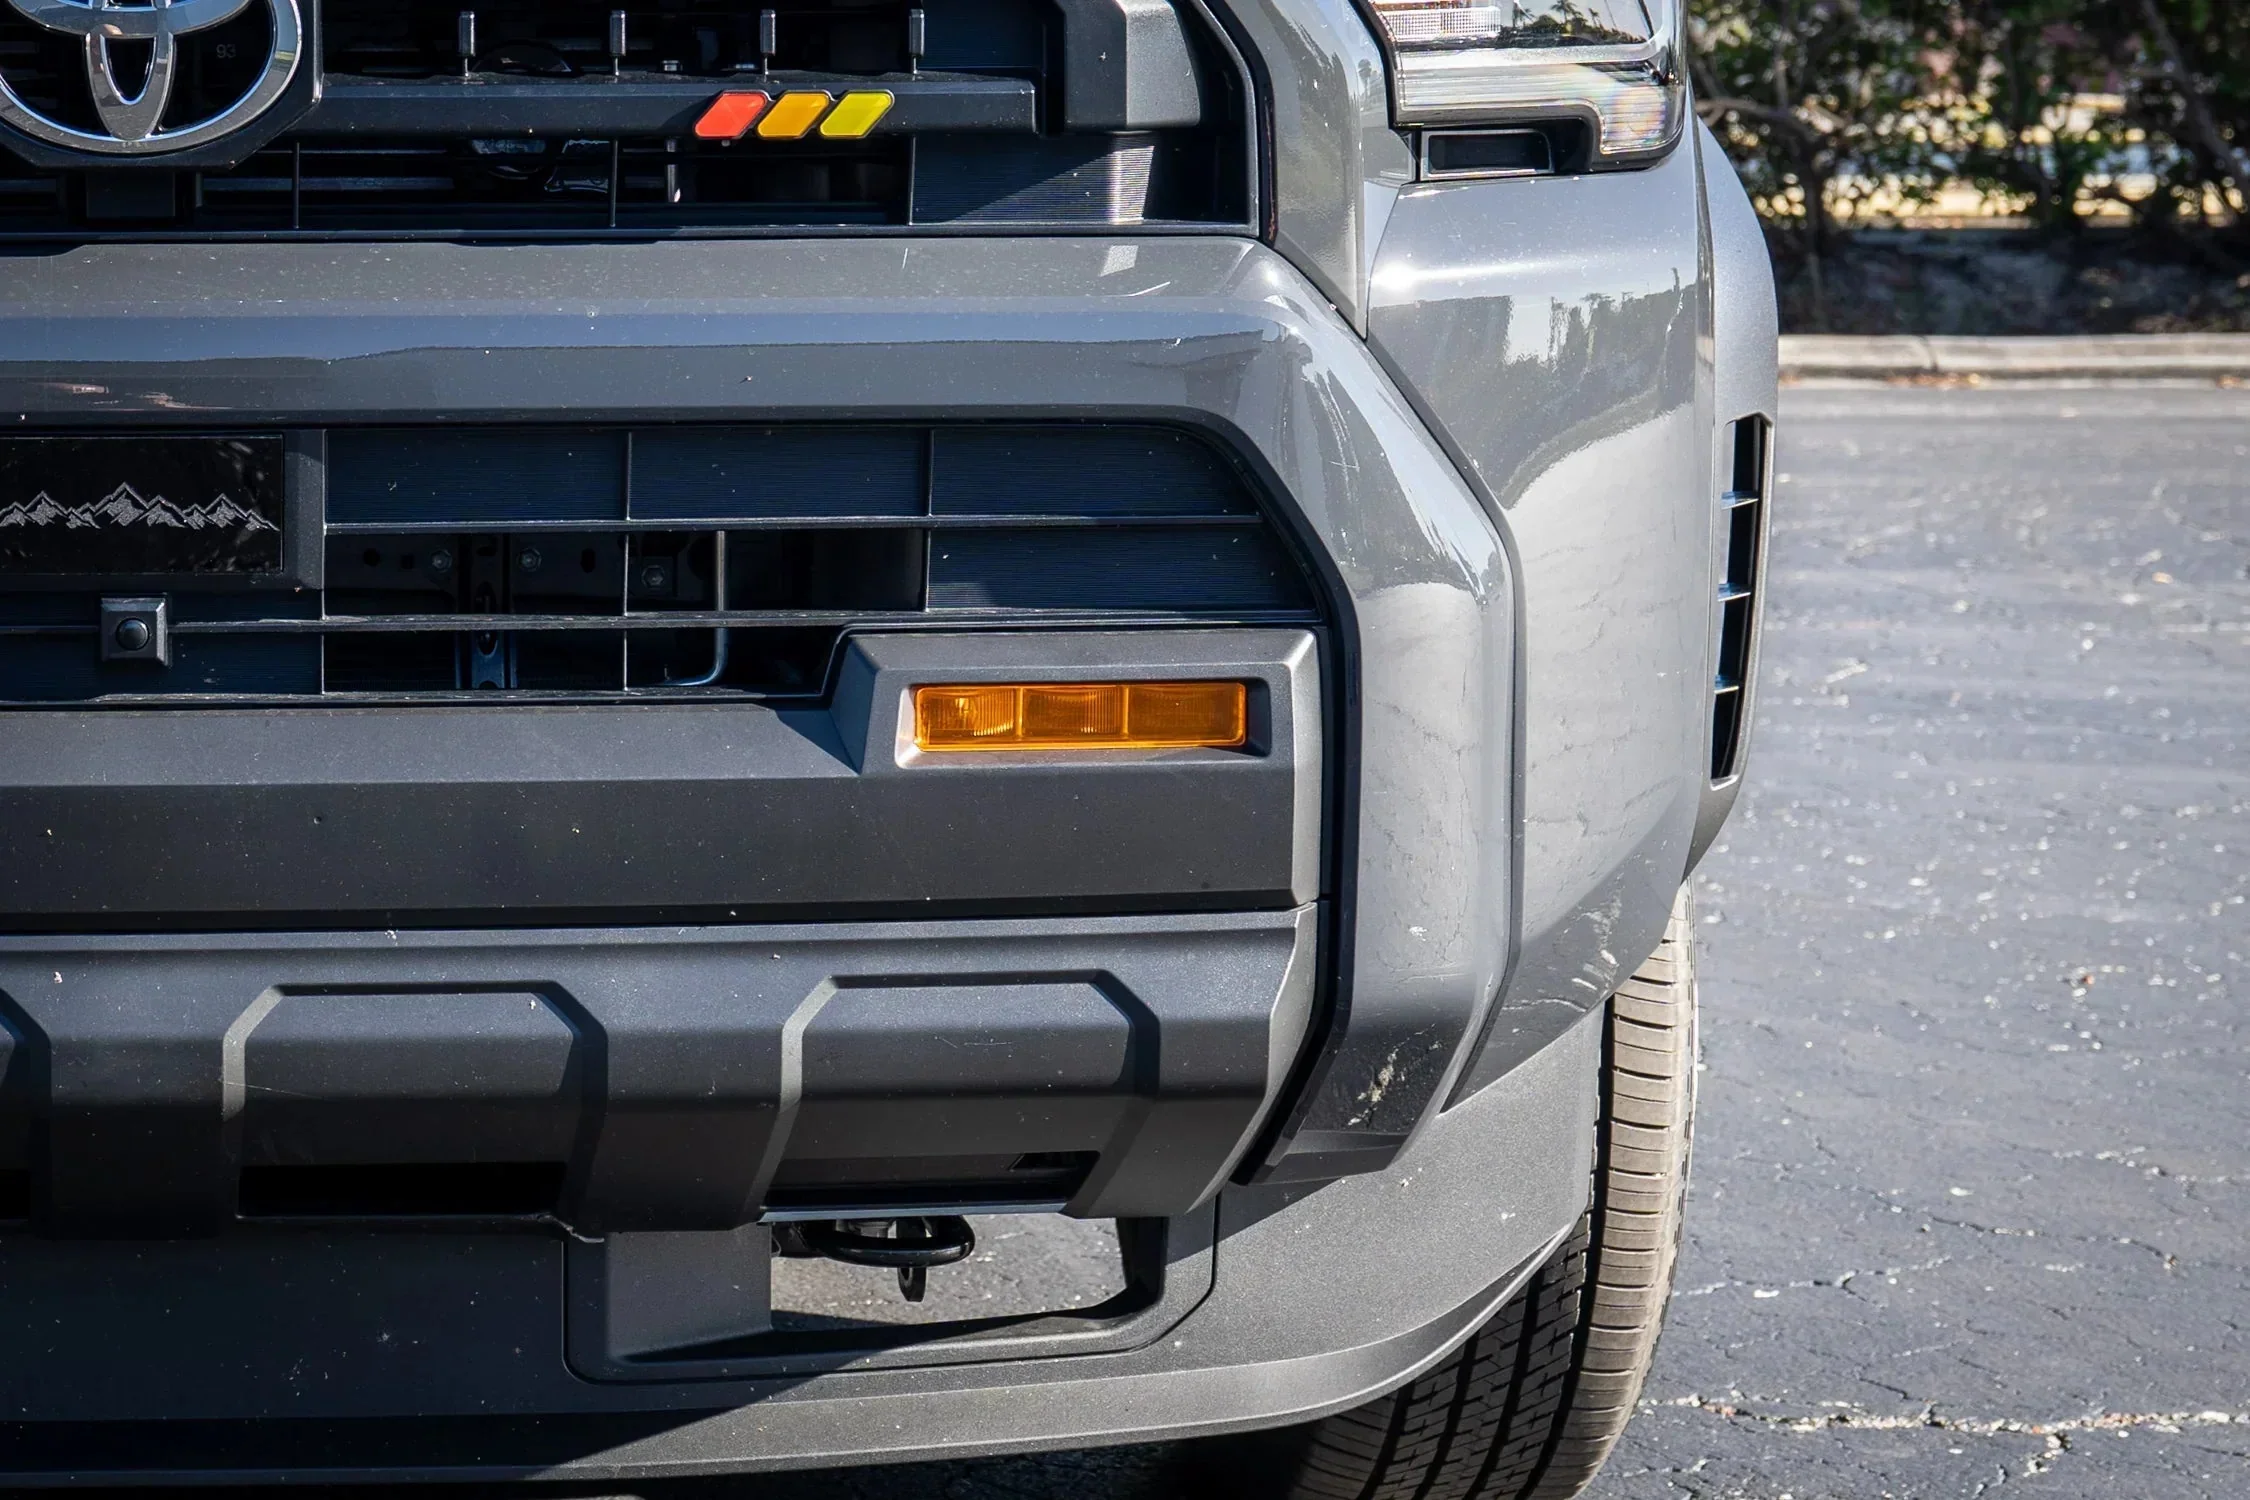
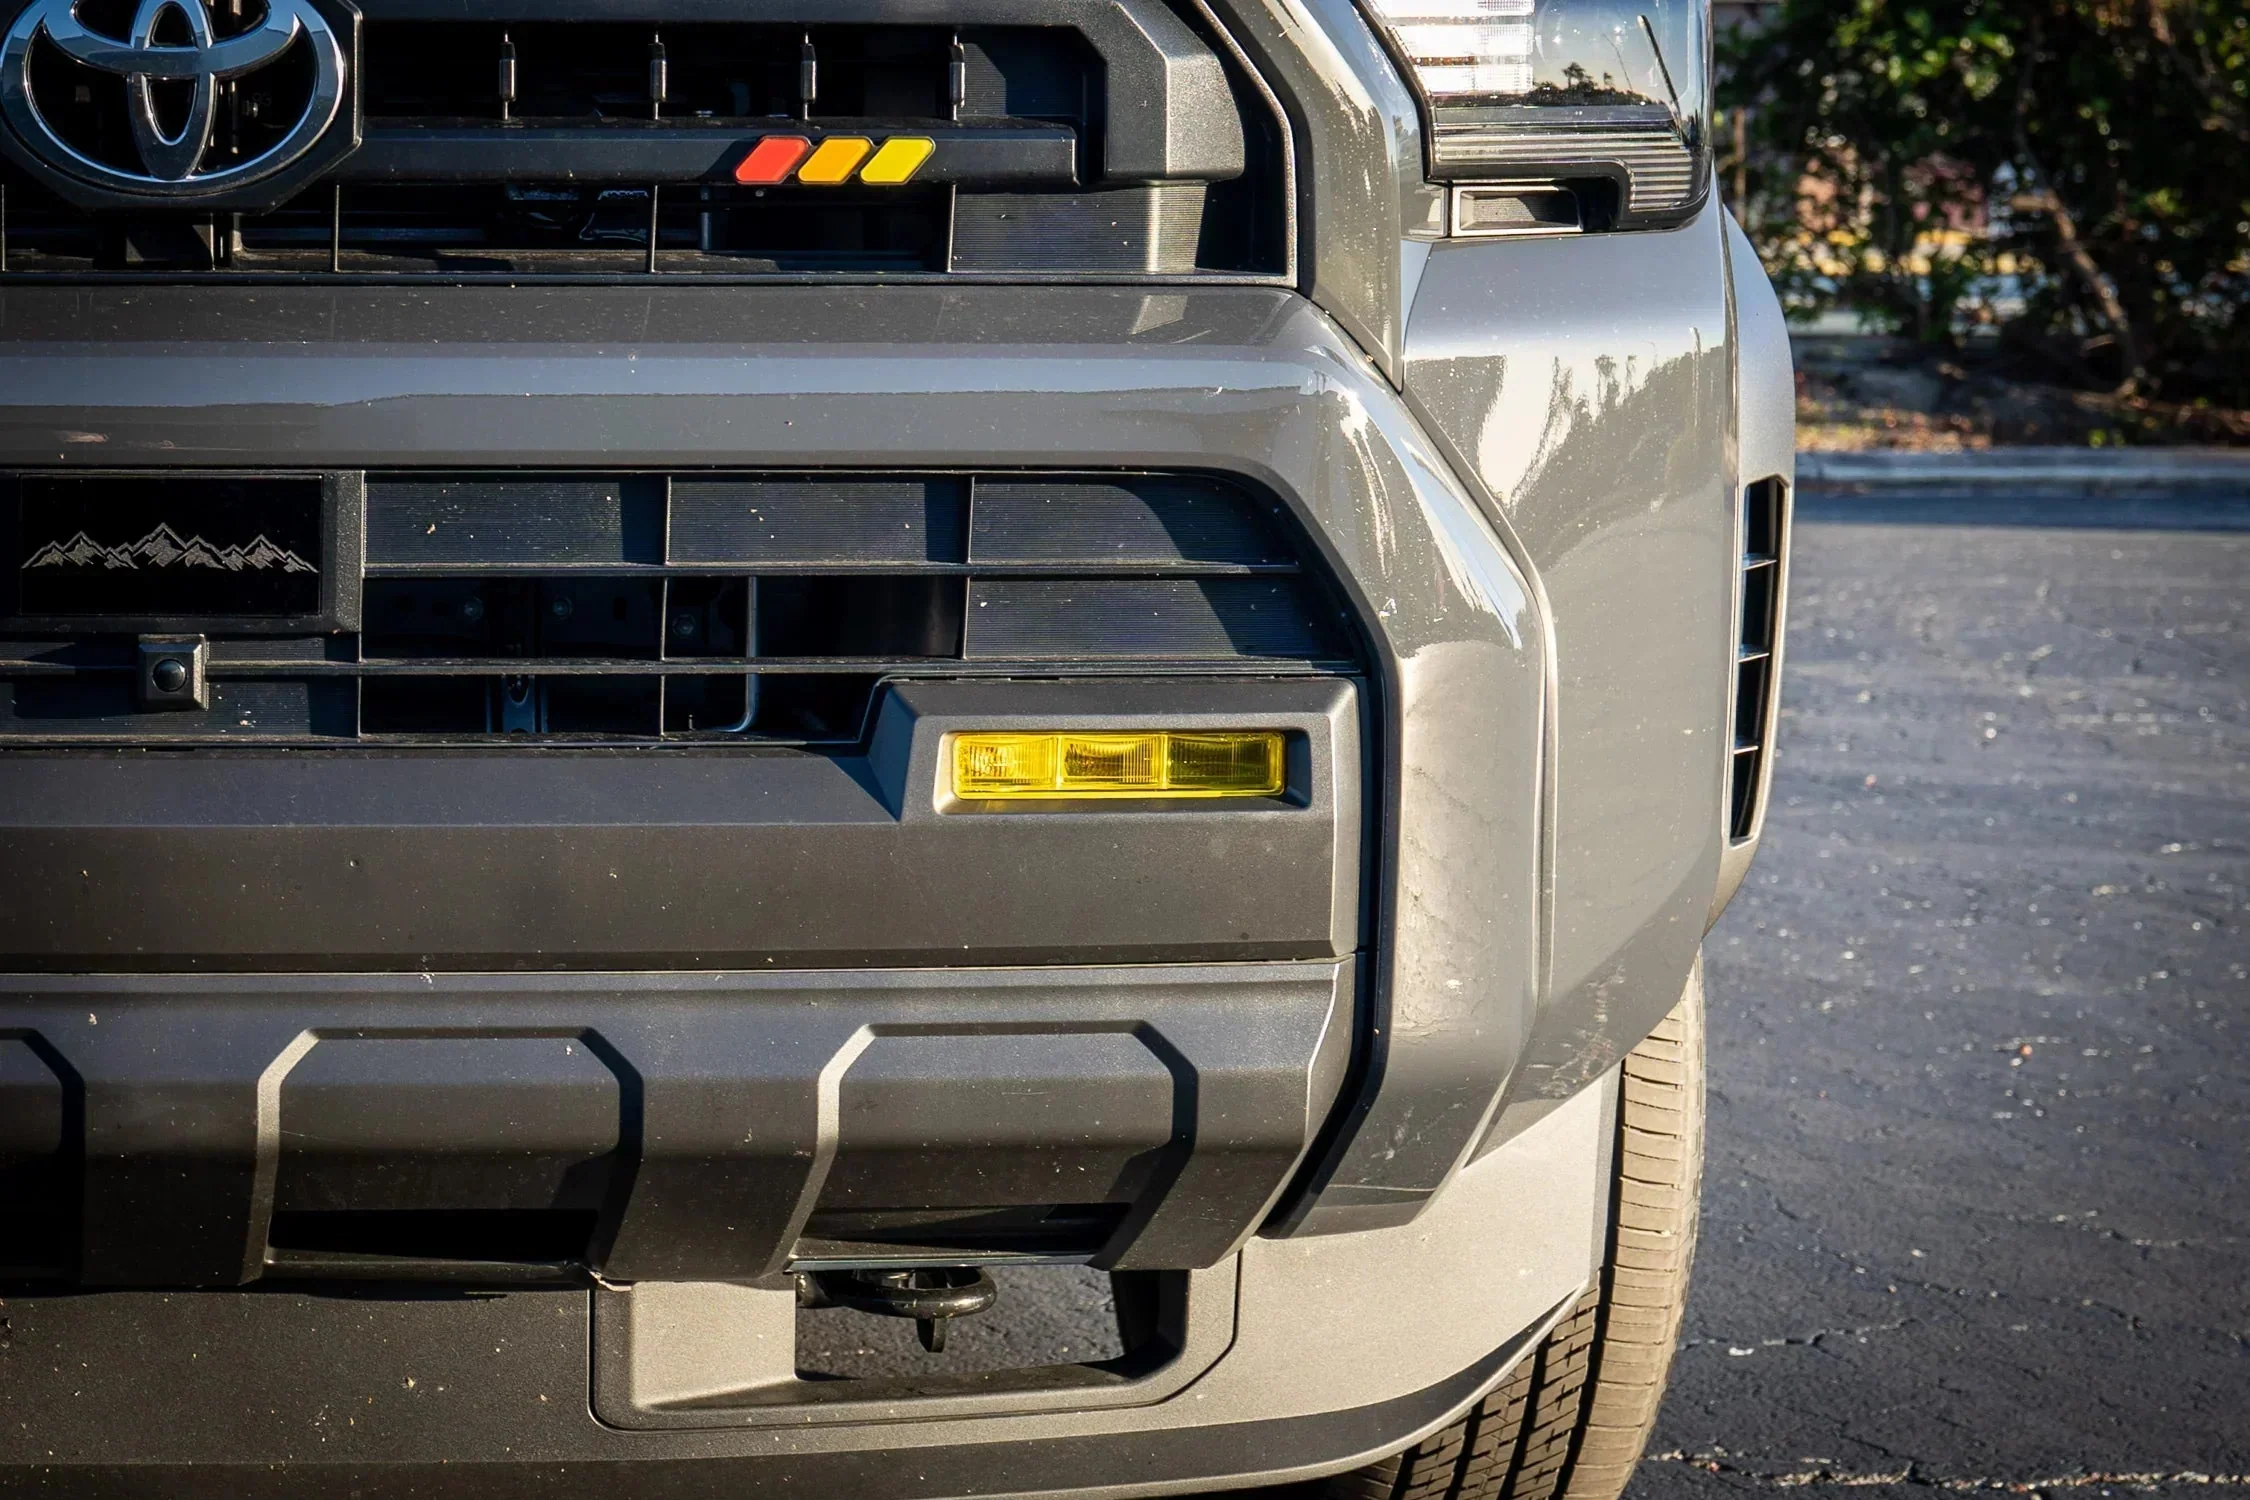
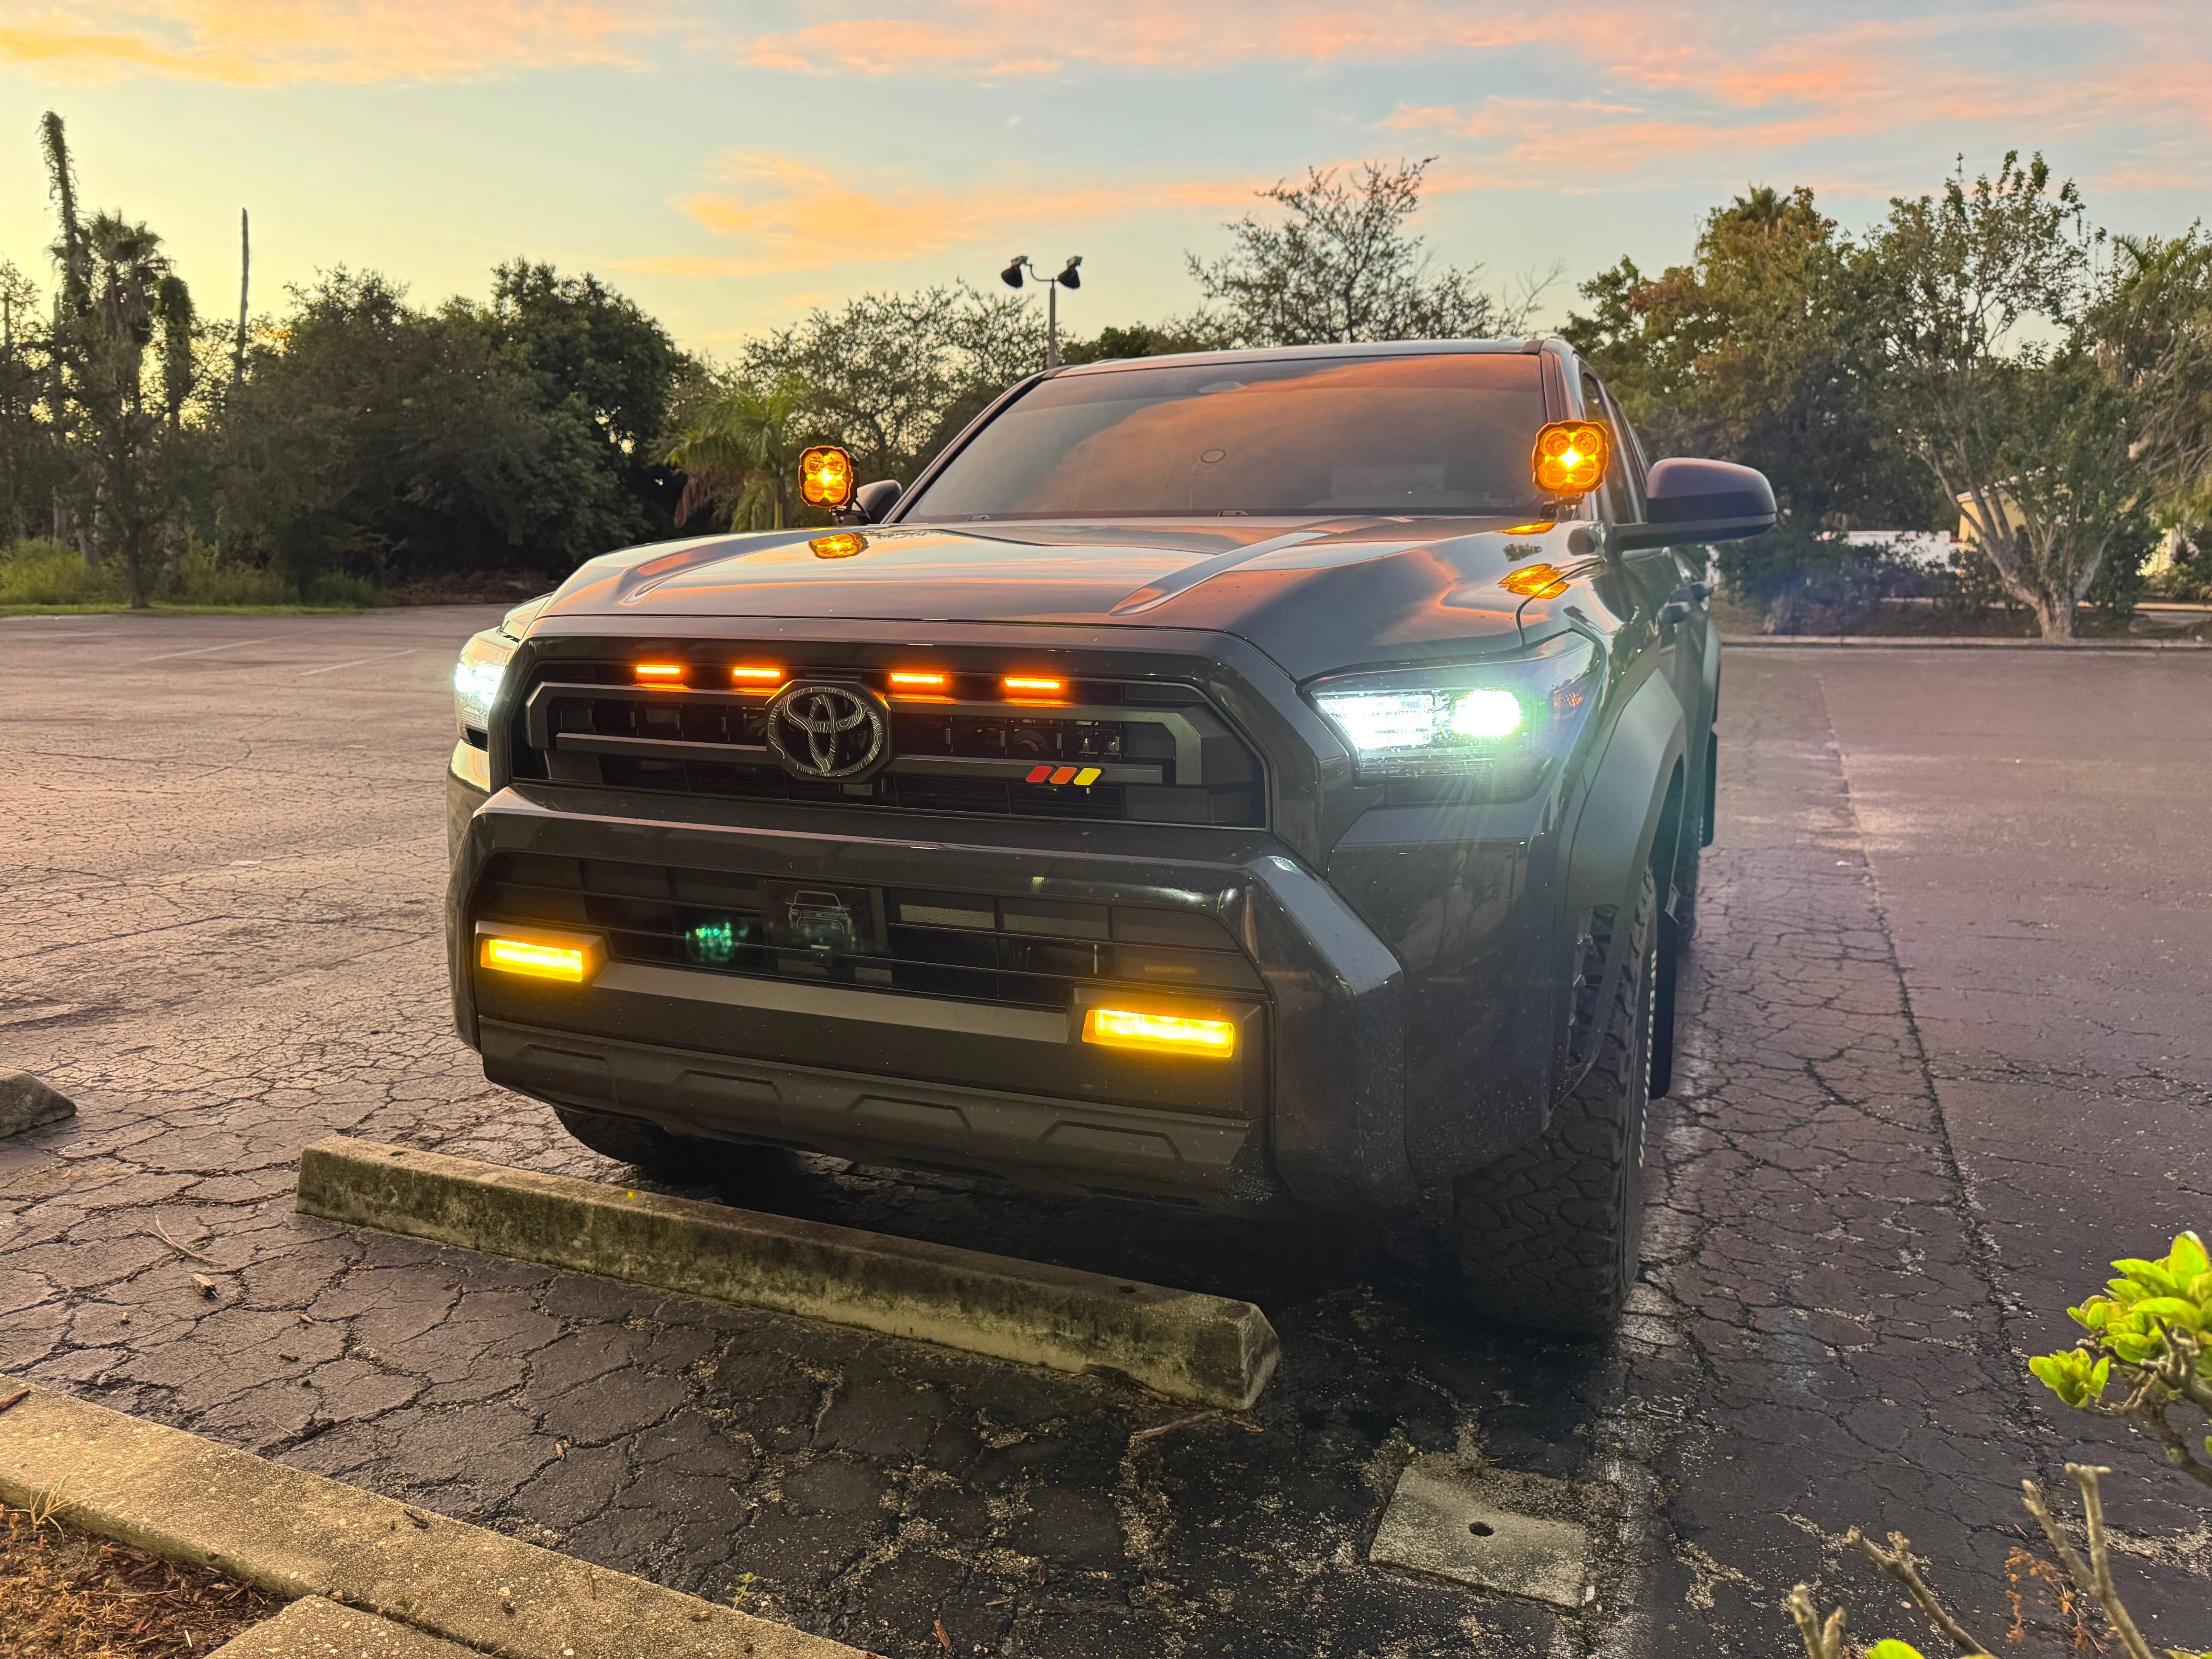
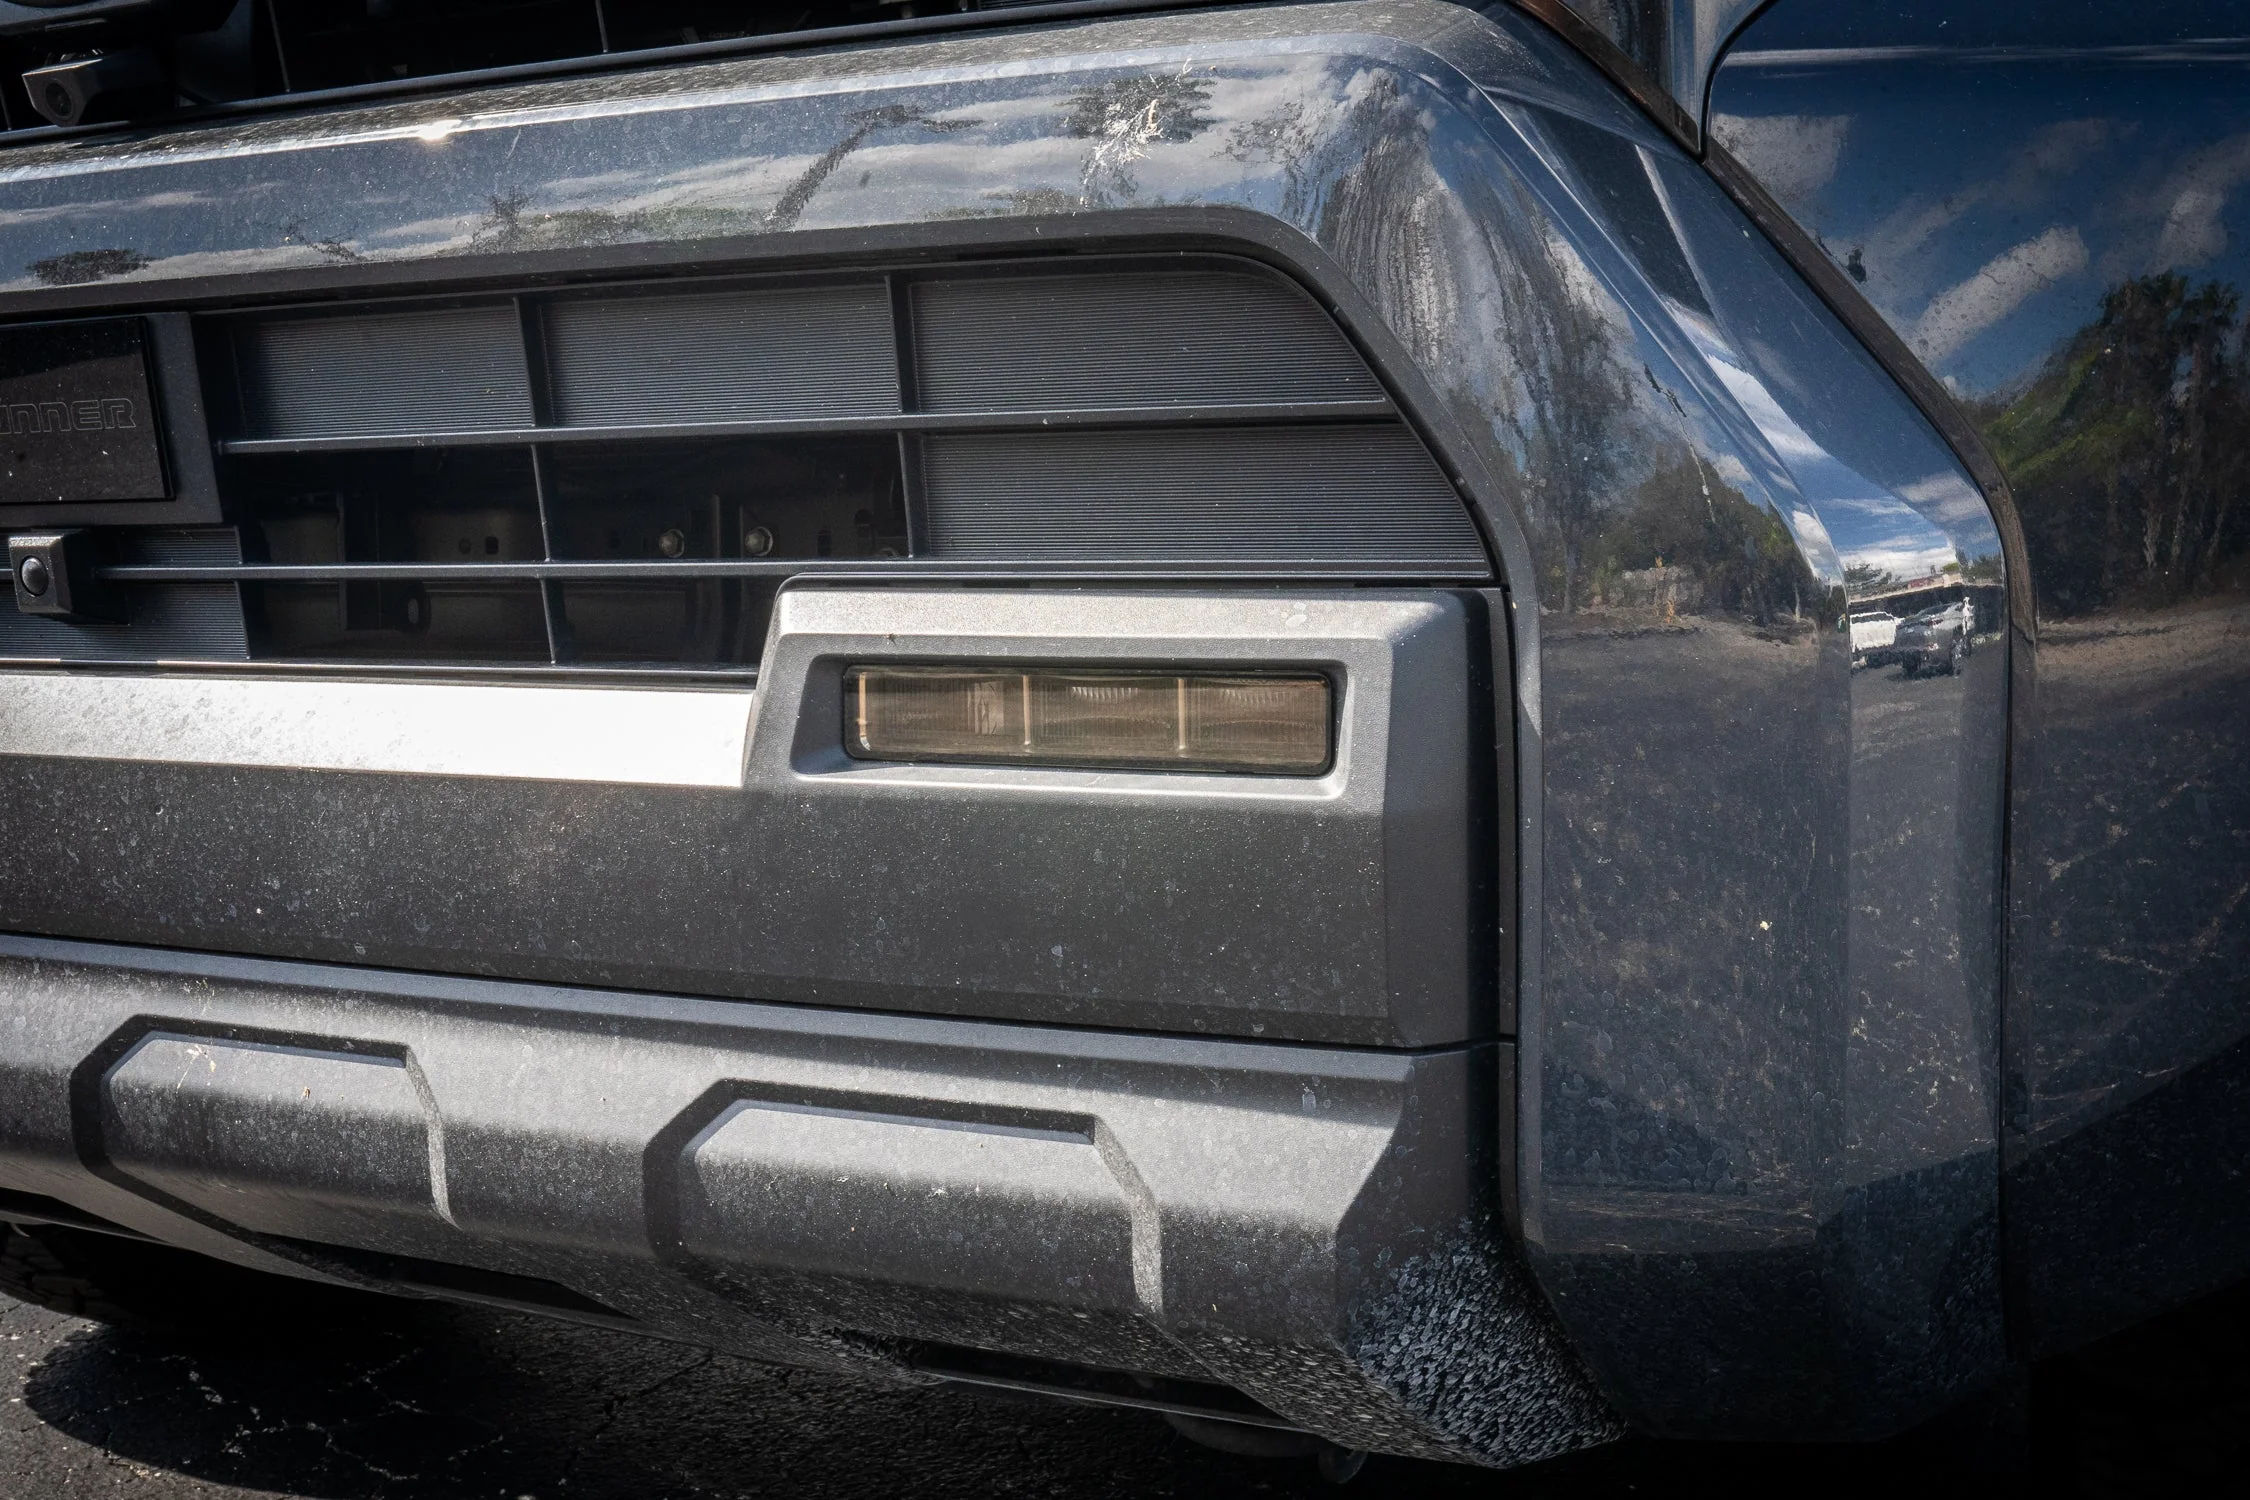
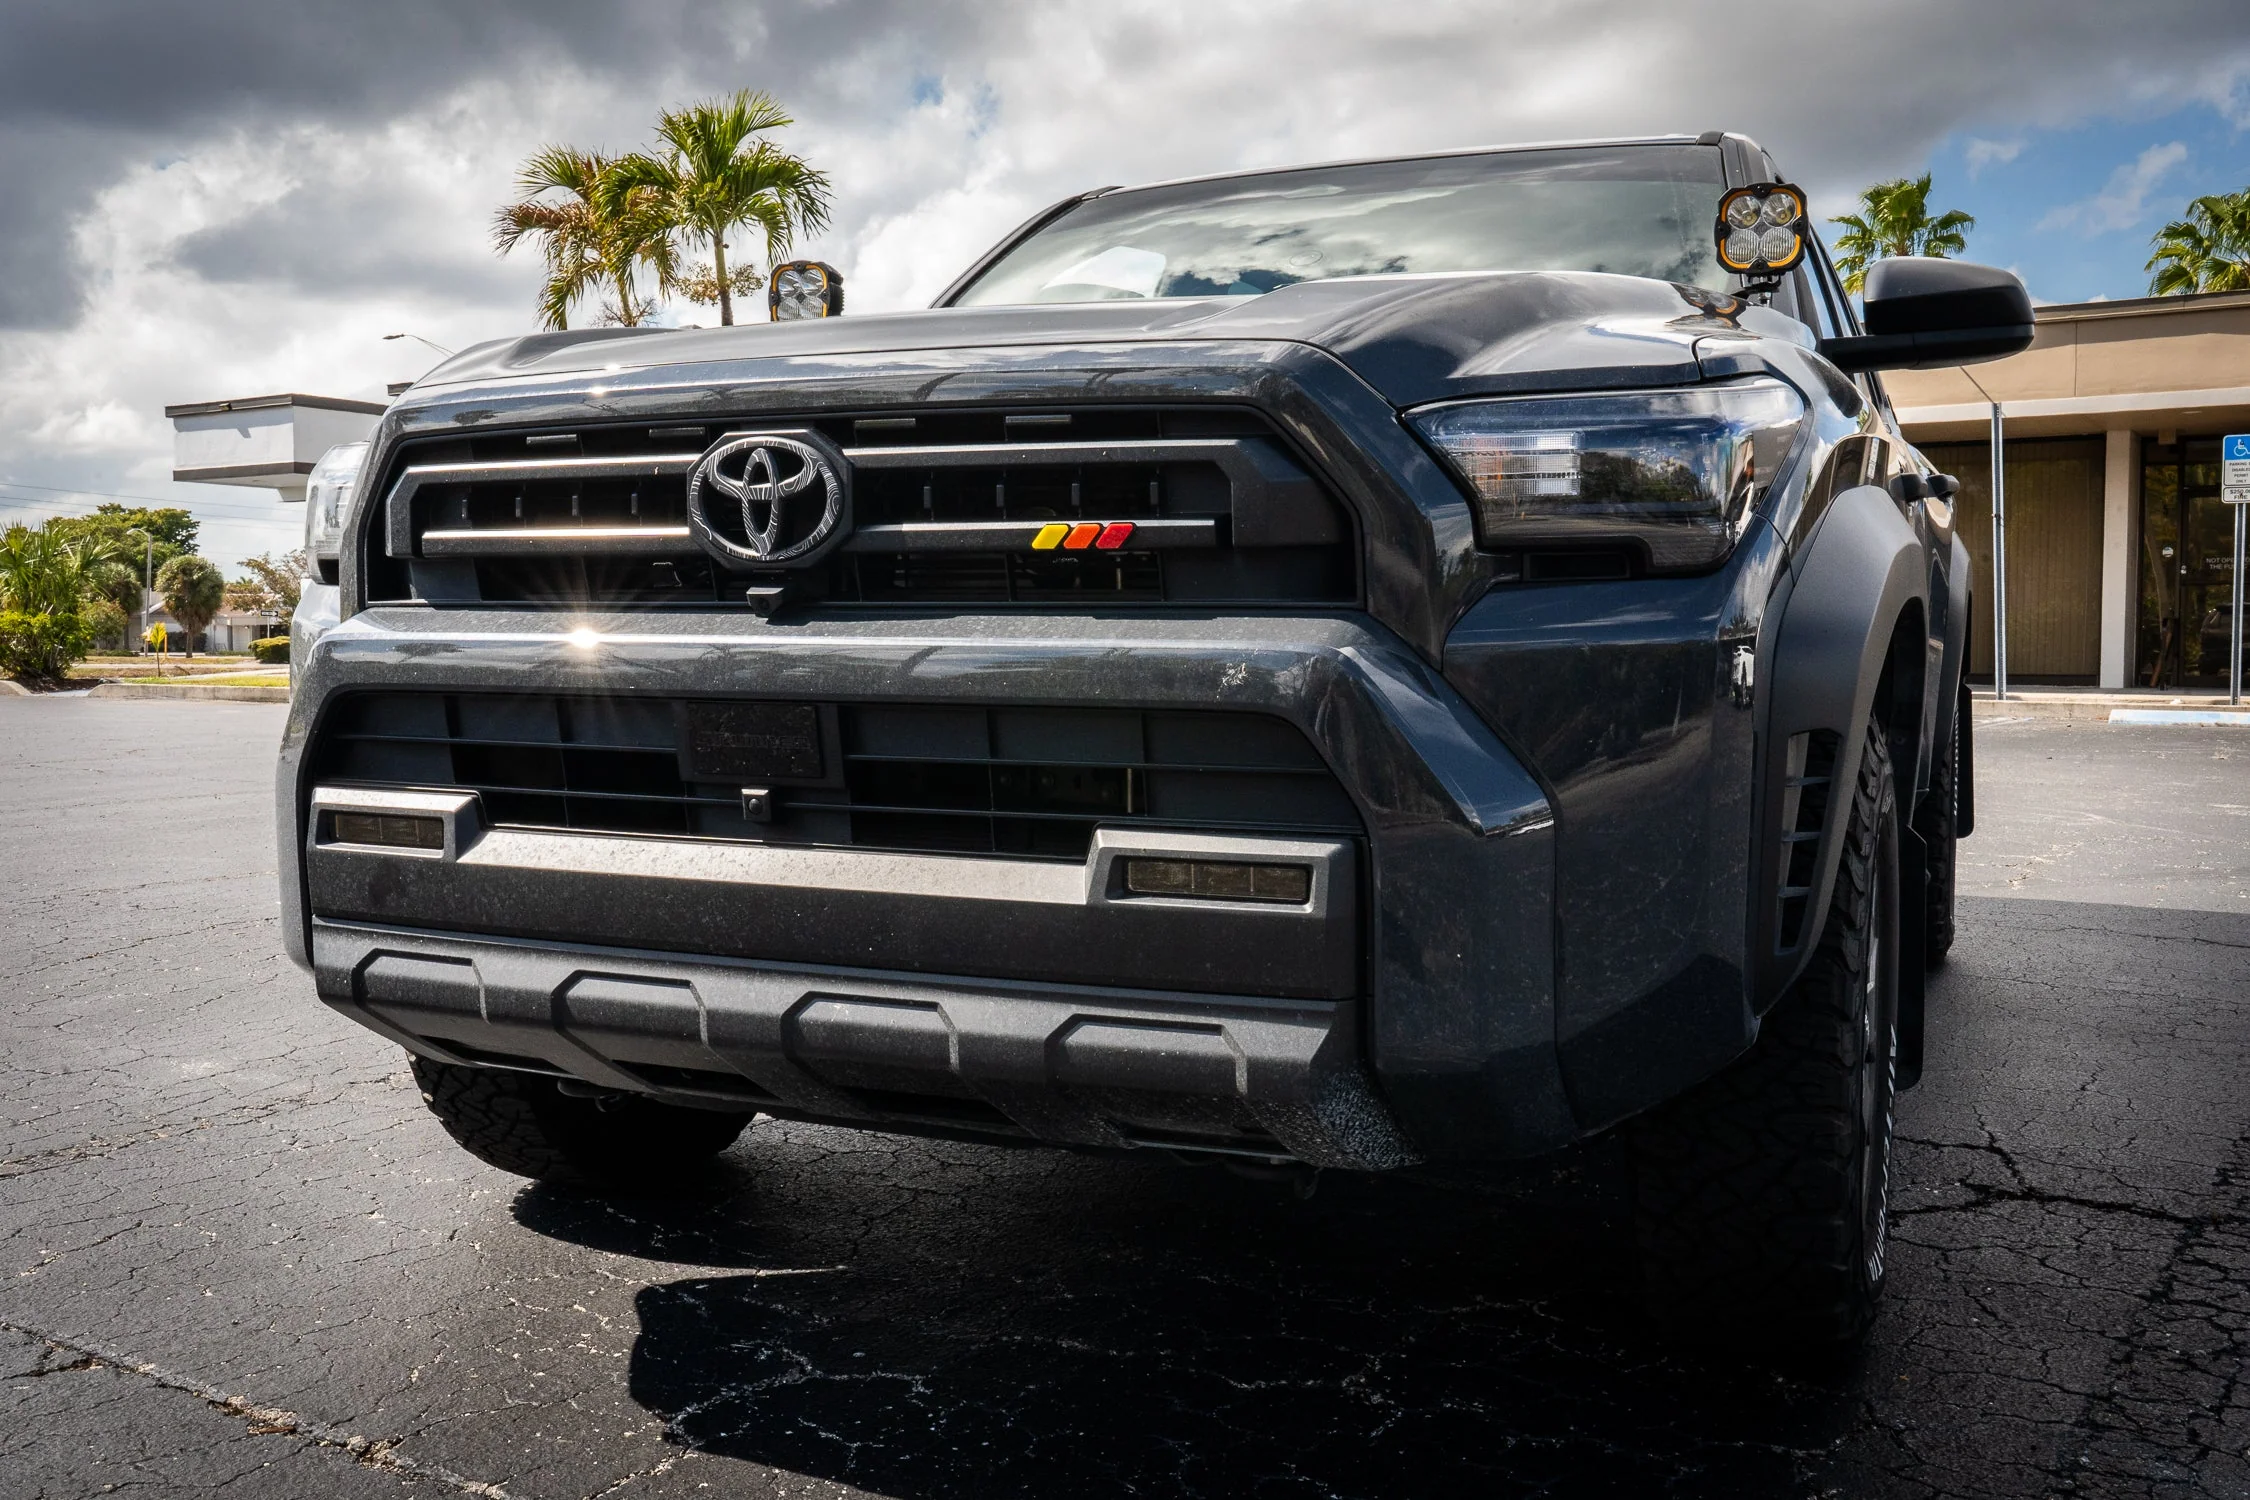
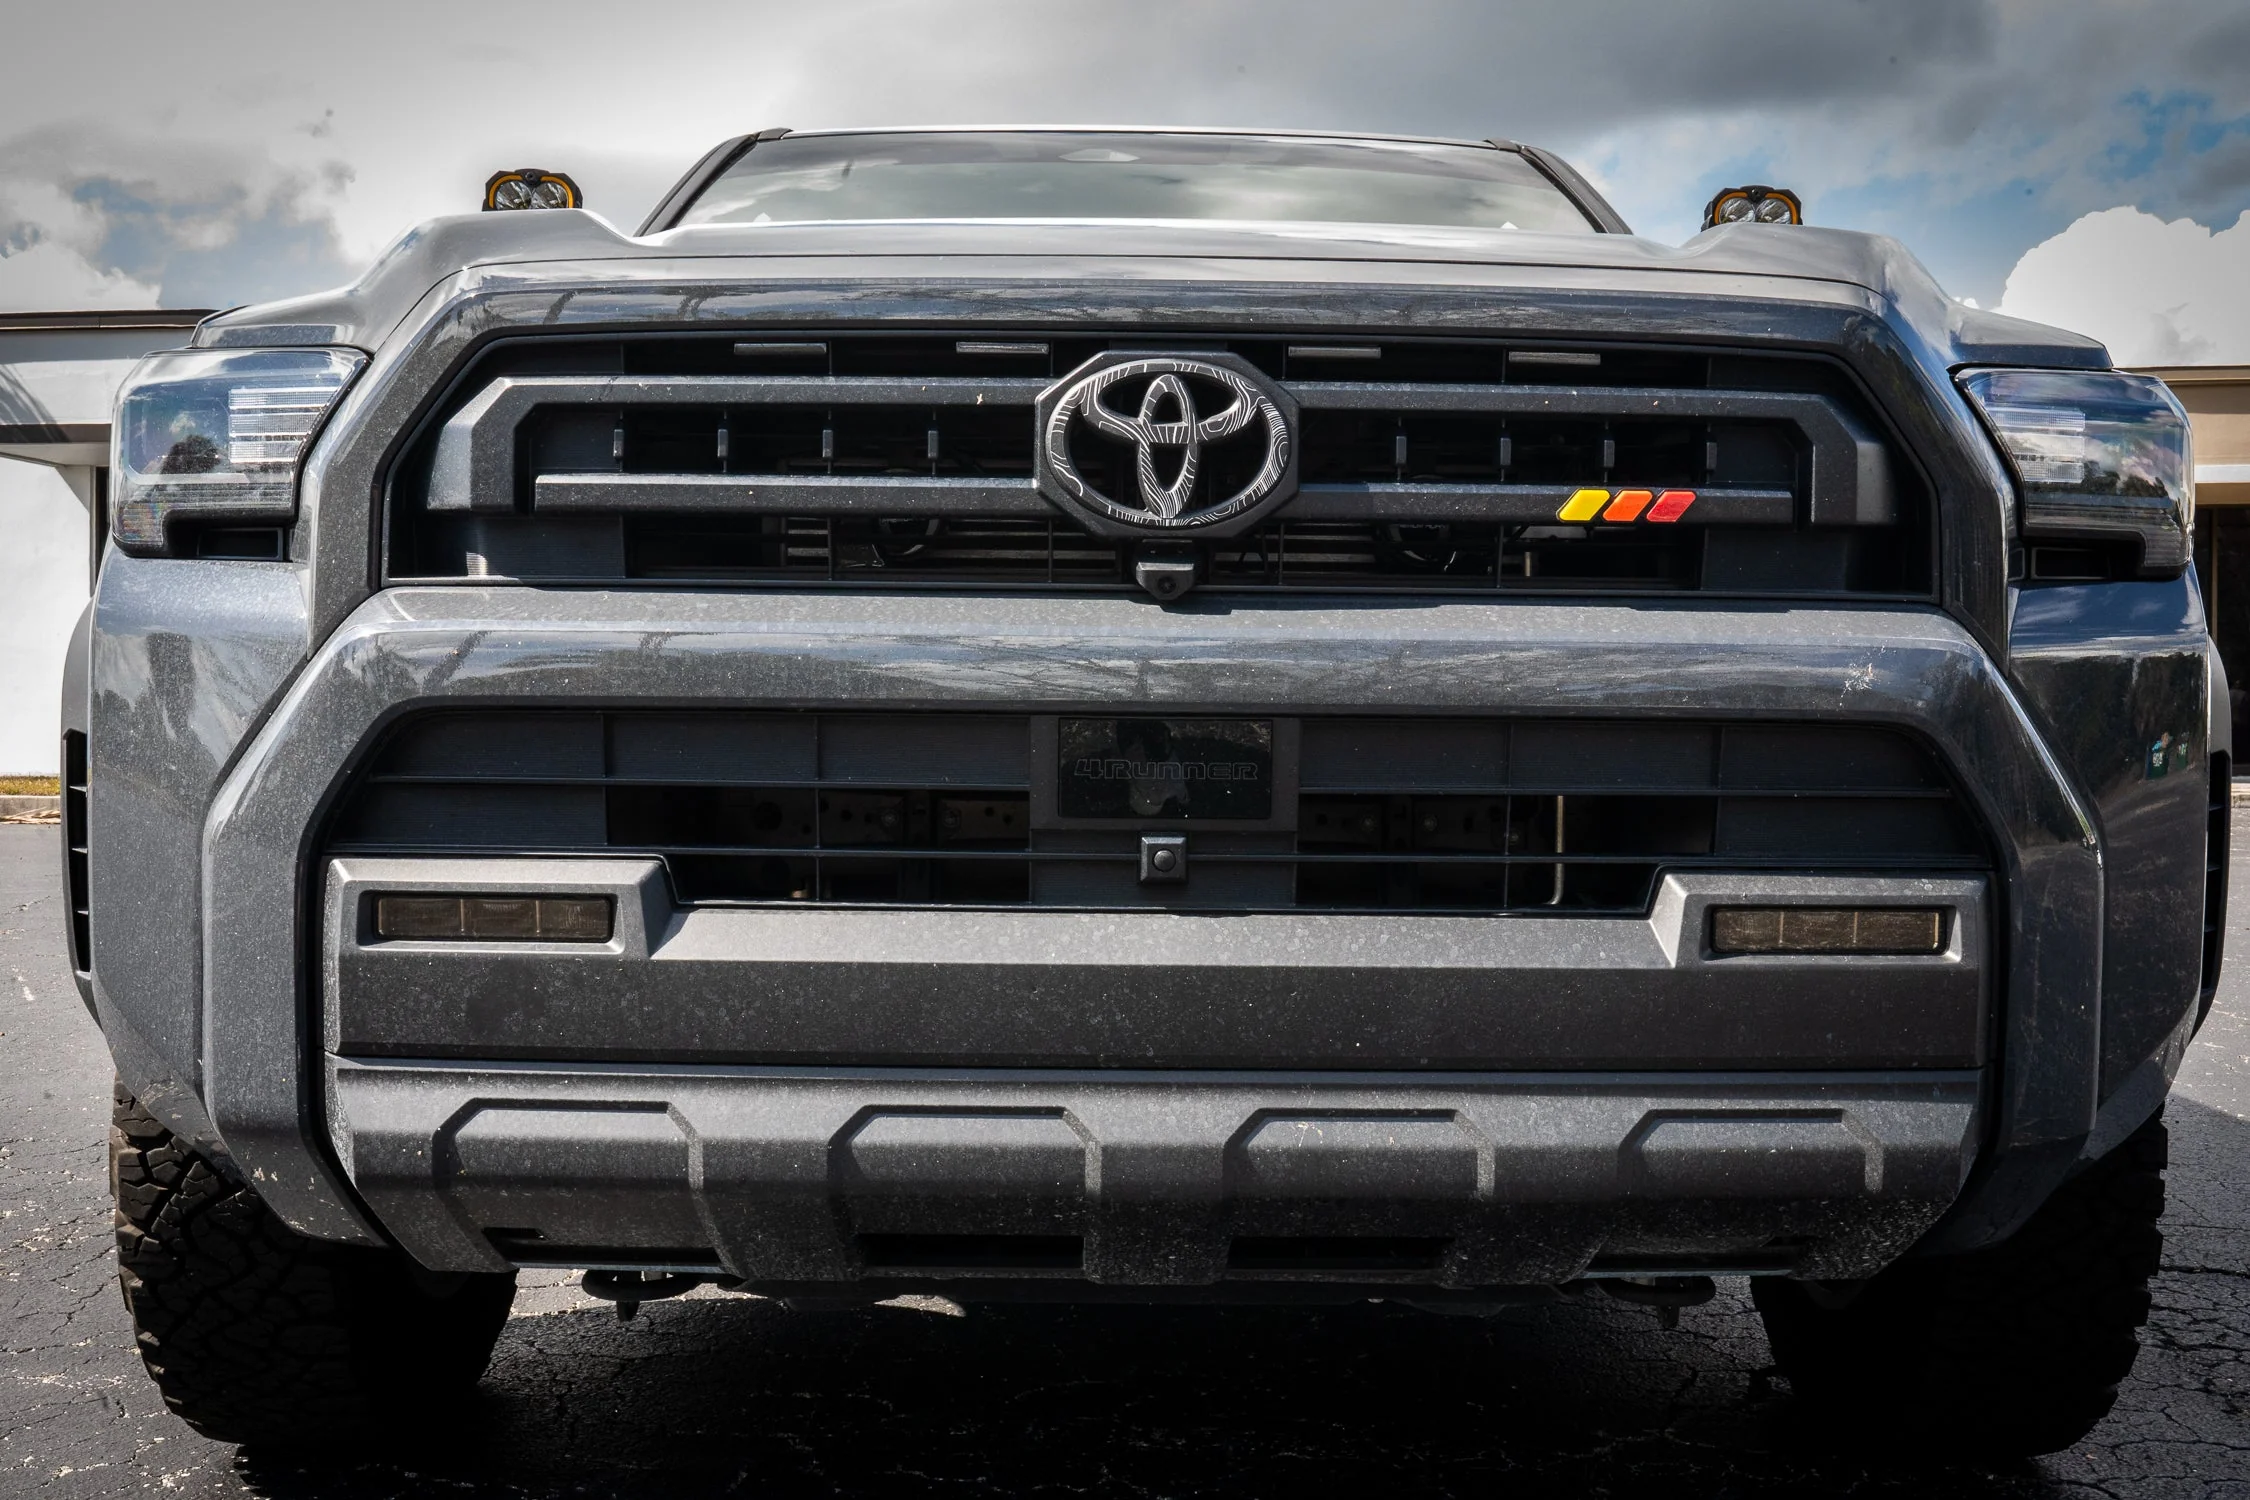
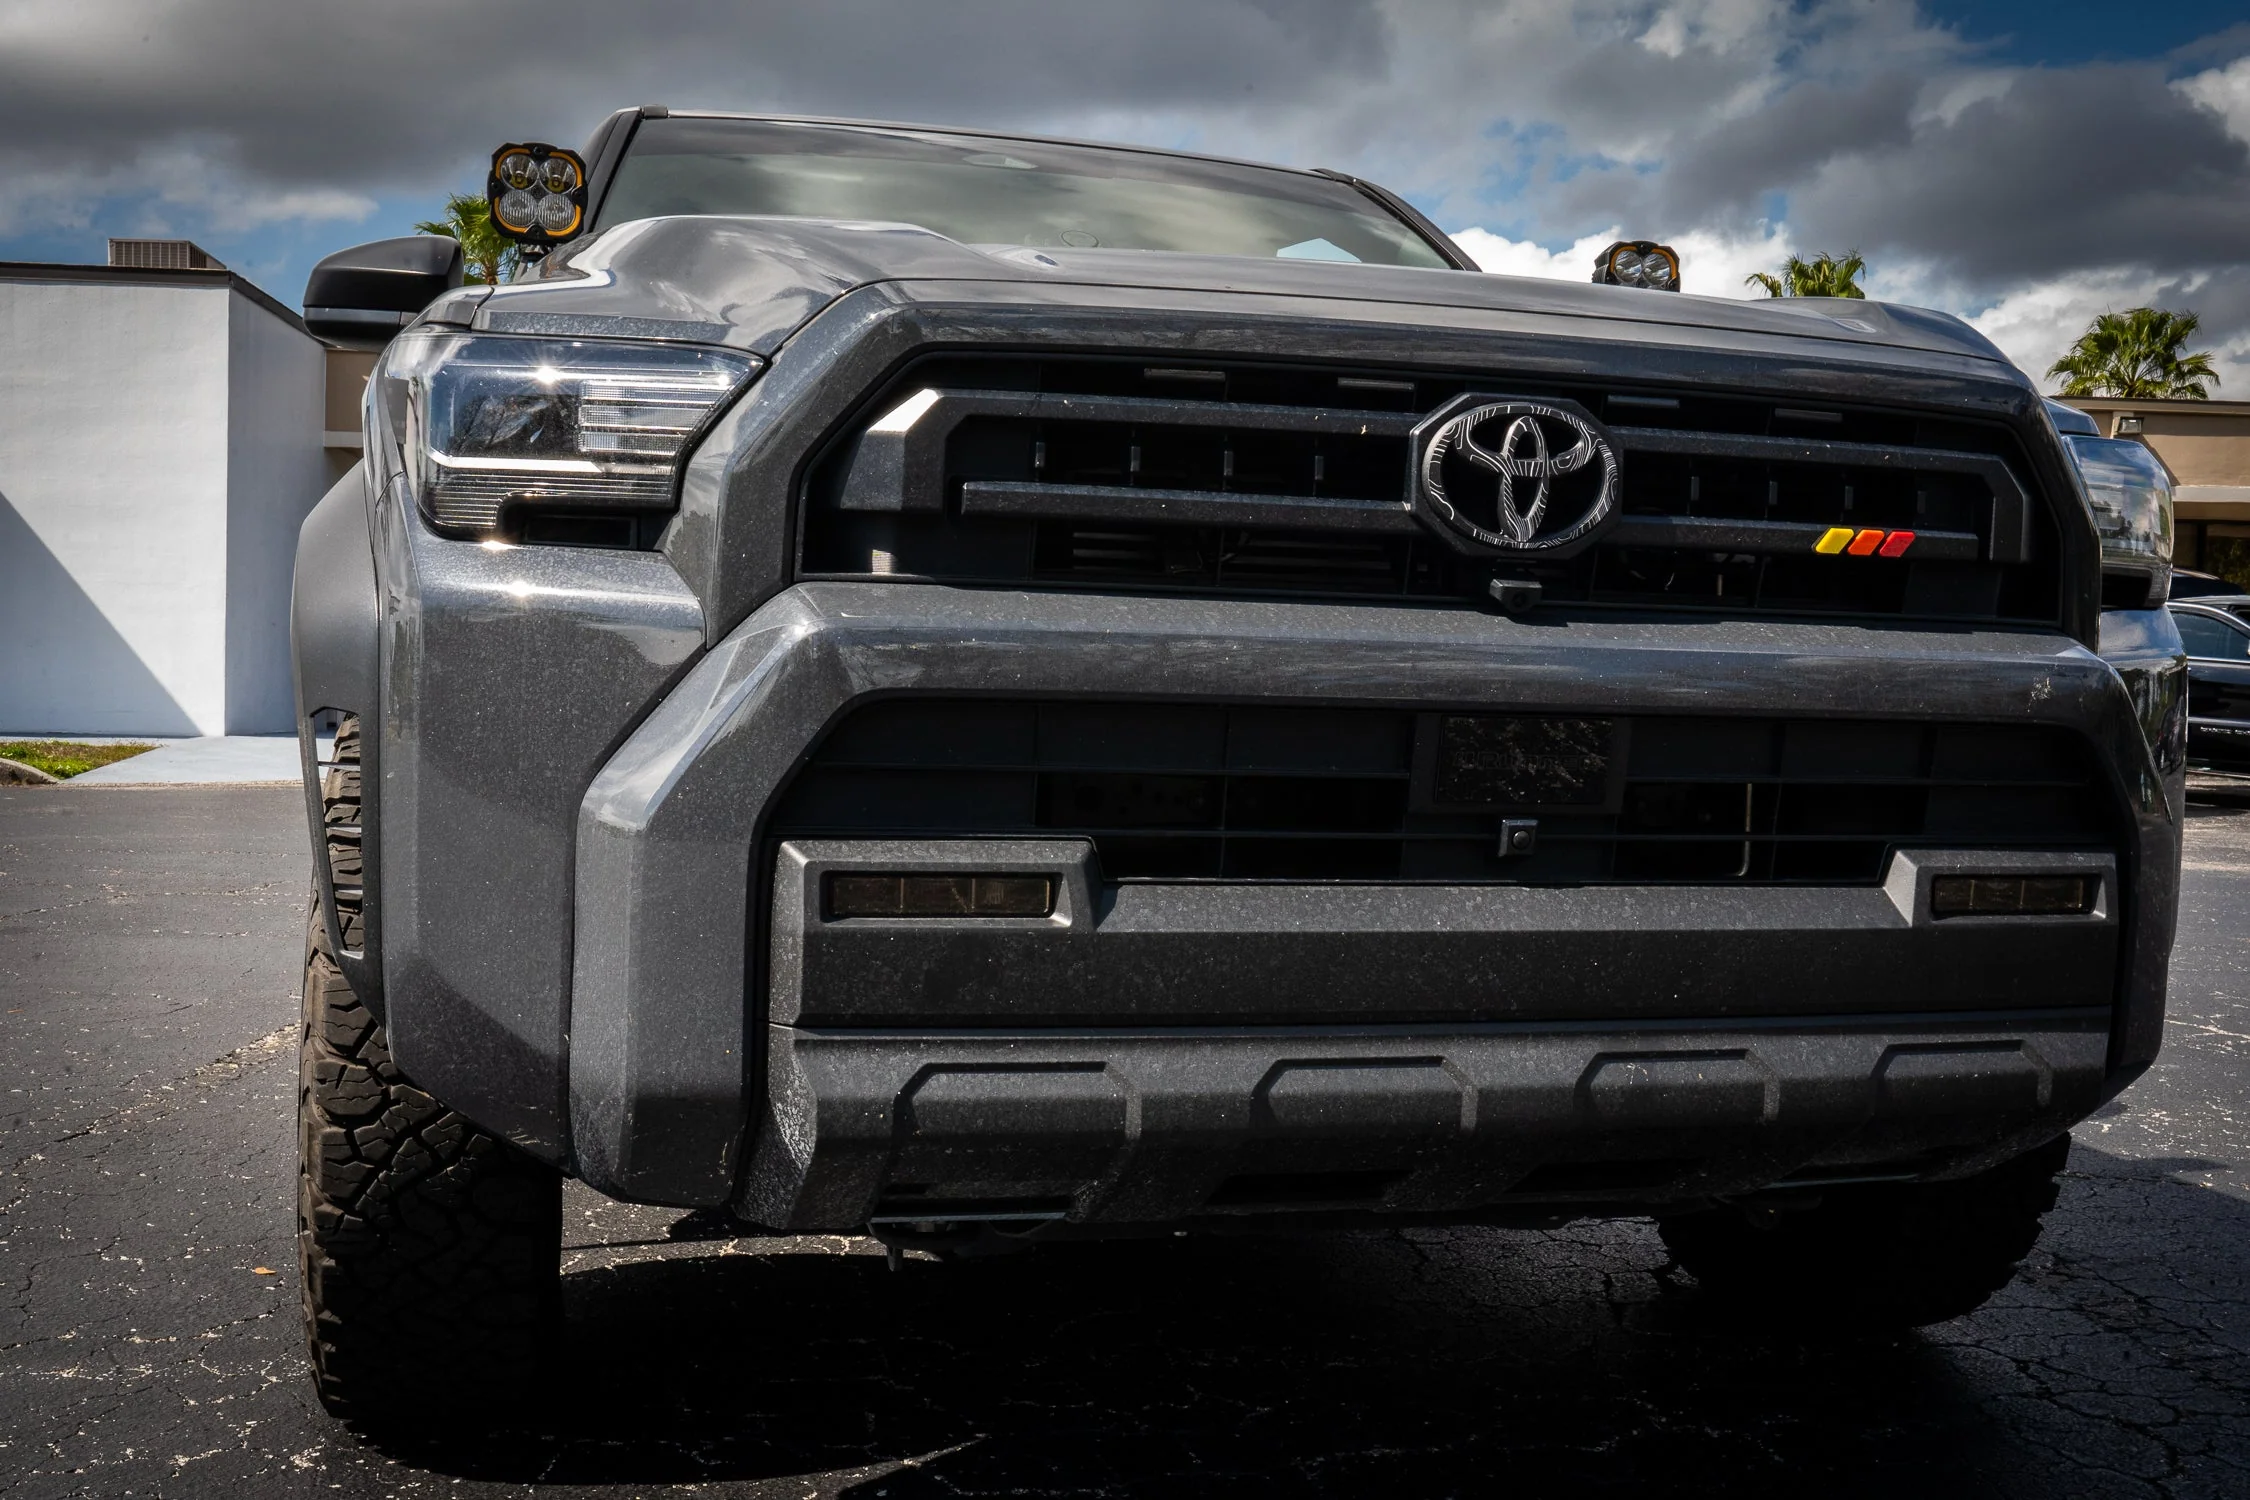
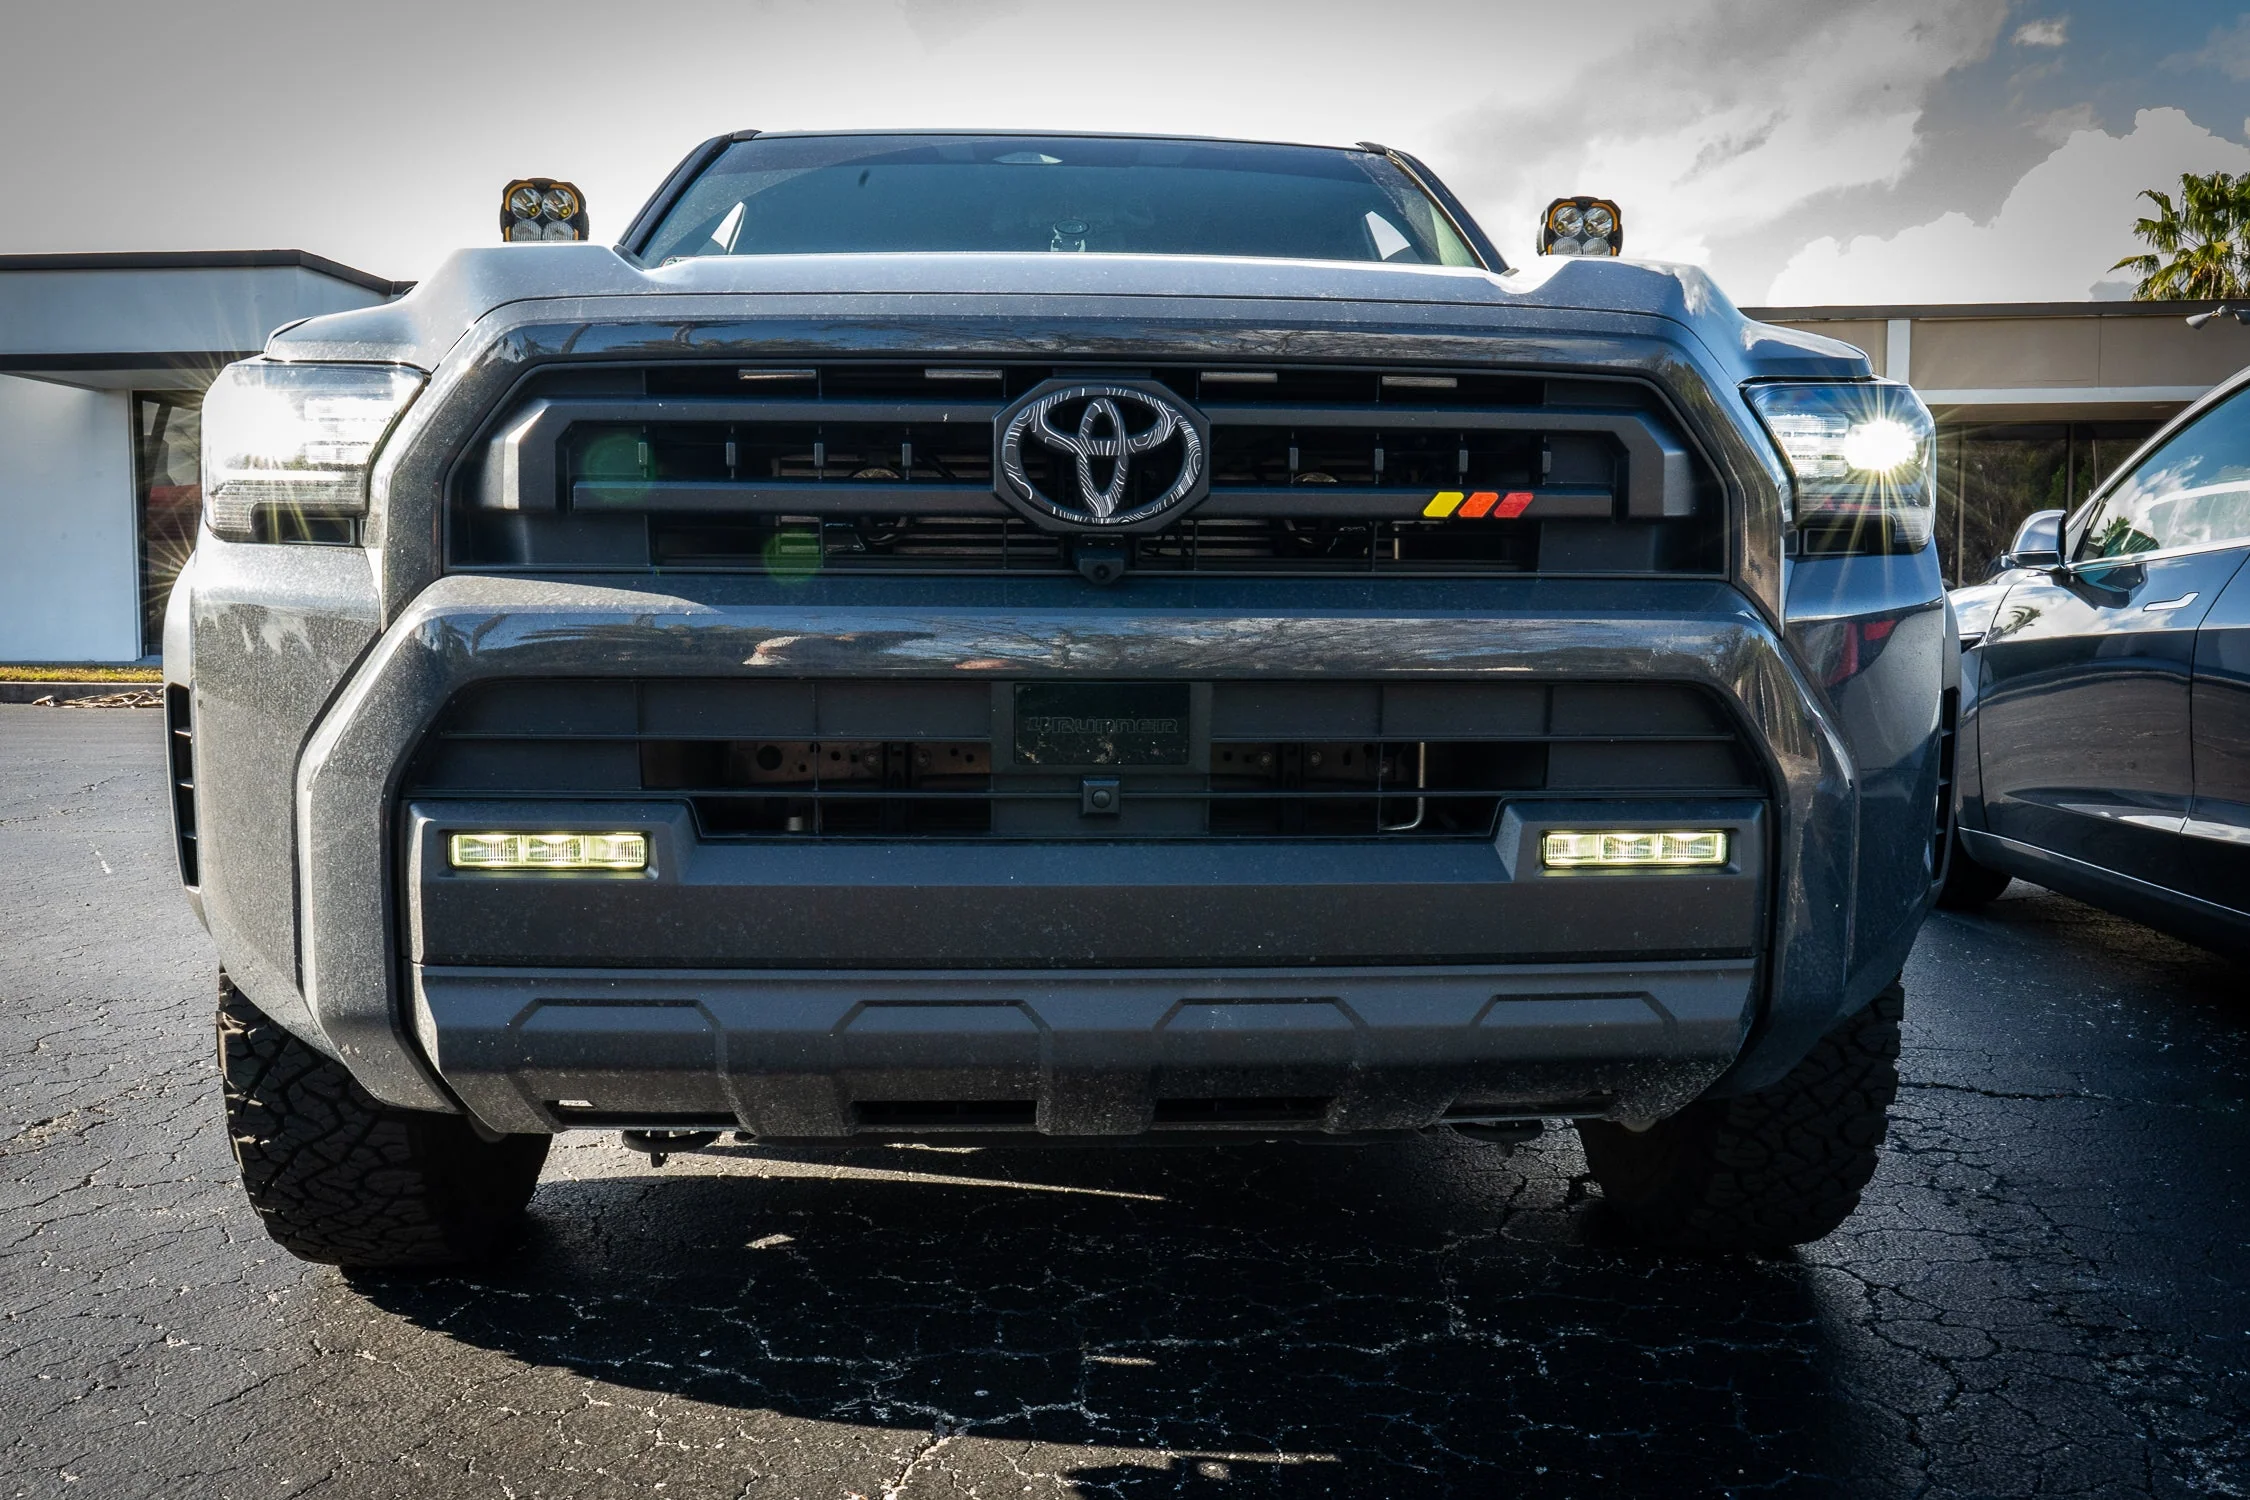
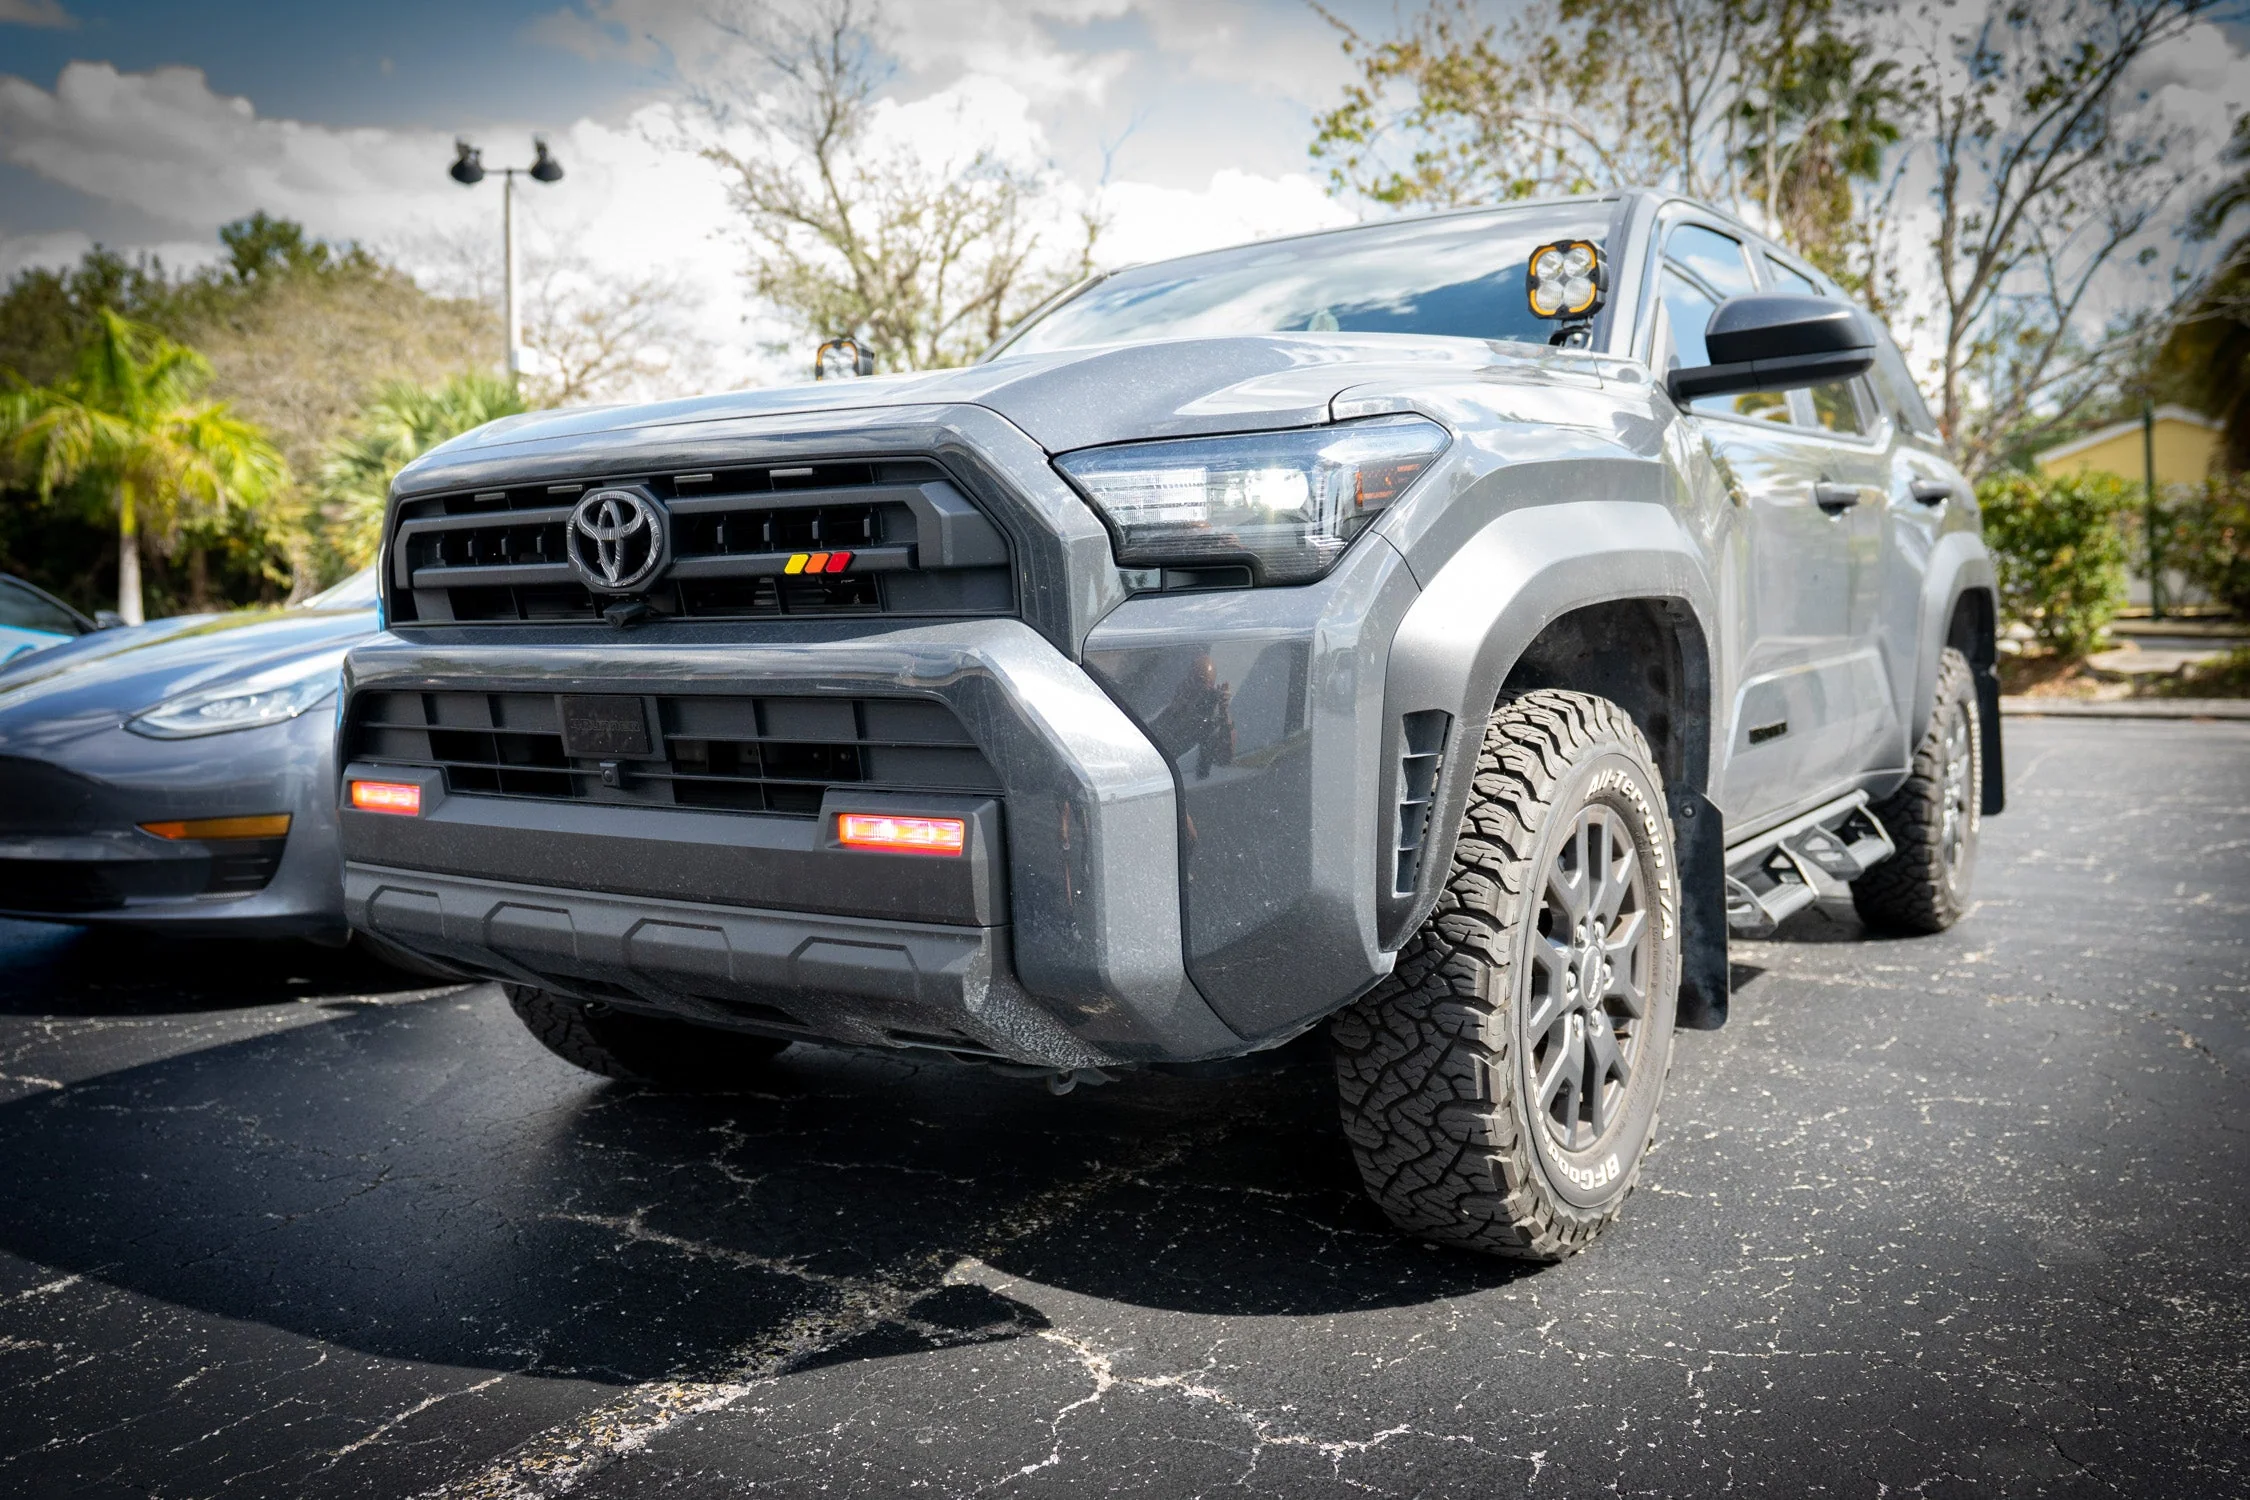
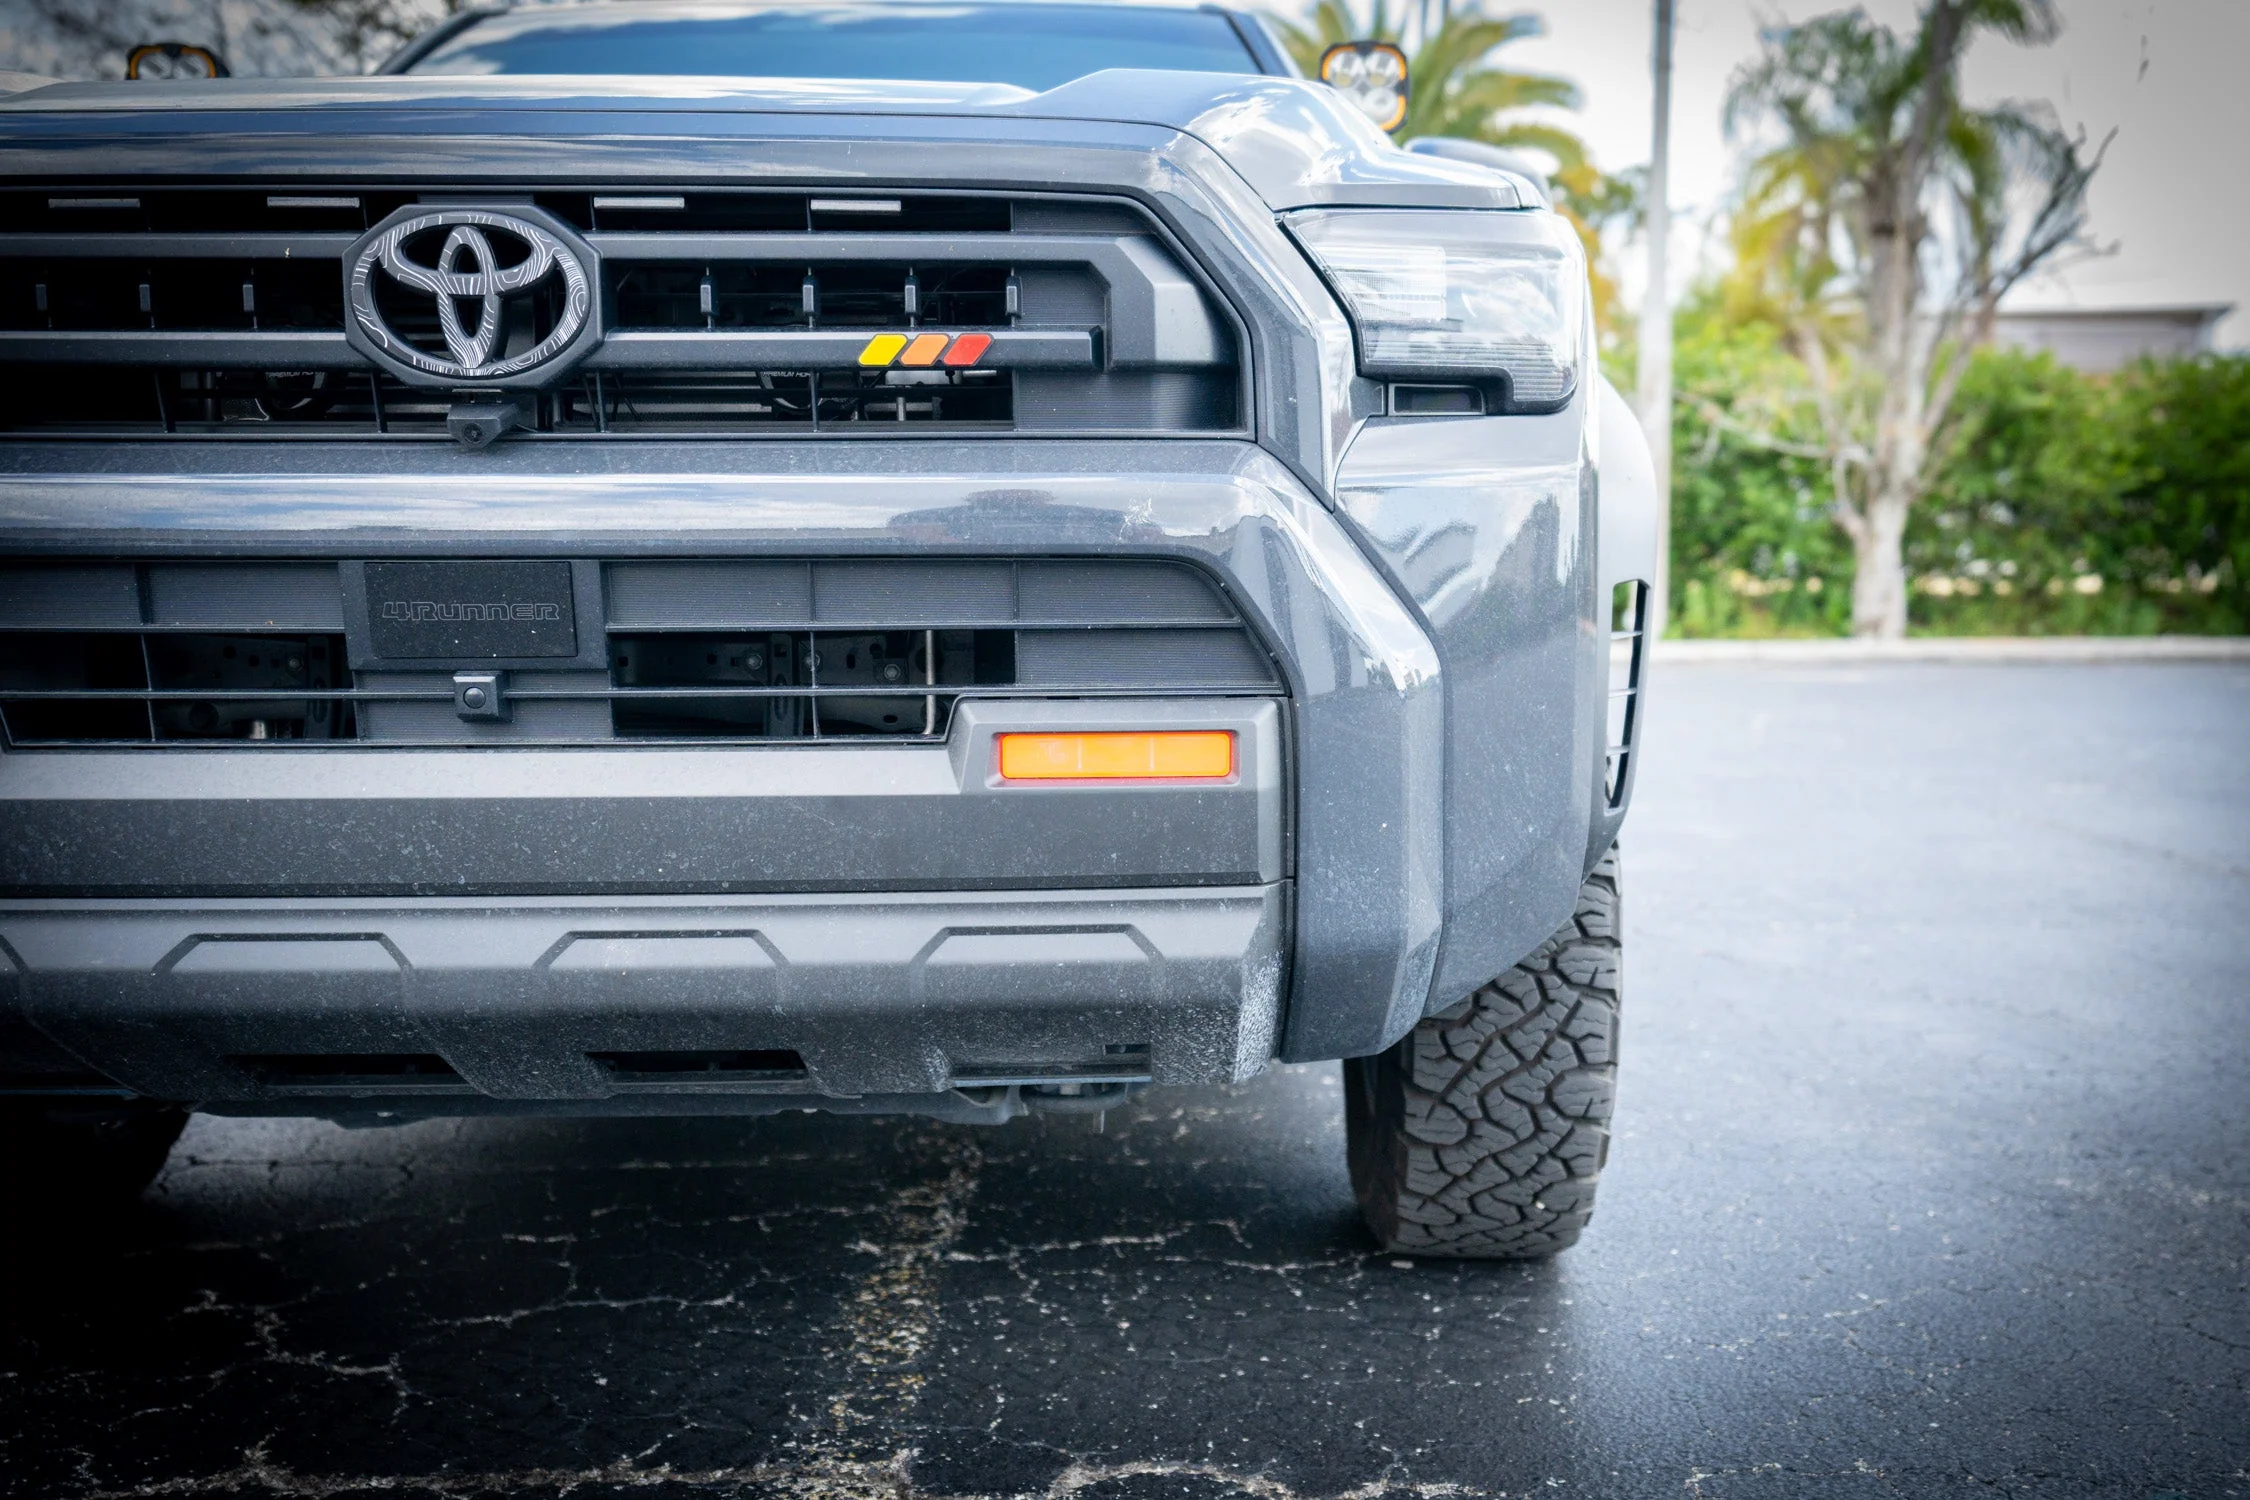
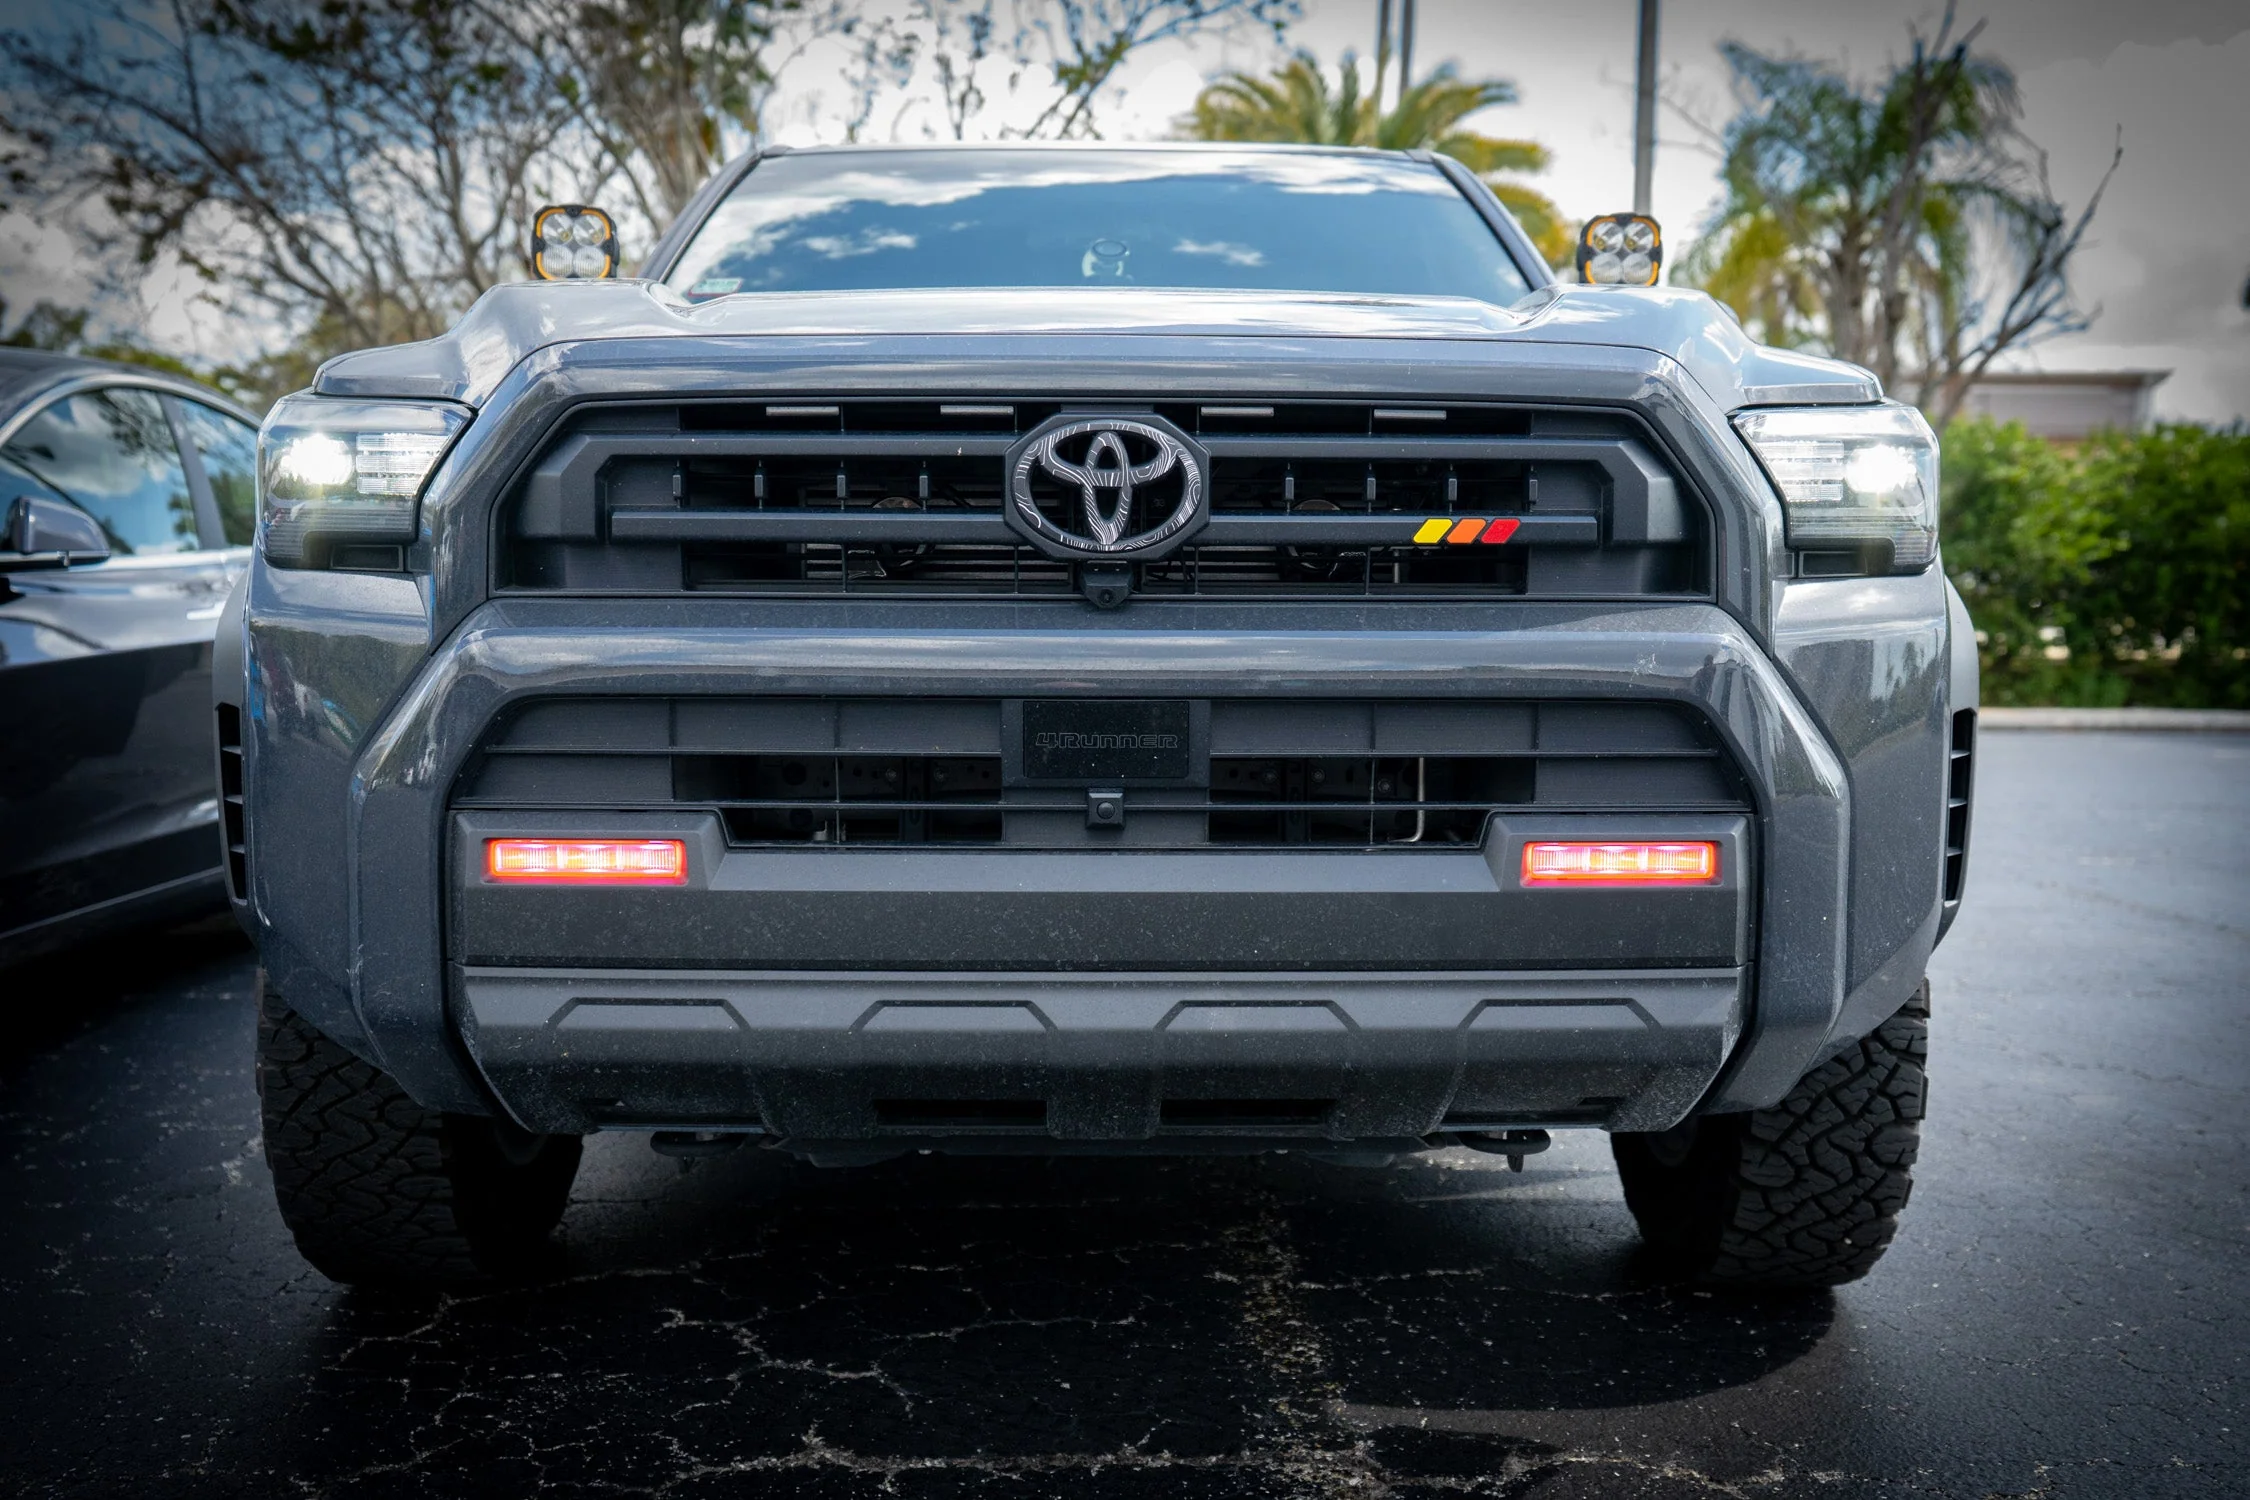
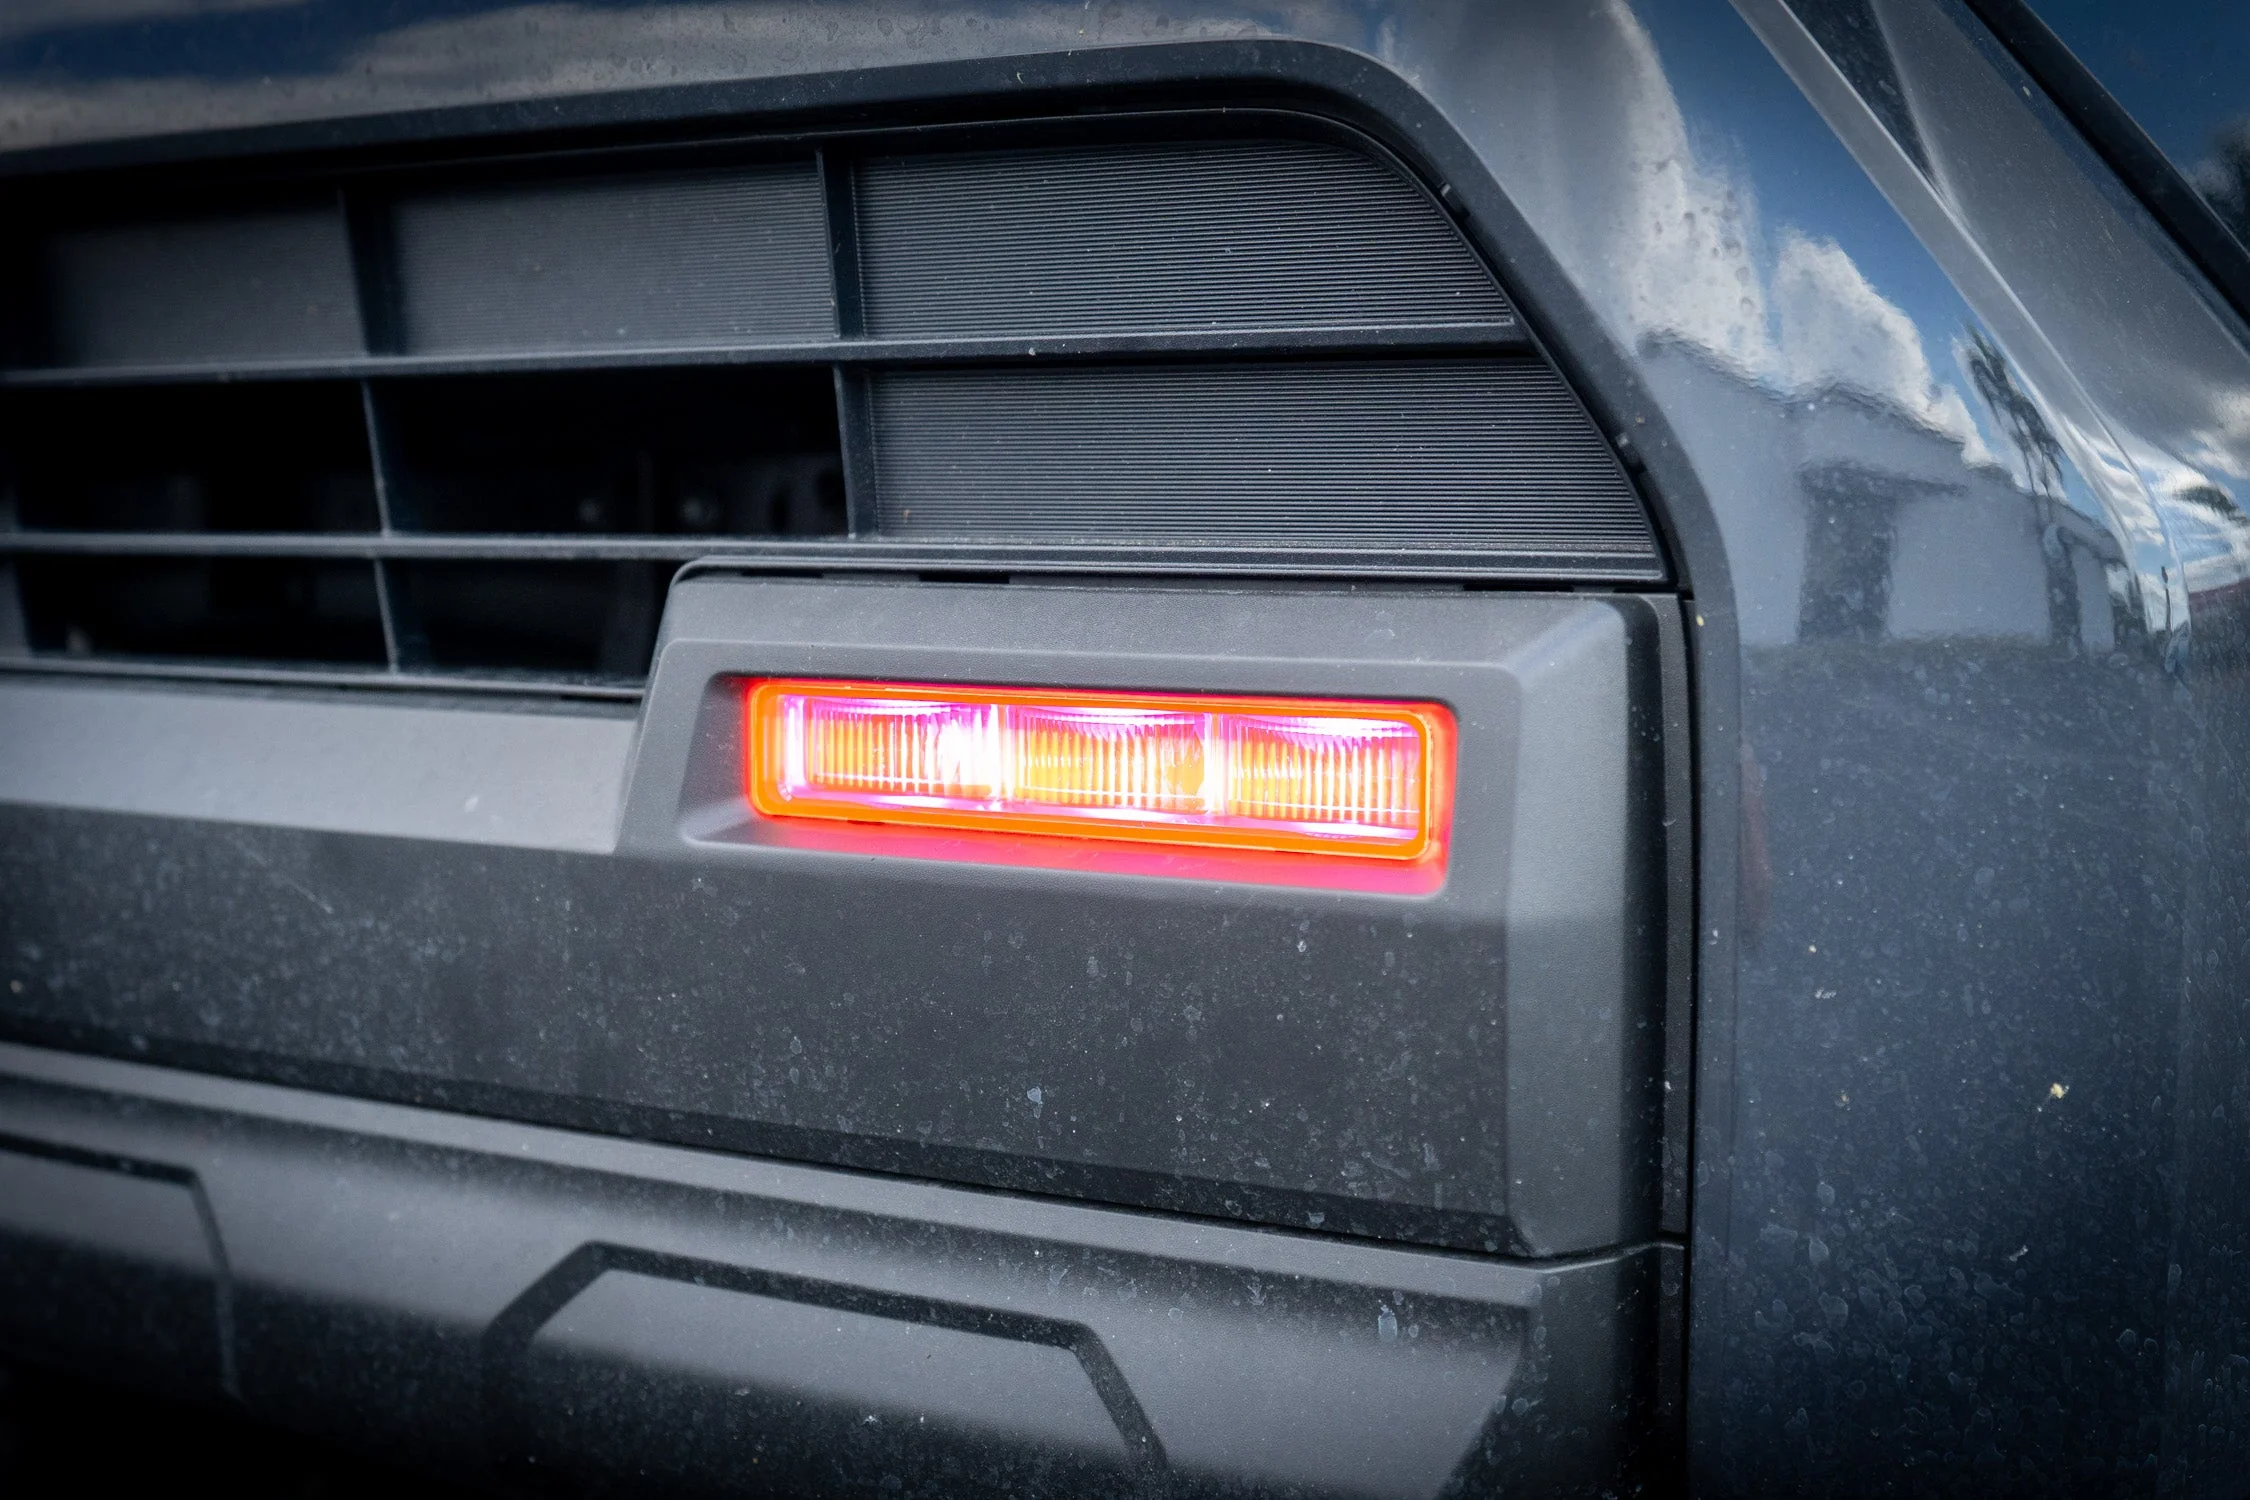
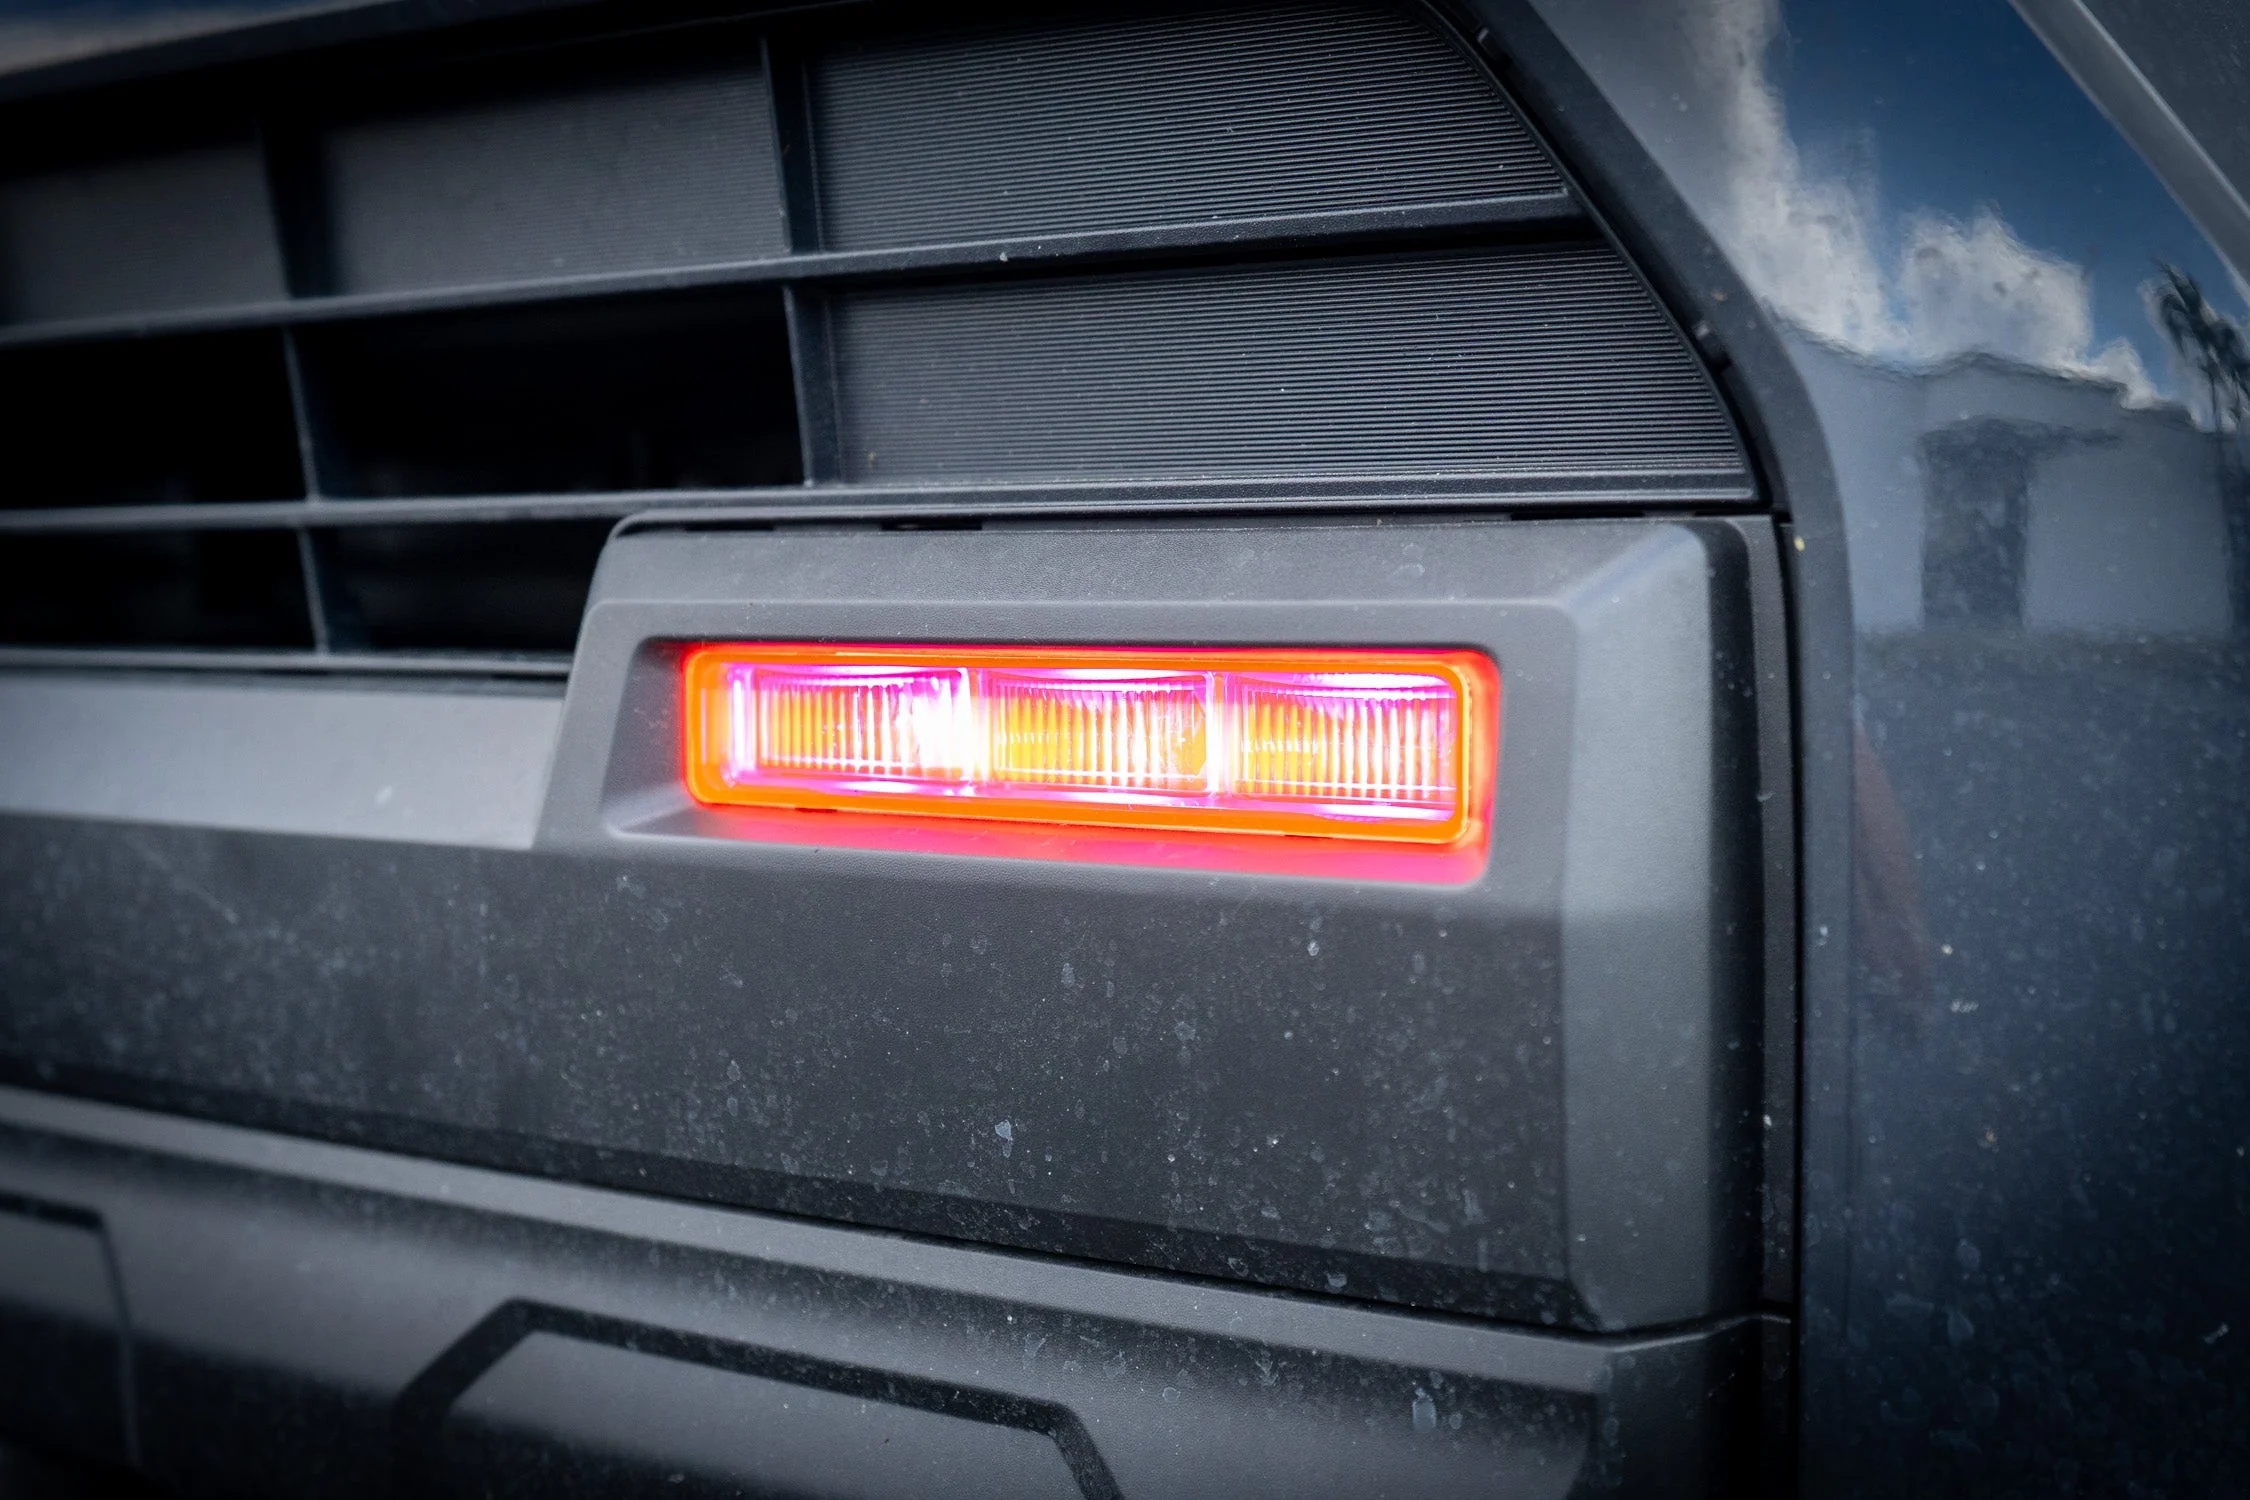
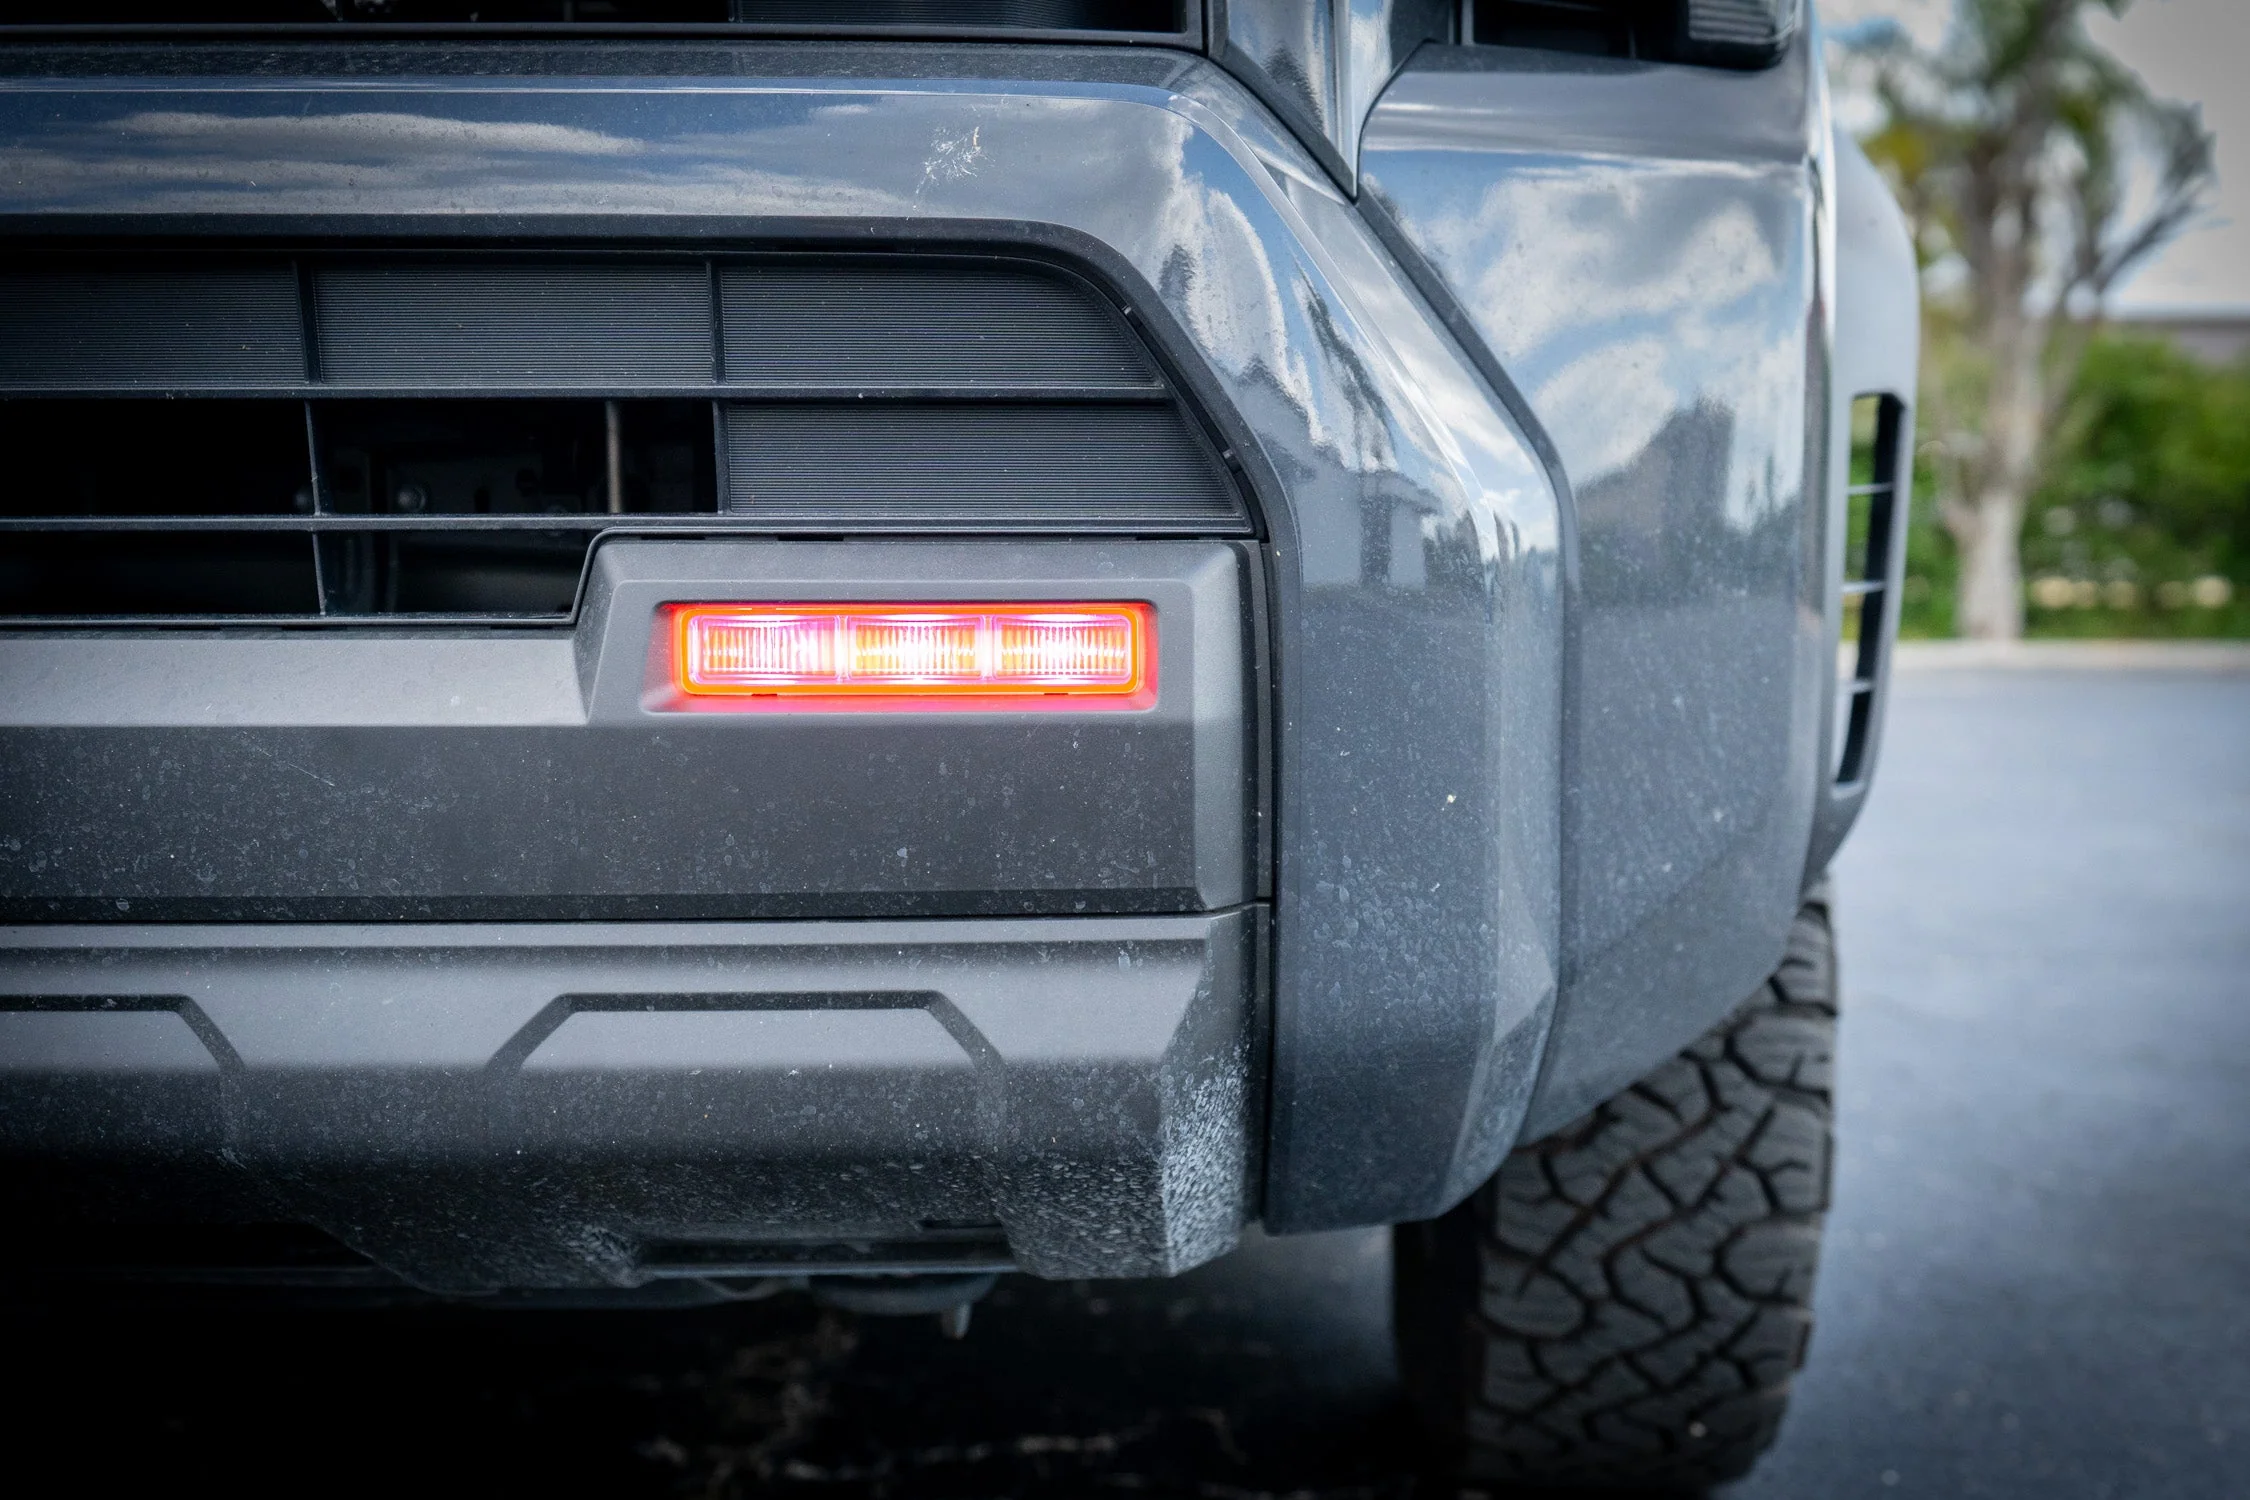
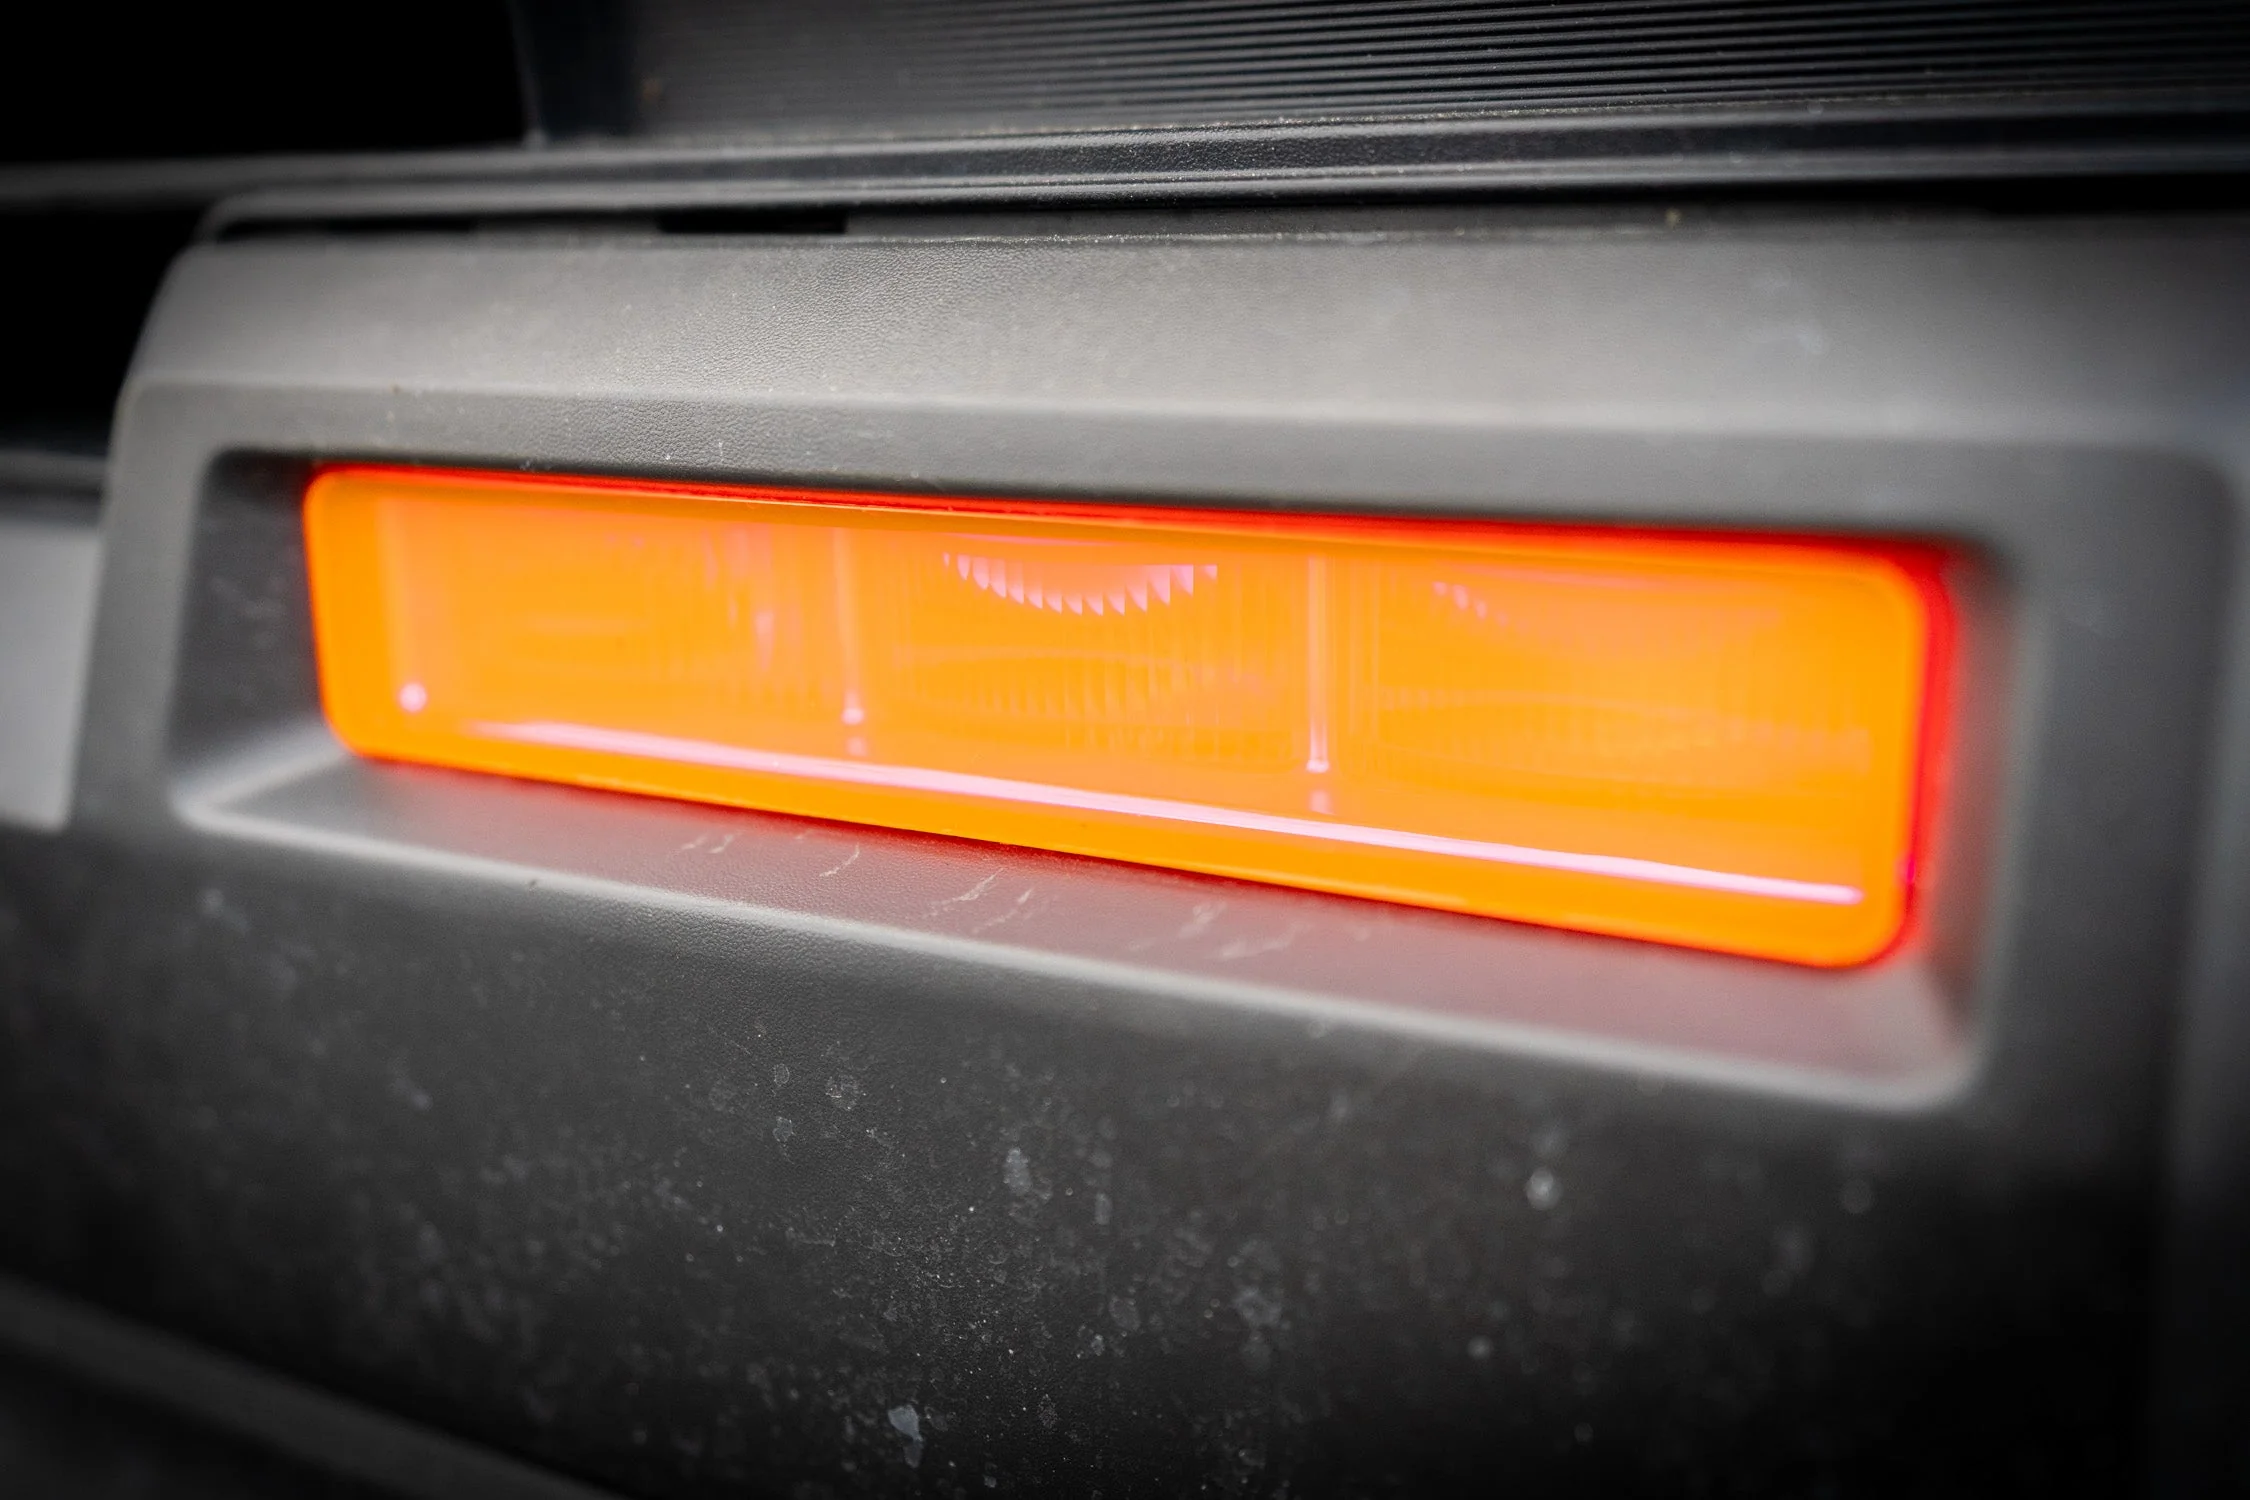
Introducing the StickerFab Fog Light Overlays for Tacoma (2024-2026). Upgrade the front end of your 2024+ Toyota Tacoma with premium fog light overlays designed specifically for the new 4th generation Tacoma. These overlays install directly over the factory fog lights to create a bold amber or yellow tint that enhances both styling and visibility in dust, rain, and fog.
These 2024 Tacoma fog light overlays are precision cut for a clean fit and install easily using automotive-grade adhesive. Whether you're customizing your SUV’s appearance or adding the popular amber fog light look, this simple upgrade transforms the front lighting in minutes.
Fog light tint overlays are one of the most popular exterior upgrades for the 4th gen Toyota Tacoma, giving owners an easy way to personalize their vehicle while maintaining a factory-style appearance.
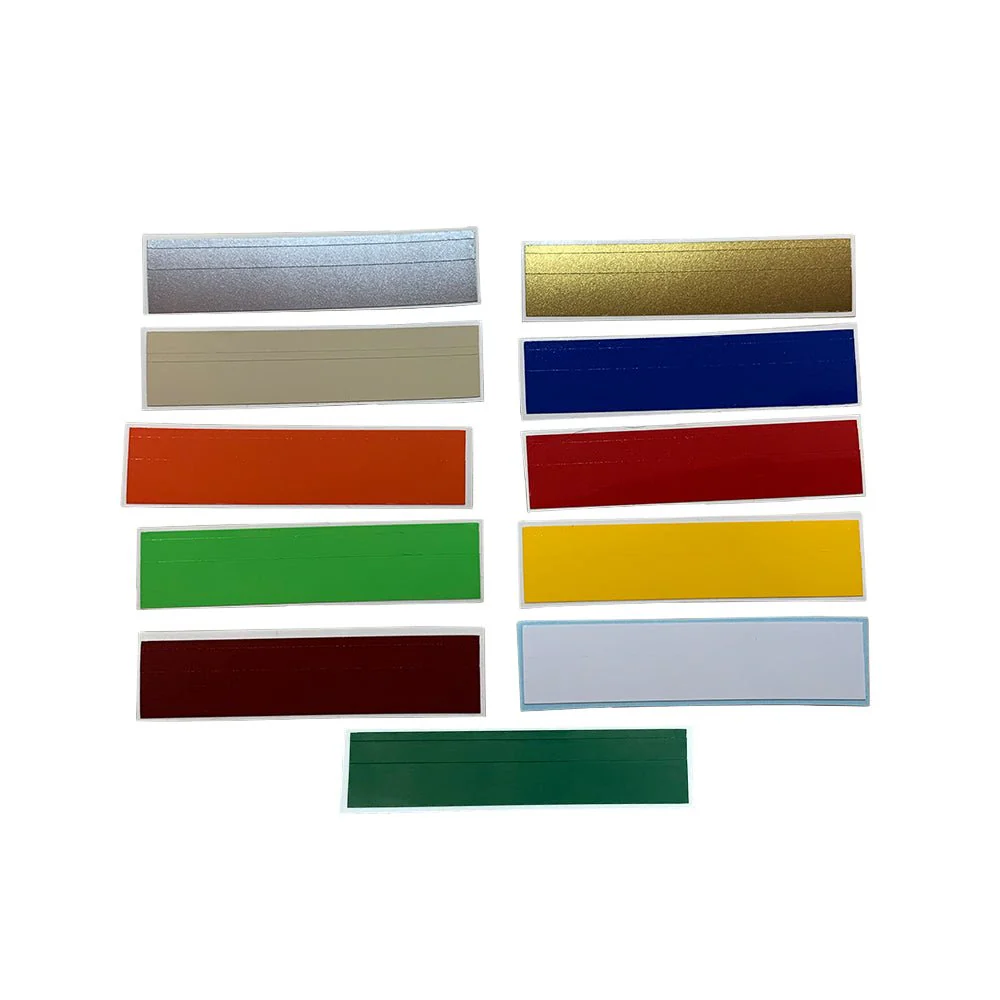
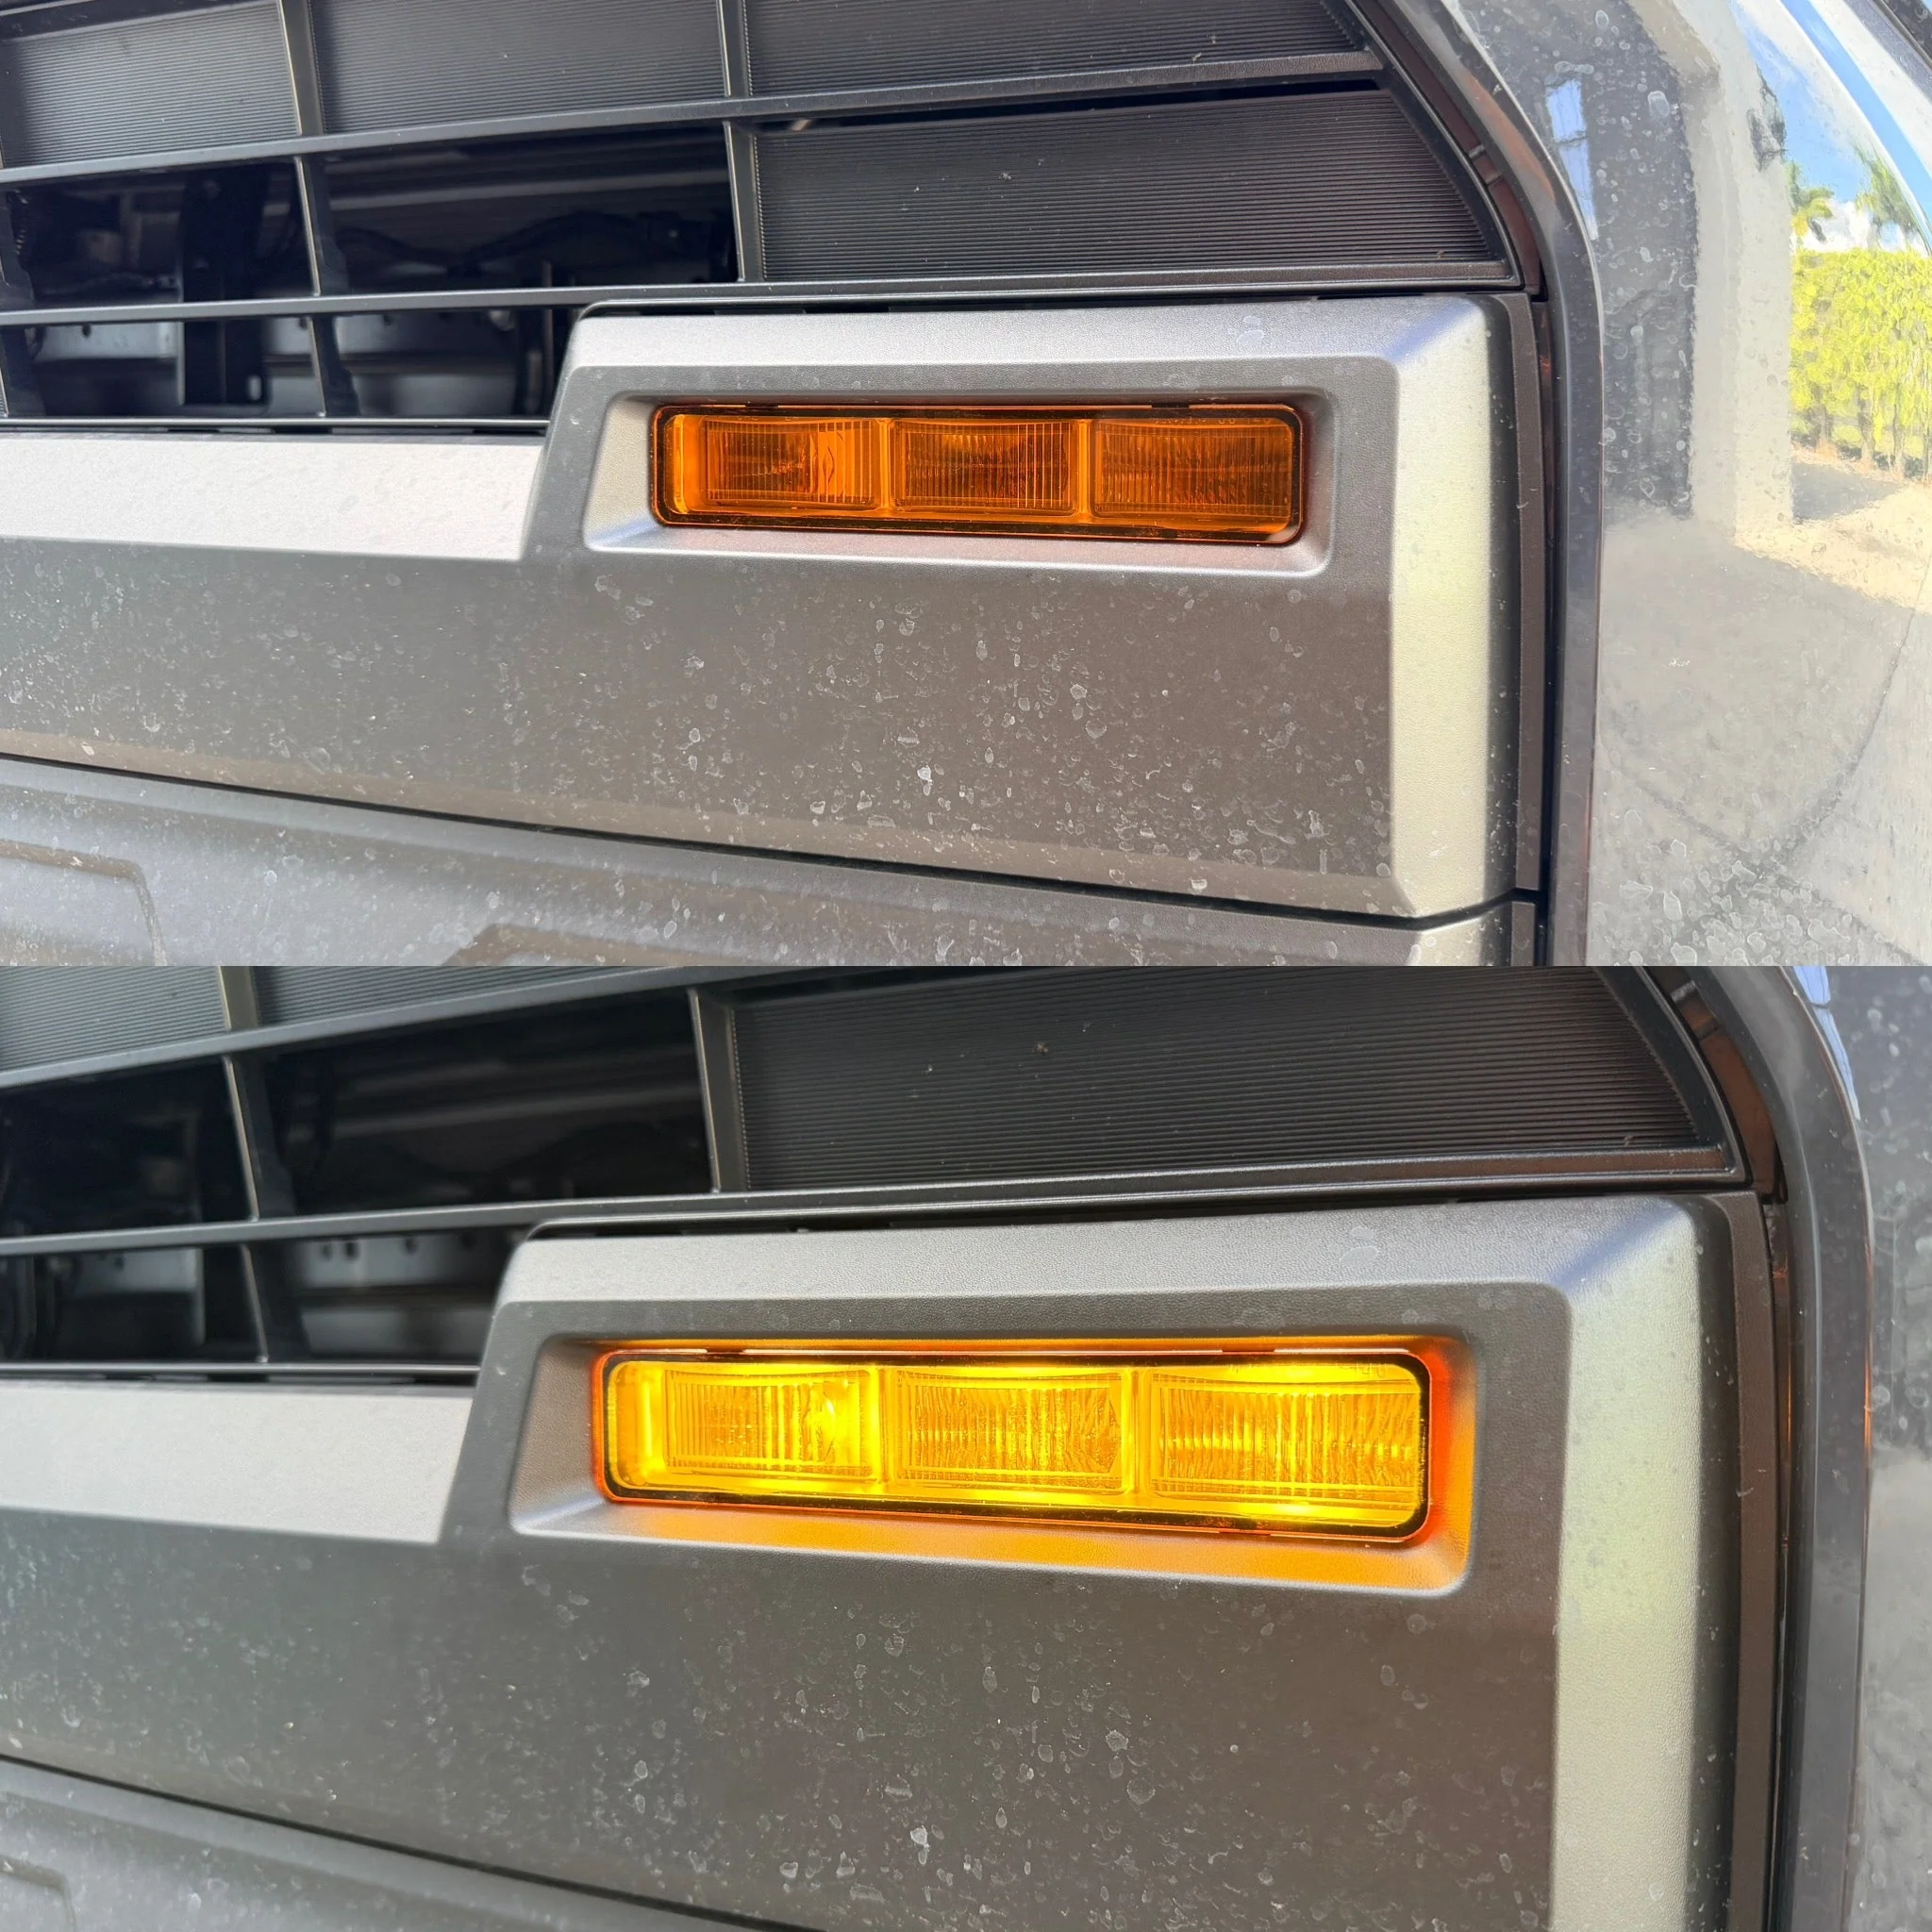
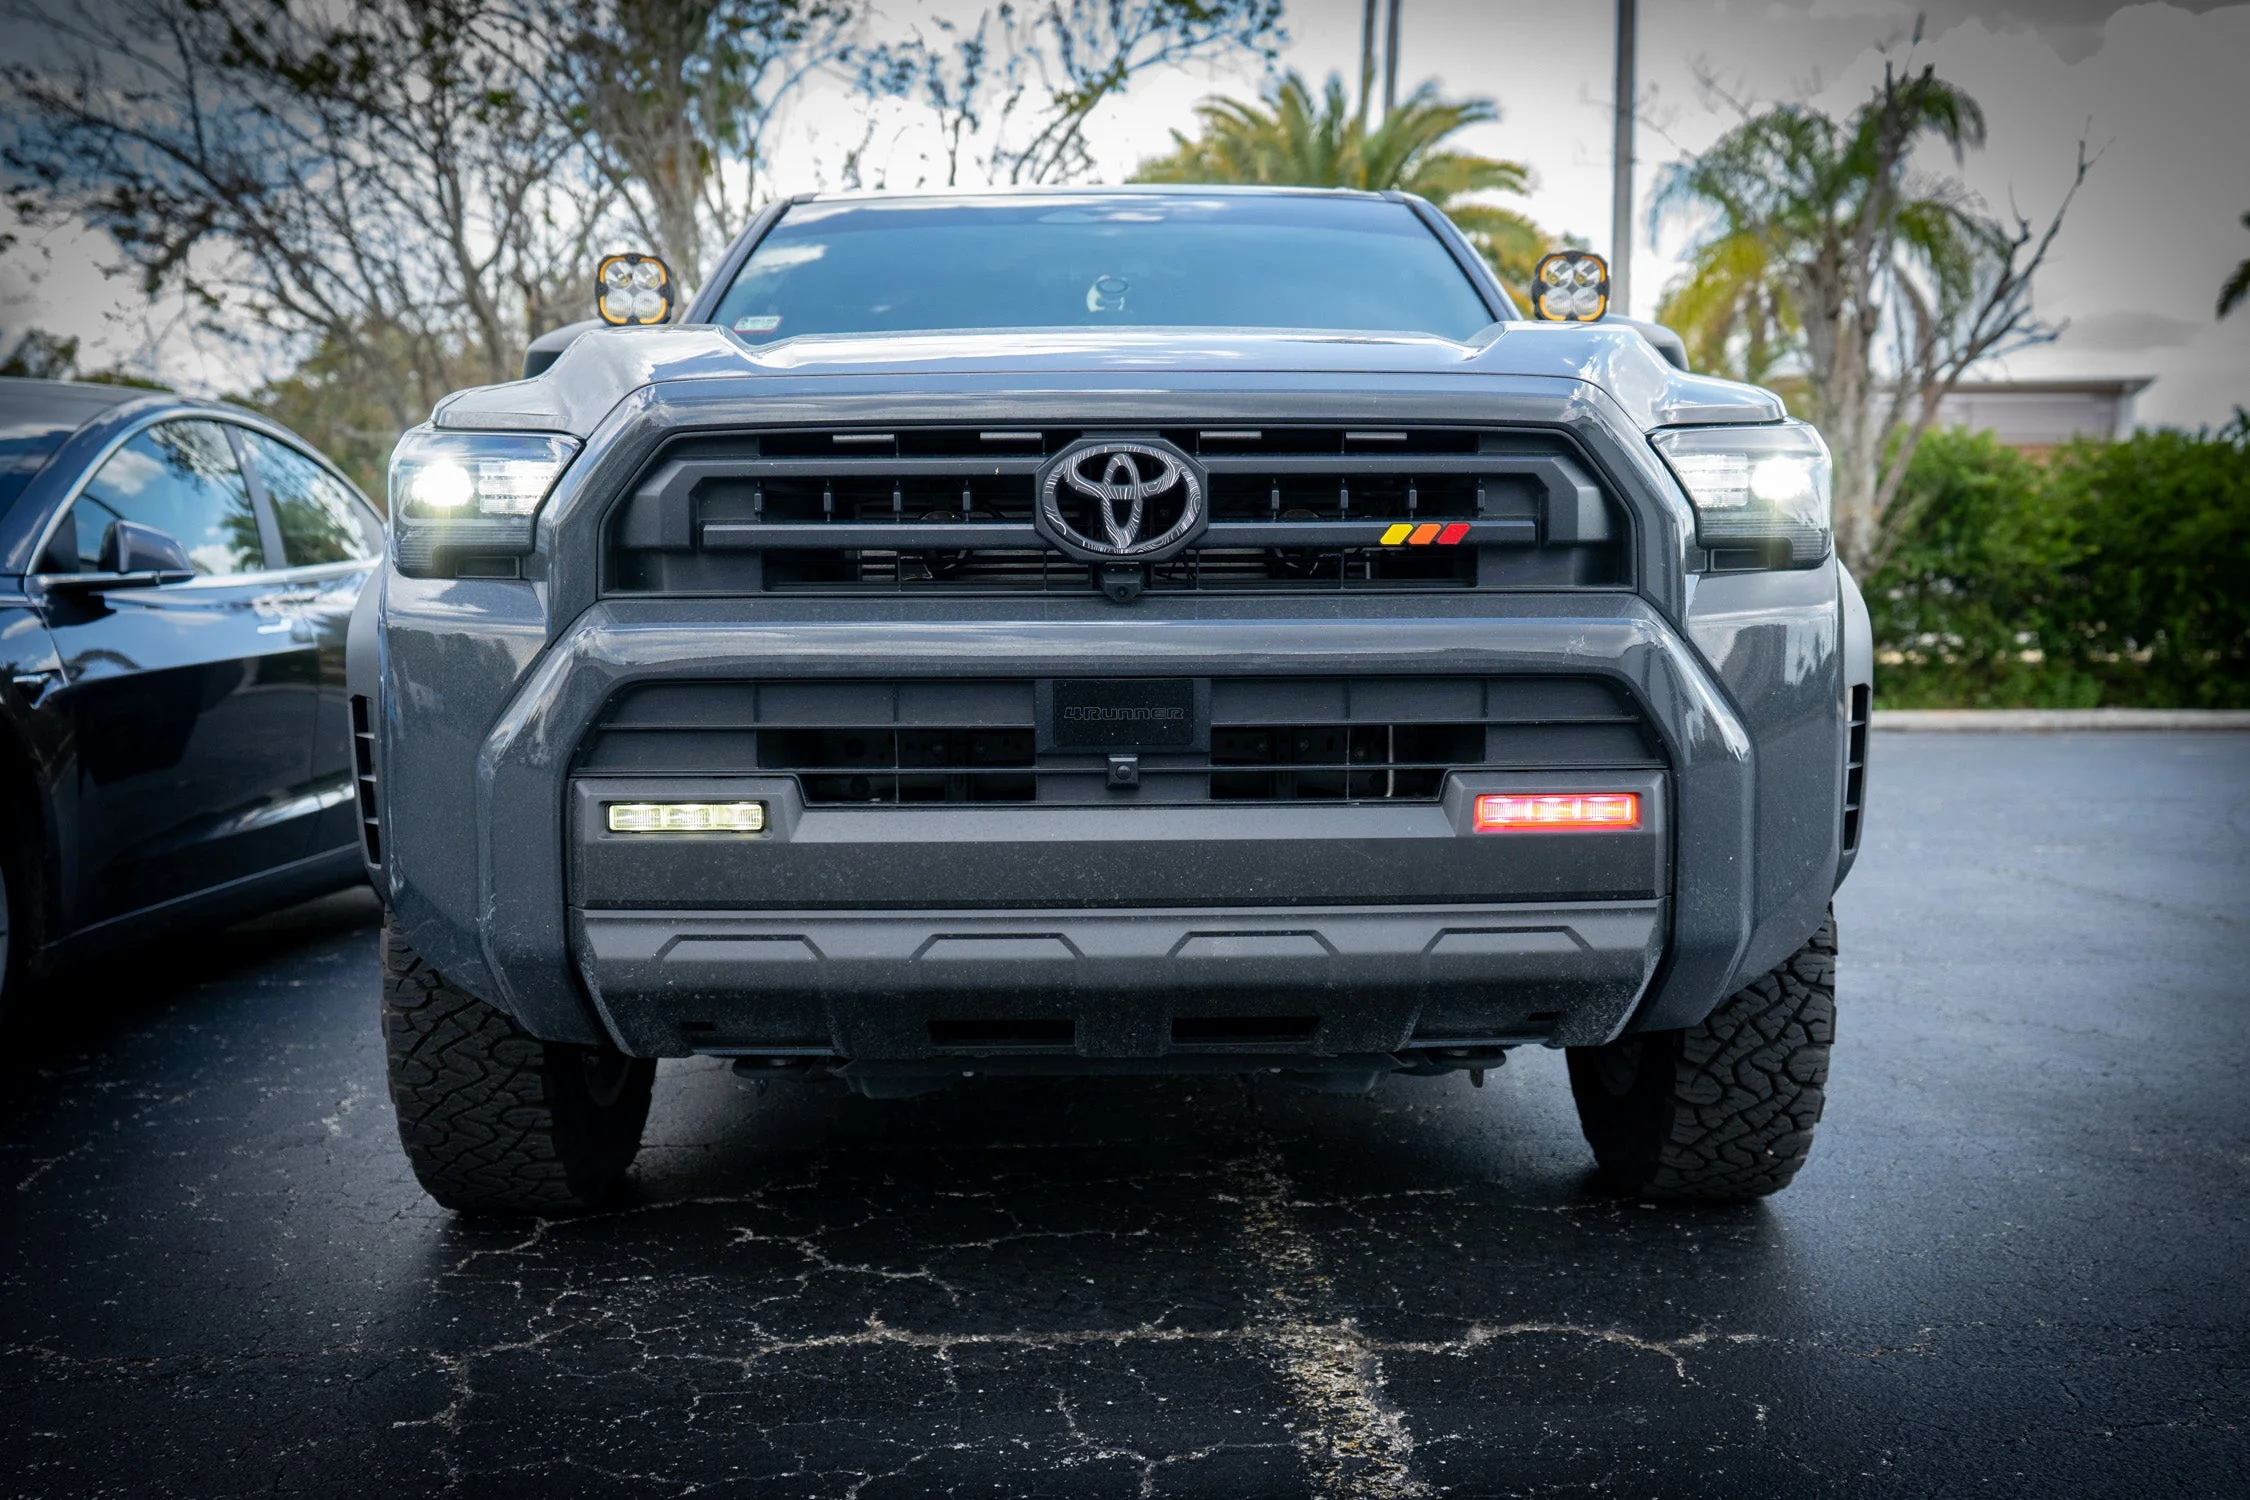
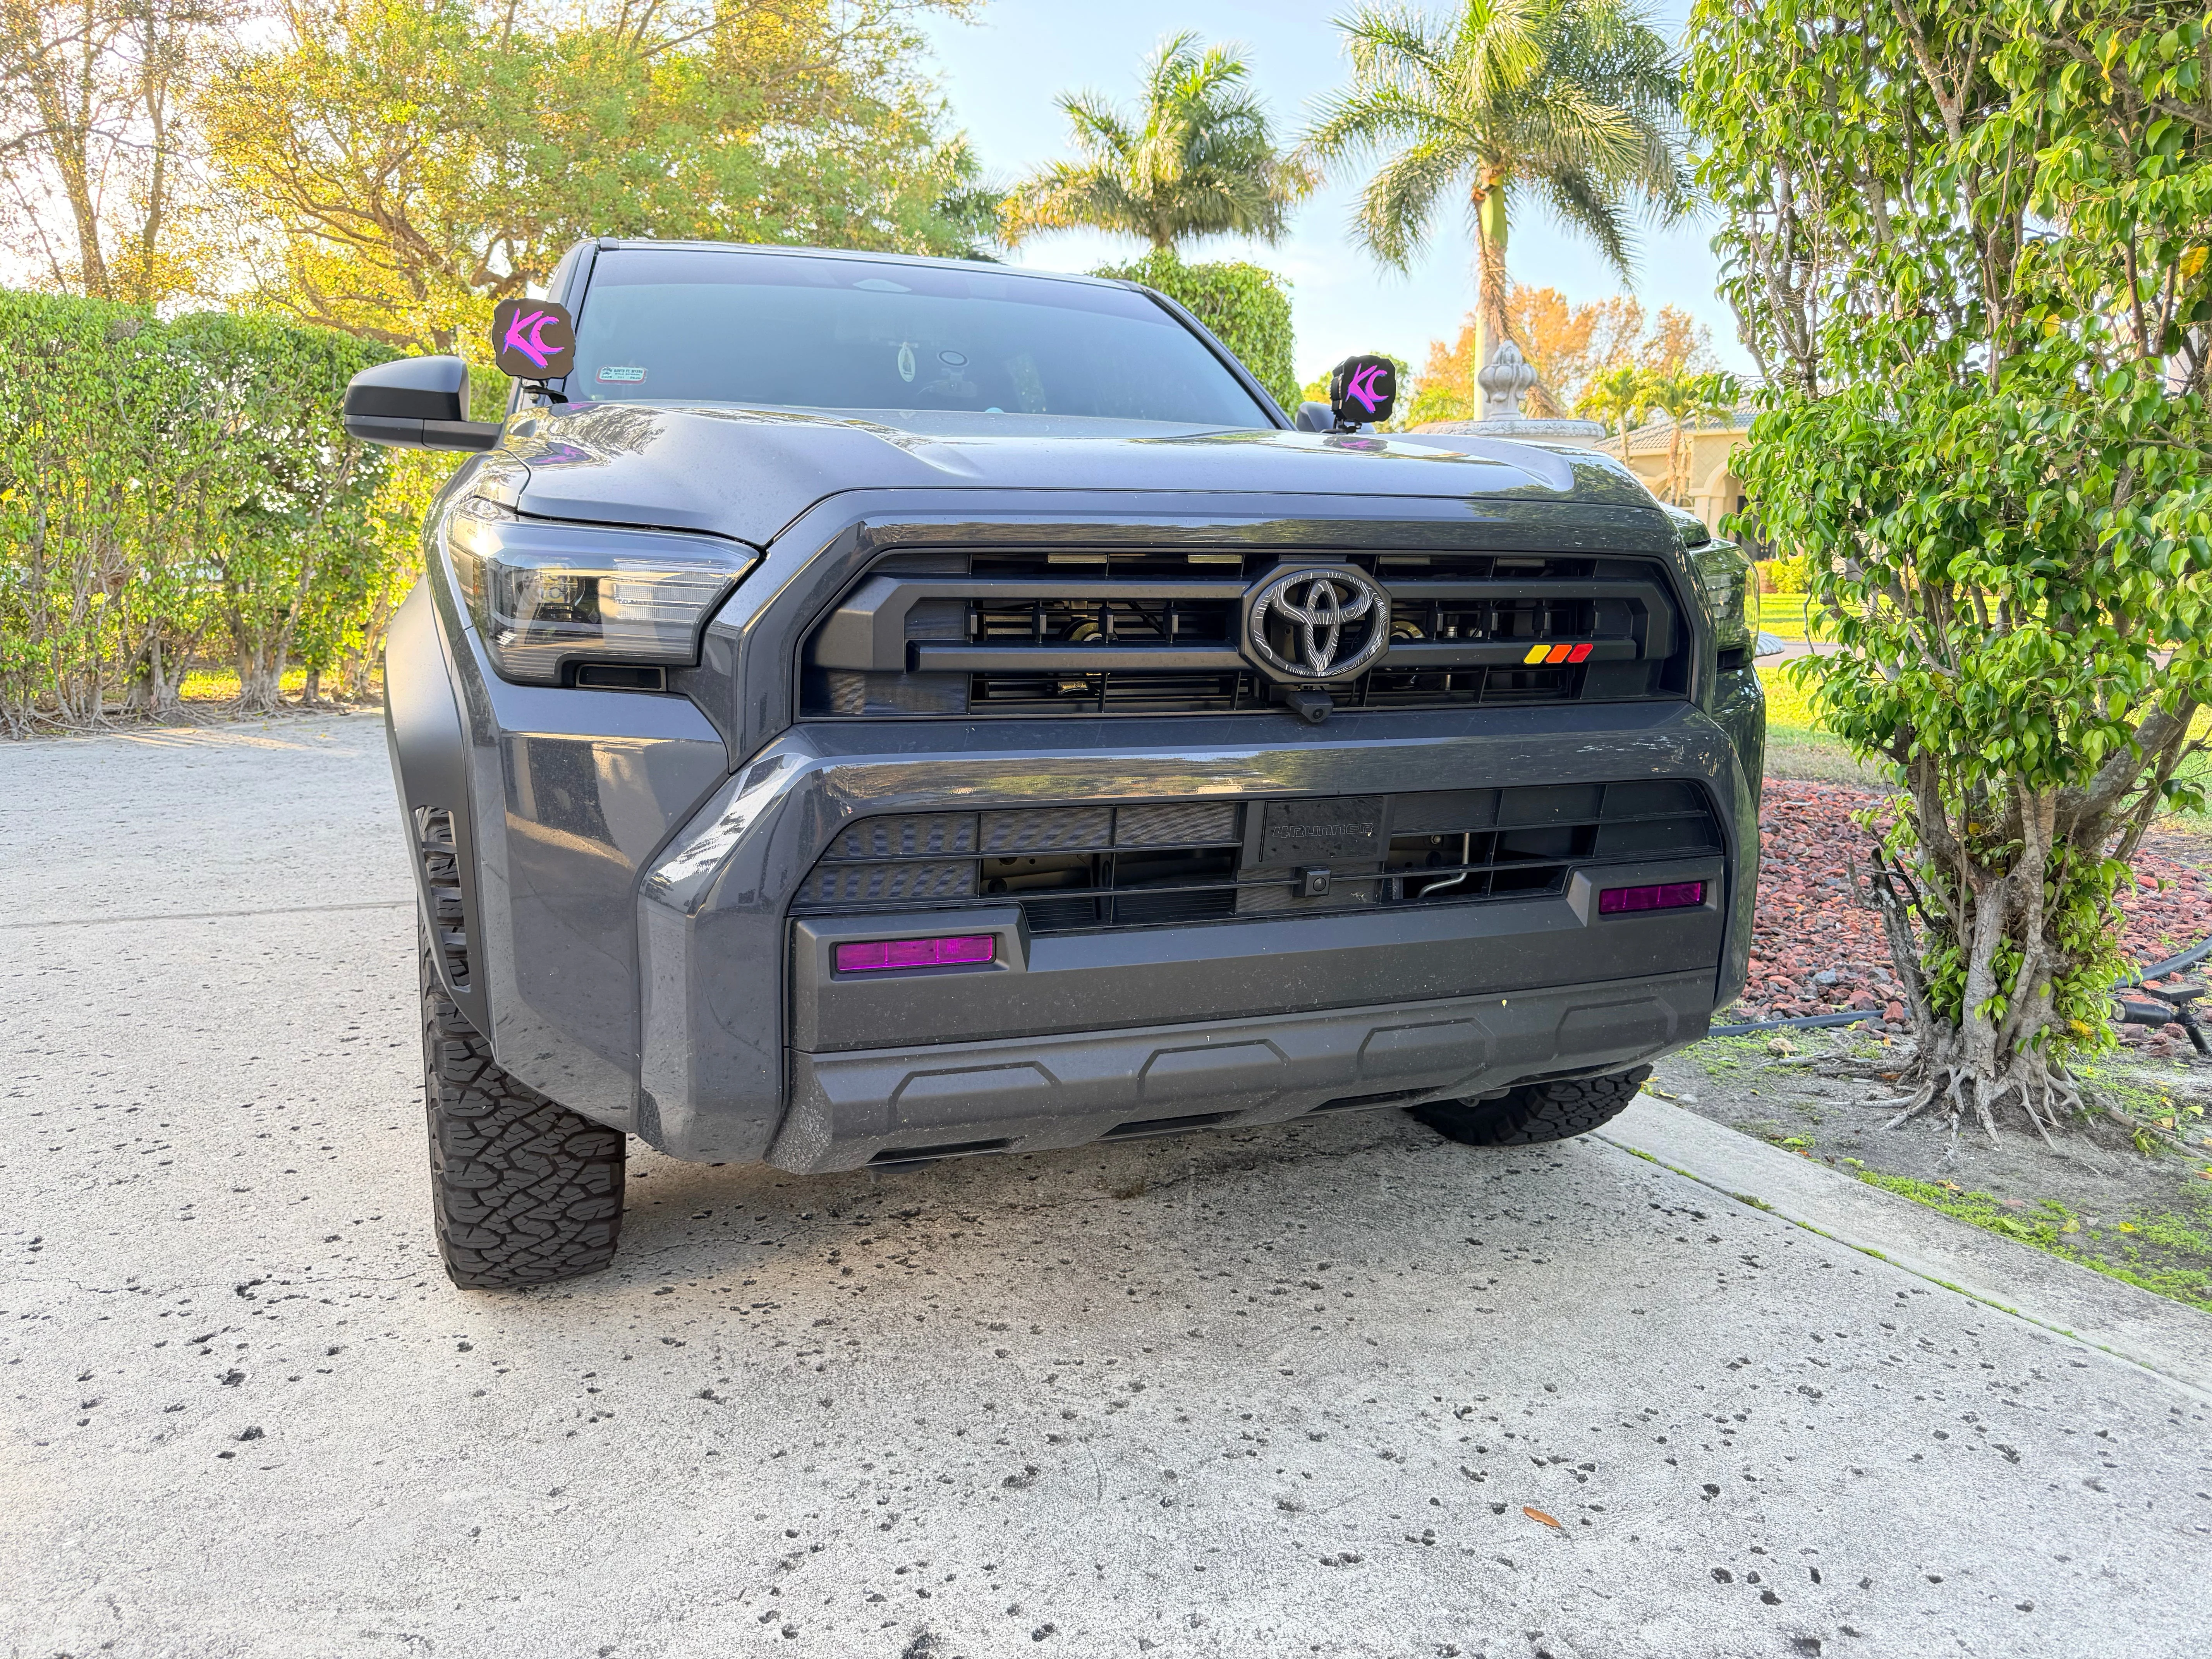
Check out all the photos including the comparison ones. Sold as a pair (extra set included for vinyl). For the most amber like color output, choose deep amber. The tradeoff with deep amber is a lower light output.
Features
- Easy to apply
- Changes light output color and daytime appearance
- Sold as a pair (extra set included for vinyl)
- NEW: Acrylic version 2 snaps in
- NOTE: Not compatible without modification for RIGID lamps (Pro / Trailhunter)
NOTE: Fitment is the same between the 2024+ Tacoma and 4Runner. This has been verified by us. Not compatible with RIGID lamps (Pro / Trailhunter). Compatible with stock 4Runner SR5, TRD Sport, TRD Sport Premium, TRD Off-Road, TRD Off-Road Premium, and Limited. For Tacoma models, SR / SR5 (if equipped with factory fogs. Also TRD PreRunner, TRD Sport, TRD Off-Road, and Limited.
NEW: Version 2 clips in and has replaced the original adhesive equipped version.
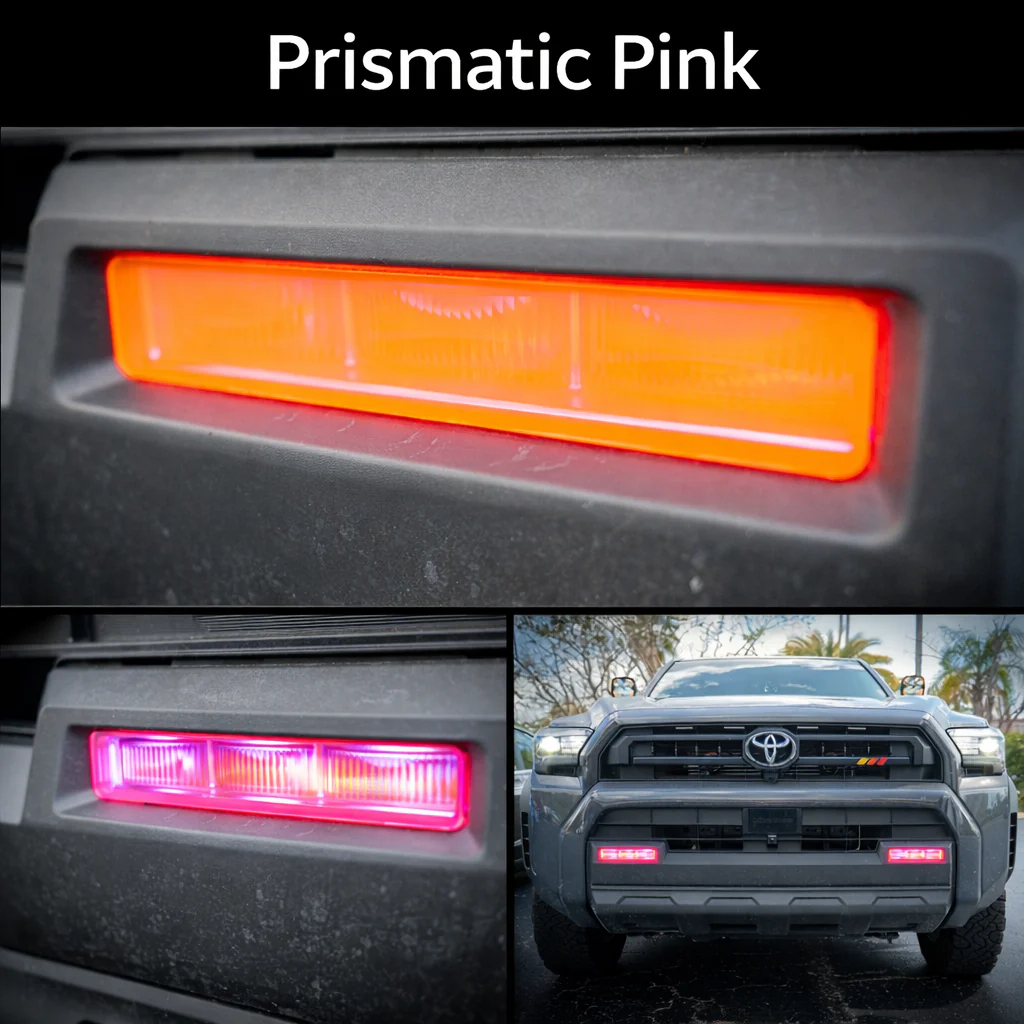
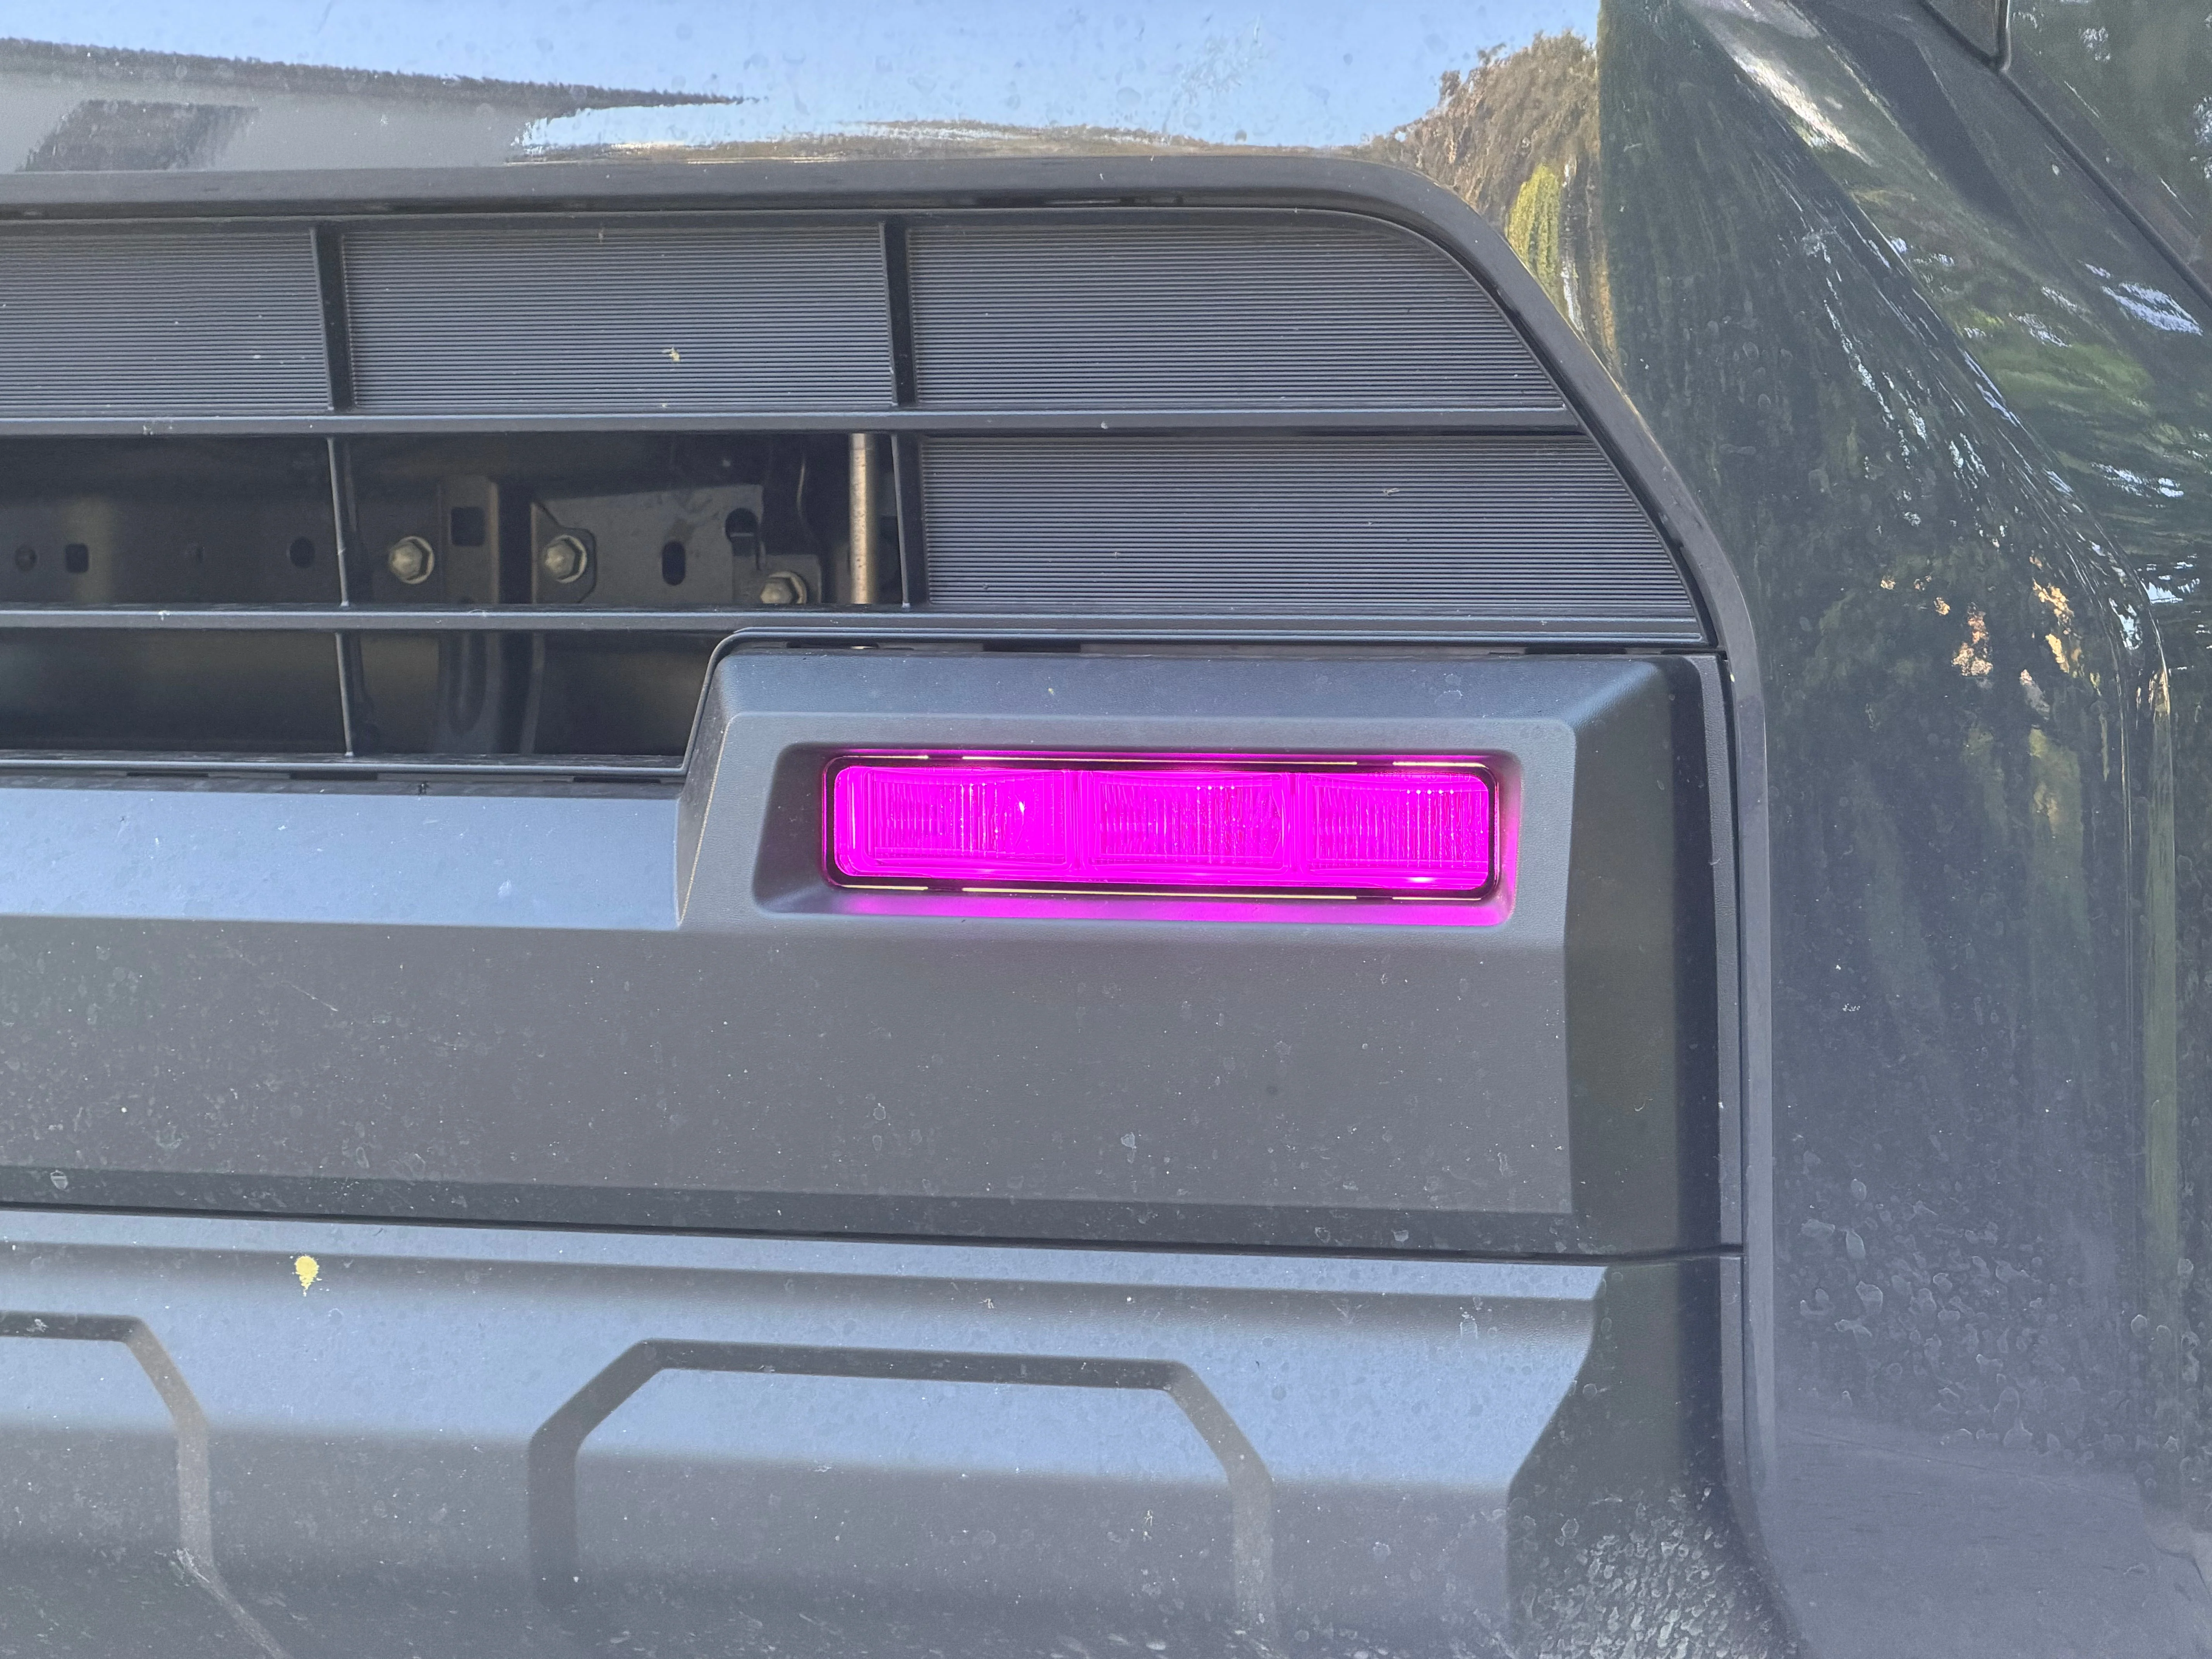
NEW: Smoked version 2 creates a stealthy look during the day and still works well at night. Prismatic pink version 2 gives the illusion of being amber / orange during the day and pink at night.
Instructions
Clean the application area to prepare it for installation. Just use a wax free detailing spray. Recommended temperature is 70 degrees or more.
Acrylic (replaced by V2)
Clean original lens. Test fit. Remove adhesive backing from small side strips. Align and press down firmly. Remove protective layer.
Acrylic V2
Clean original lens. Slip the bottom tabs in and then press top in, making sure all 4 tabs are behind the plastic bumper cover. You can remove this version by placing upward pressure on the bumper cover and picking the piece back out in the reverse manner it was installed. Remove protective layer.
Vinyl
NOTES: We recommend that the installation area be free of wax and not in direct sunlight. Extra backup set can be saved or installed on top of original for a darker, more tinted appearance.
- Microfiber
- Detailing Spray
- Soapy Water (we recommend our StickerFab Installation Fluid)
- Heat Gun or Hair Dryer (optional)
- Felt Tip Squeegee
Wet installs require one drop of dish or hand soap in a cup of water, however we prefer and highly recommend using StickerFab Application Fluid. Apply to the vinyl and the surface of your trim so that the vinyl doesn't stick to anything it touches immediately.
Then you can slide it around until you find the correct position. You can also remove it while both surfaces are wet. Once happy with the alignment, push out the extra water with your fingers and squeegee. Be gentle when using your fingers and a squeegee especially if the vinyl gets warm. Gradually apply more pressure as you get it aligned.
Do not allow water bubbles to form. Work slowly until they are all gone. Allow to dry in the sun and then come back one final time to make sure all the edges are down. You can use light heat from a heatgun or hairdryer on the edges as well. Make sure the heat isn't high enough to burn yourself. If it's too much for you to handle, it will likely be too much for the vinyl.
Try doing the install in the shade so it doesn't heat up the vinyl rapidly. Exposure to sun at the end though is encouraged.
You can gently lift the trim around the lamps to push the vinyl behind it if needed.
Original: $9.99
-65%$9.99
$3.50Product Information
Product Information
Shipping & Returns
Shipping & Returns
Description
Introducing the StickerFab Fog Light Overlays for Tacoma (2024-2026). Upgrade the front end of your 2024+ Toyota Tacoma with premium fog light overlays designed specifically for the new 4th generation Tacoma. These overlays install directly over the factory fog lights to create a bold amber or yellow tint that enhances both styling and visibility in dust, rain, and fog.
These 2024 Tacoma fog light overlays are precision cut for a clean fit and install easily using automotive-grade adhesive. Whether you're customizing your SUV’s appearance or adding the popular amber fog light look, this simple upgrade transforms the front lighting in minutes.
Fog light tint overlays are one of the most popular exterior upgrades for the 4th gen Toyota Tacoma, giving owners an easy way to personalize their vehicle while maintaining a factory-style appearance.
Check out all the photos including the comparison ones. Sold as a pair (extra set included for vinyl). For the most amber like color output, choose deep amber. The tradeoff with deep amber is a lower light output.
Features
- Easy to apply
- Changes light output color and daytime appearance
- Sold as a pair (extra set included for vinyl)
- NEW: Acrylic version 2 snaps in
- NOTE: Not compatible without modification for RIGID lamps (Pro / Trailhunter)
NOTE: Fitment is the same between the 2024+ Tacoma and 4Runner. This has been verified by us. Not compatible with RIGID lamps (Pro / Trailhunter). Compatible with stock 4Runner SR5, TRD Sport, TRD Sport Premium, TRD Off-Road, TRD Off-Road Premium, and Limited. For Tacoma models, SR / SR5 (if equipped with factory fogs. Also TRD PreRunner, TRD Sport, TRD Off-Road, and Limited.
NEW: Version 2 clips in and has replaced the original adhesive equipped version.
NEW: Smoked version 2 creates a stealthy look during the day and still works well at night. Prismatic pink version 2 gives the illusion of being amber / orange during the day and pink at night.
Instructions
Clean the application area to prepare it for installation. Just use a wax free detailing spray. Recommended temperature is 70 degrees or more.
Acrylic (replaced by V2)
Clean original lens. Test fit. Remove adhesive backing from small side strips. Align and press down firmly. Remove protective layer.
Acrylic V2
Clean original lens. Slip the bottom tabs in and then press top in, making sure all 4 tabs are behind the plastic bumper cover. You can remove this version by placing upward pressure on the bumper cover and picking the piece back out in the reverse manner it was installed. Remove protective layer.
Vinyl
NOTES: We recommend that the installation area be free of wax and not in direct sunlight. Extra backup set can be saved or installed on top of original for a darker, more tinted appearance.
- Microfiber
- Detailing Spray
- Soapy Water (we recommend our StickerFab Installation Fluid)
- Heat Gun or Hair Dryer (optional)
- Felt Tip Squeegee
Wet installs require one drop of dish or hand soap in a cup of water, however we prefer and highly recommend using StickerFab Application Fluid. Apply to the vinyl and the surface of your trim so that the vinyl doesn't stick to anything it touches immediately.
Then you can slide it around until you find the correct position. You can also remove it while both surfaces are wet. Once happy with the alignment, push out the extra water with your fingers and squeegee. Be gentle when using your fingers and a squeegee especially if the vinyl gets warm. Gradually apply more pressure as you get it aligned.
Do not allow water bubbles to form. Work slowly until they are all gone. Allow to dry in the sun and then come back one final time to make sure all the edges are down. You can use light heat from a heatgun or hairdryer on the edges as well. Make sure the heat isn't high enough to burn yourself. If it's too much for you to handle, it will likely be too much for the vinyl.
Try doing the install in the shade so it doesn't heat up the vinyl rapidly. Exposure to sun at the end though is encouraged.
You can gently lift the trim around the lamps to push the vinyl behind it if needed.